
Fly tying
News
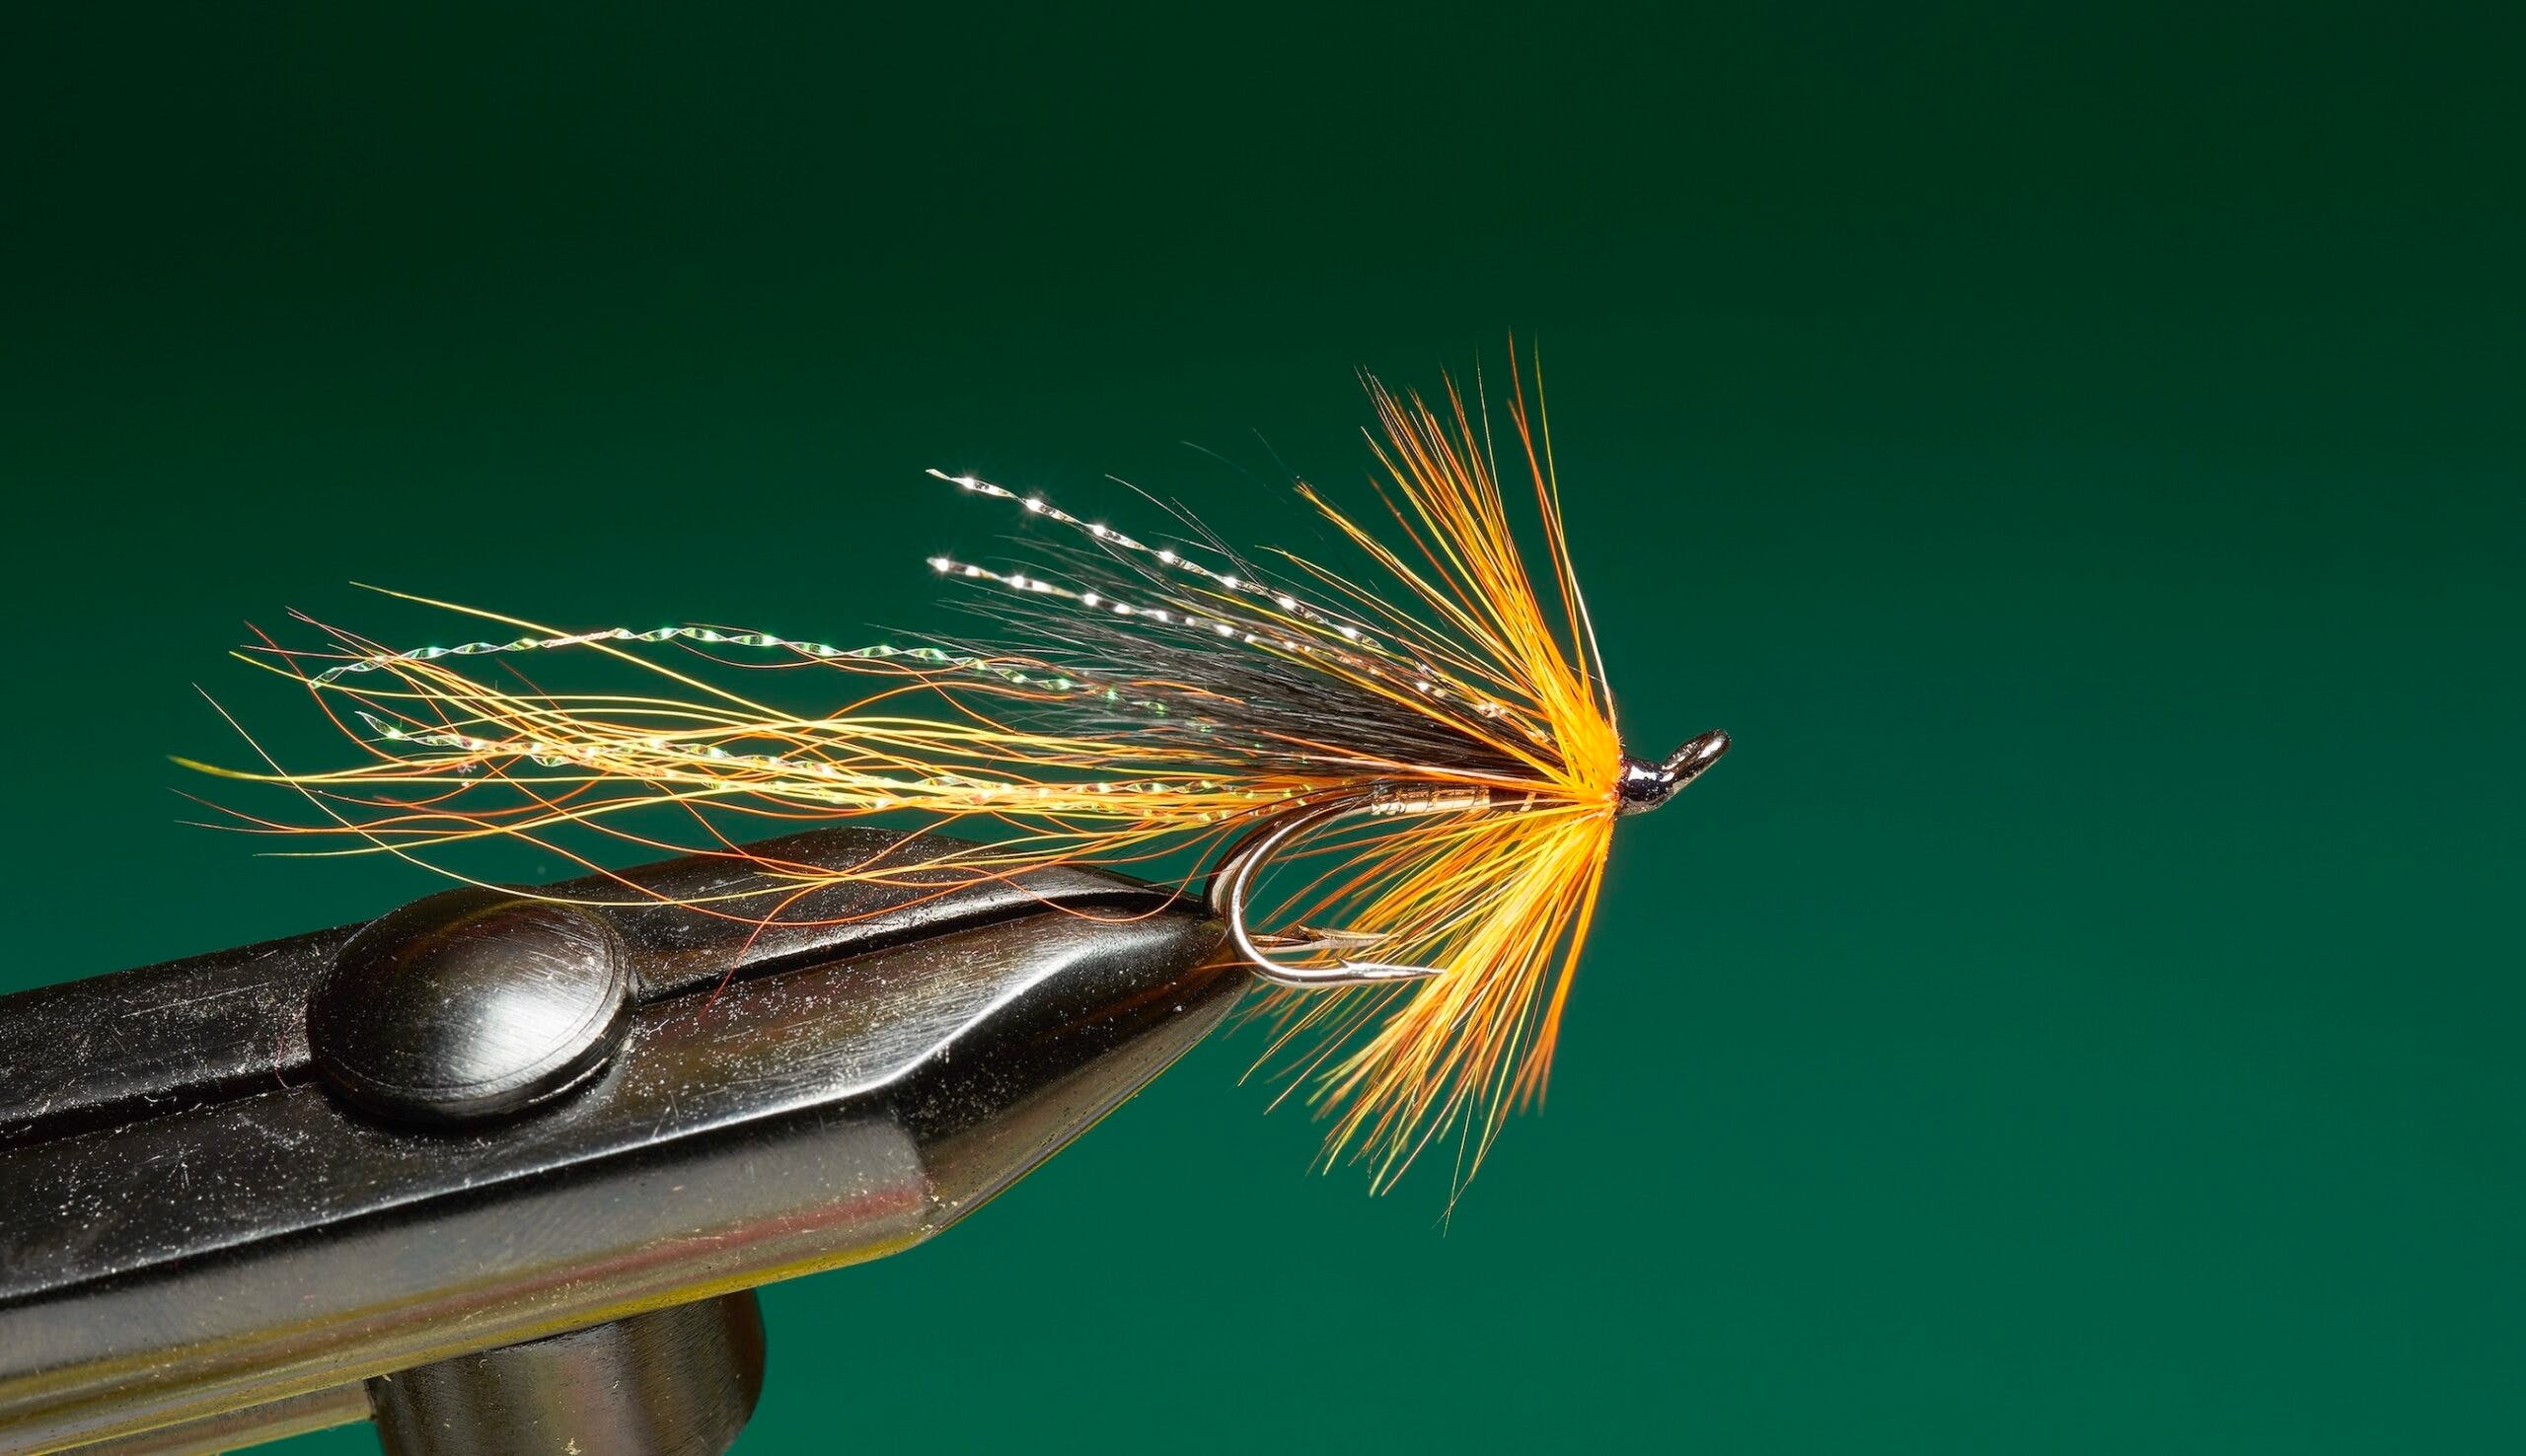
How to tie the Cascade
Would you like to appear on our site? We offer sponsored articles and advertising to put you in front of our readers. Find out more.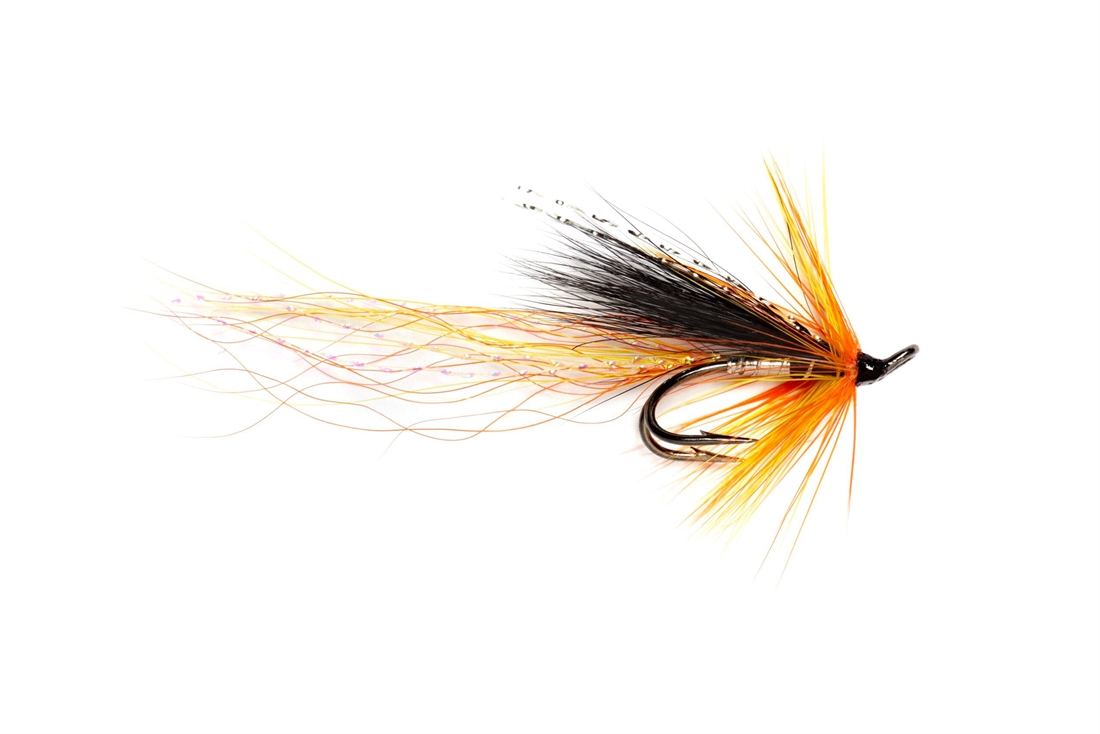
Ally Gowans’s irresistible creation is probably the most successful salmon fly of the past 20 years.
Material list for the Cascade
Hook: Doubles, singles, trebles and tubes
Thread: Black
Rib: Oval silver tinsel
Tail: Orange and yellow bucktail and strands of pearl Krystal Flash
Body: Flat silver tinsel and black floss
Wing: Black squirrel tail and silver Krystal Flash
Hackle: Orange and yellow cock hackles
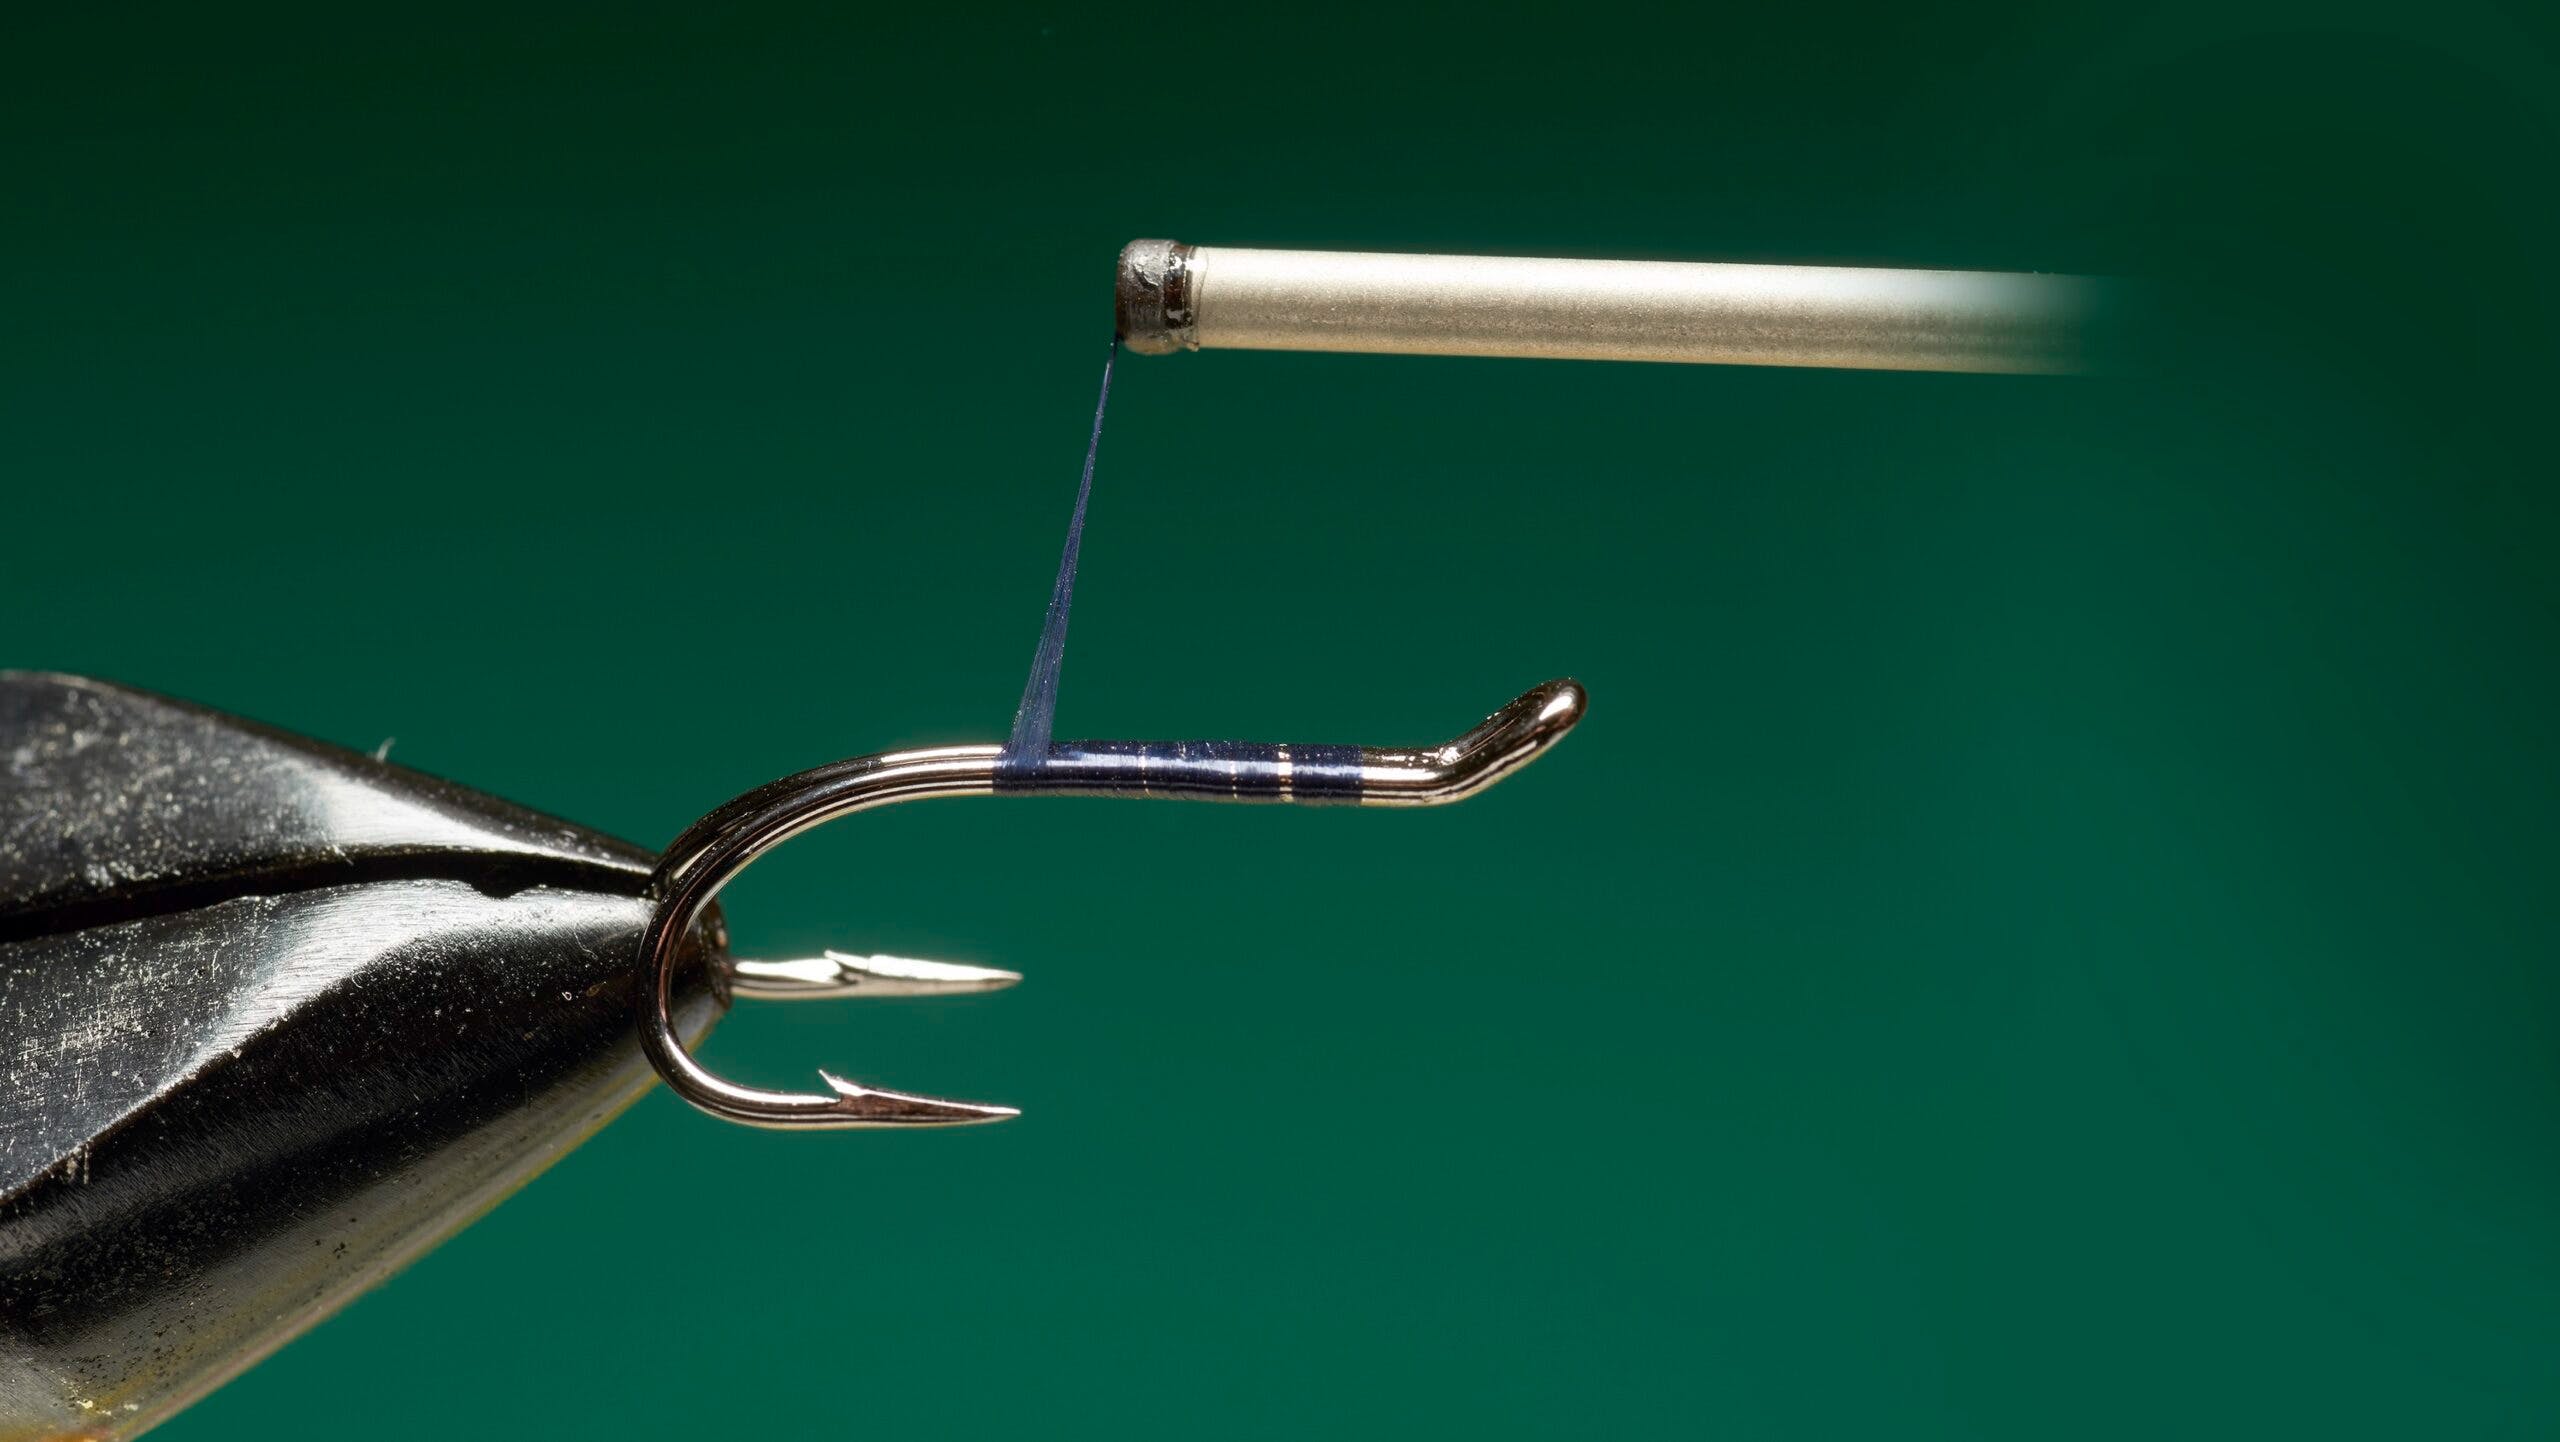
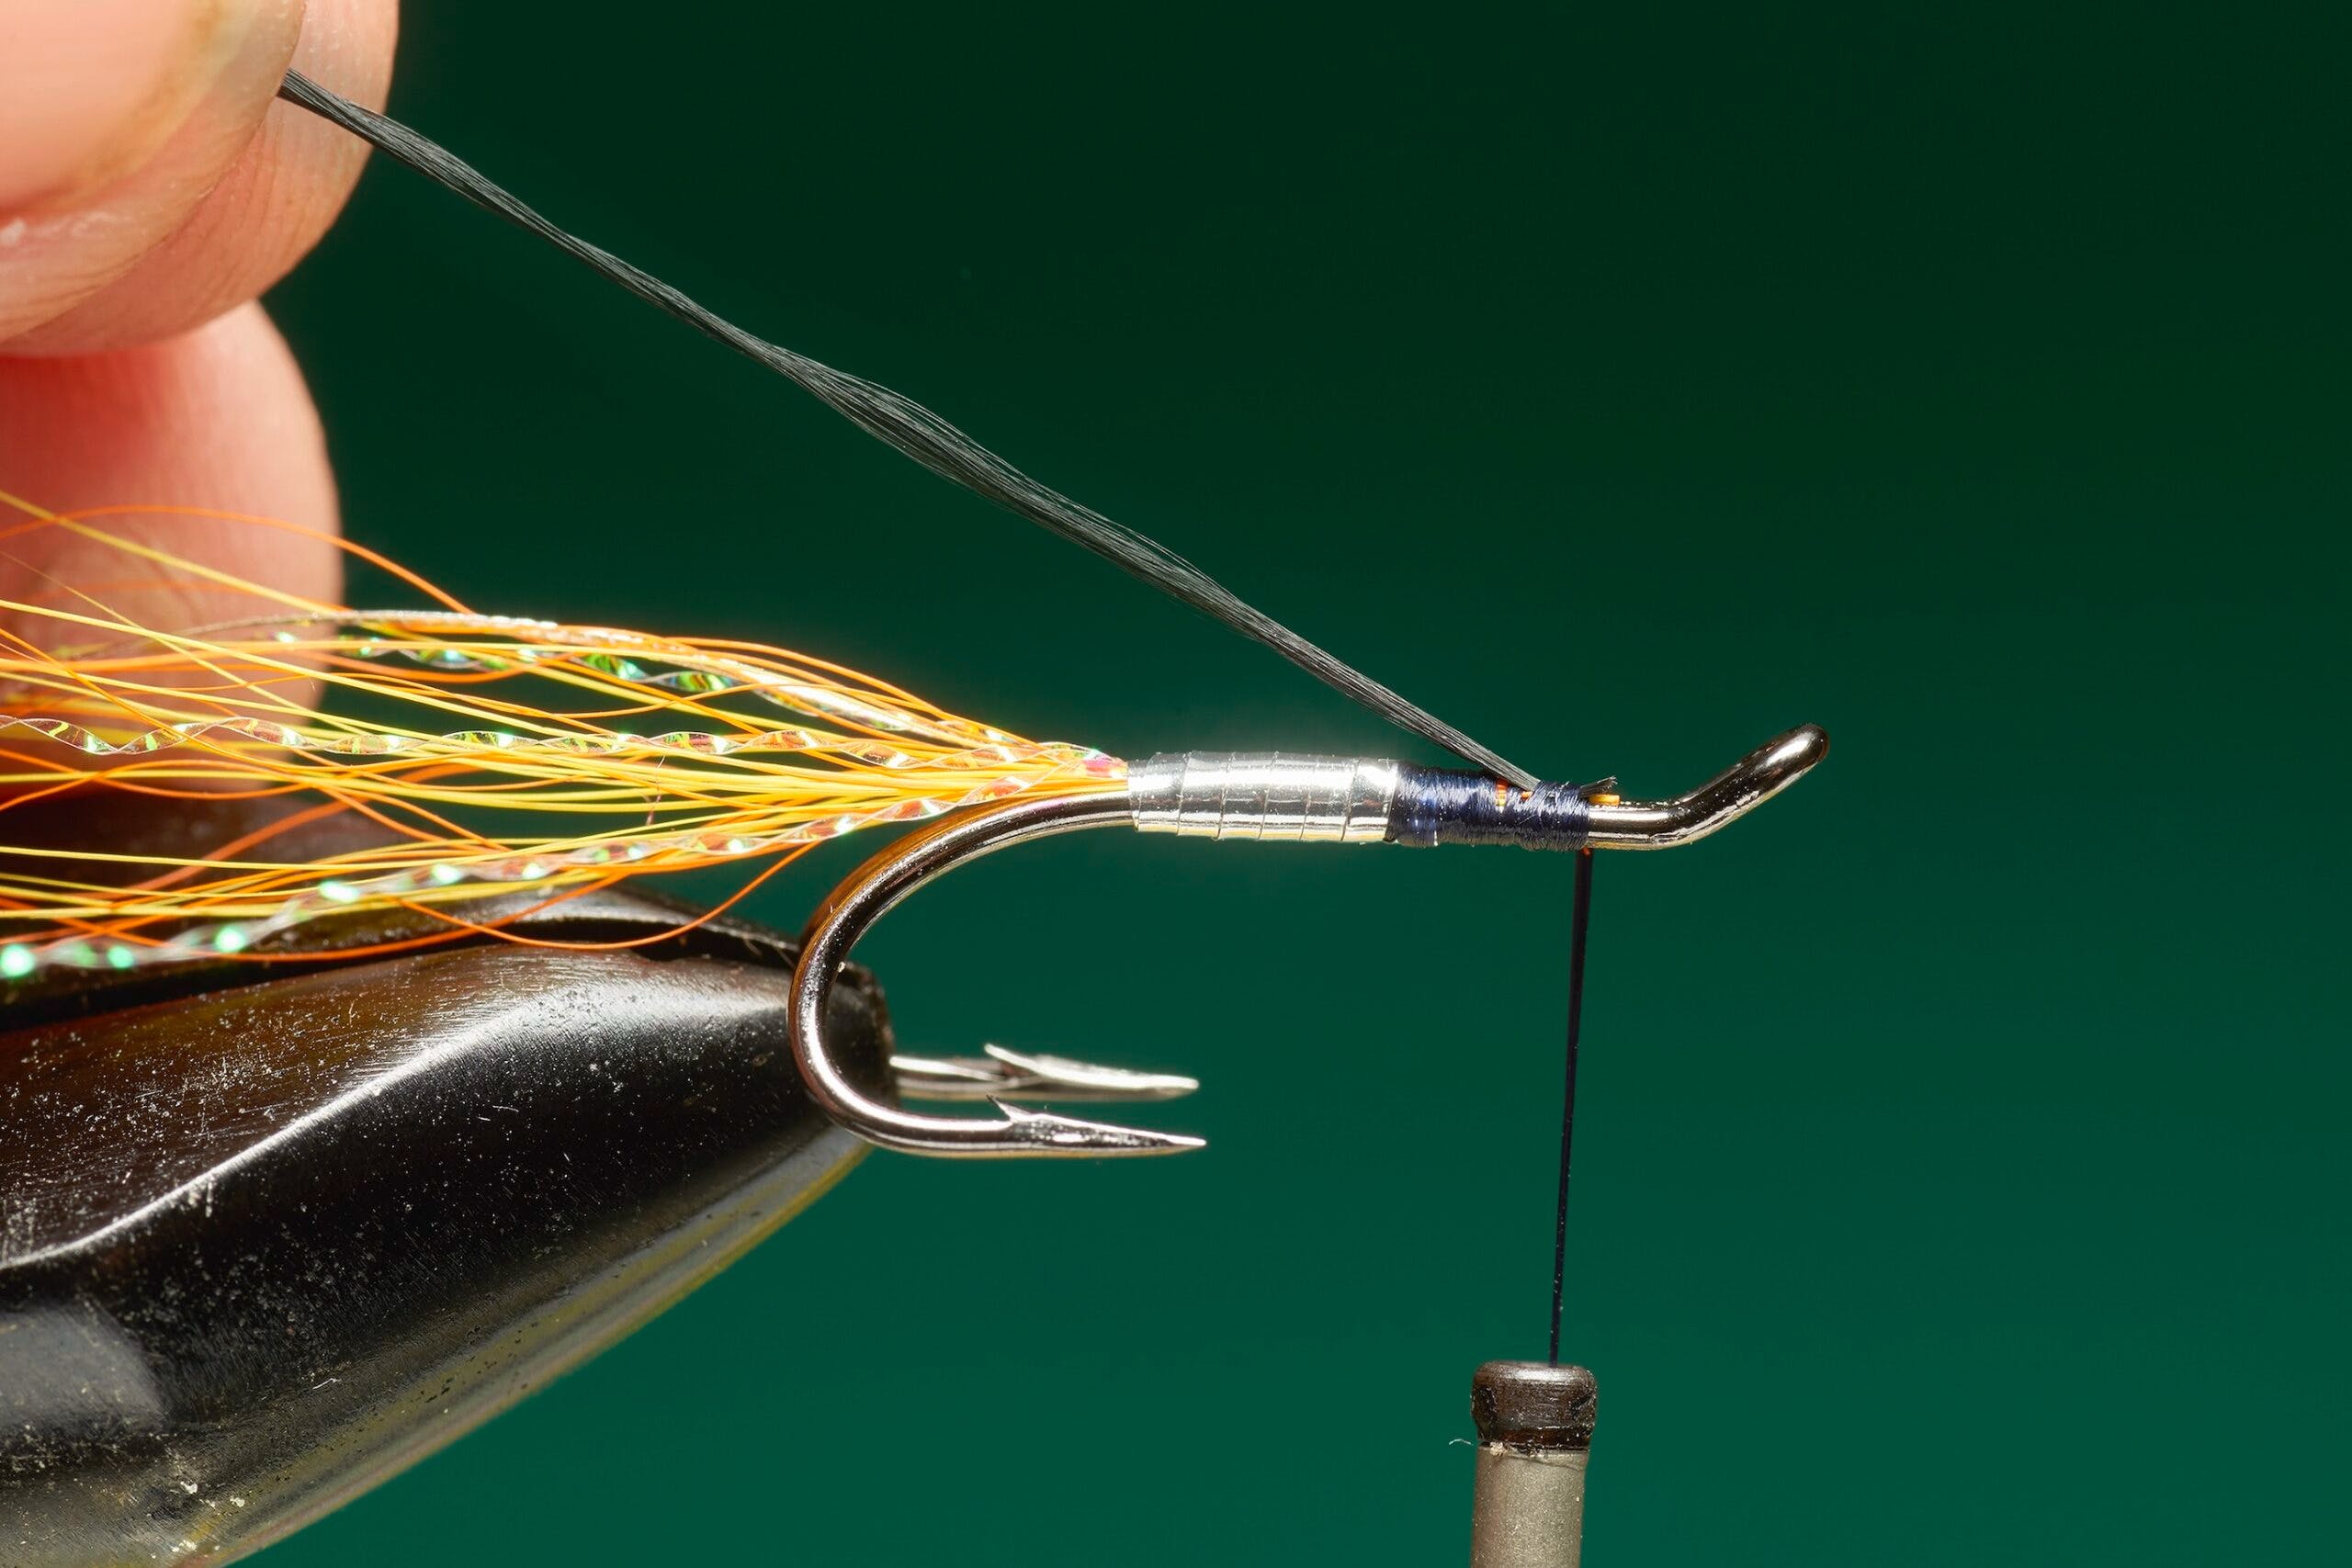
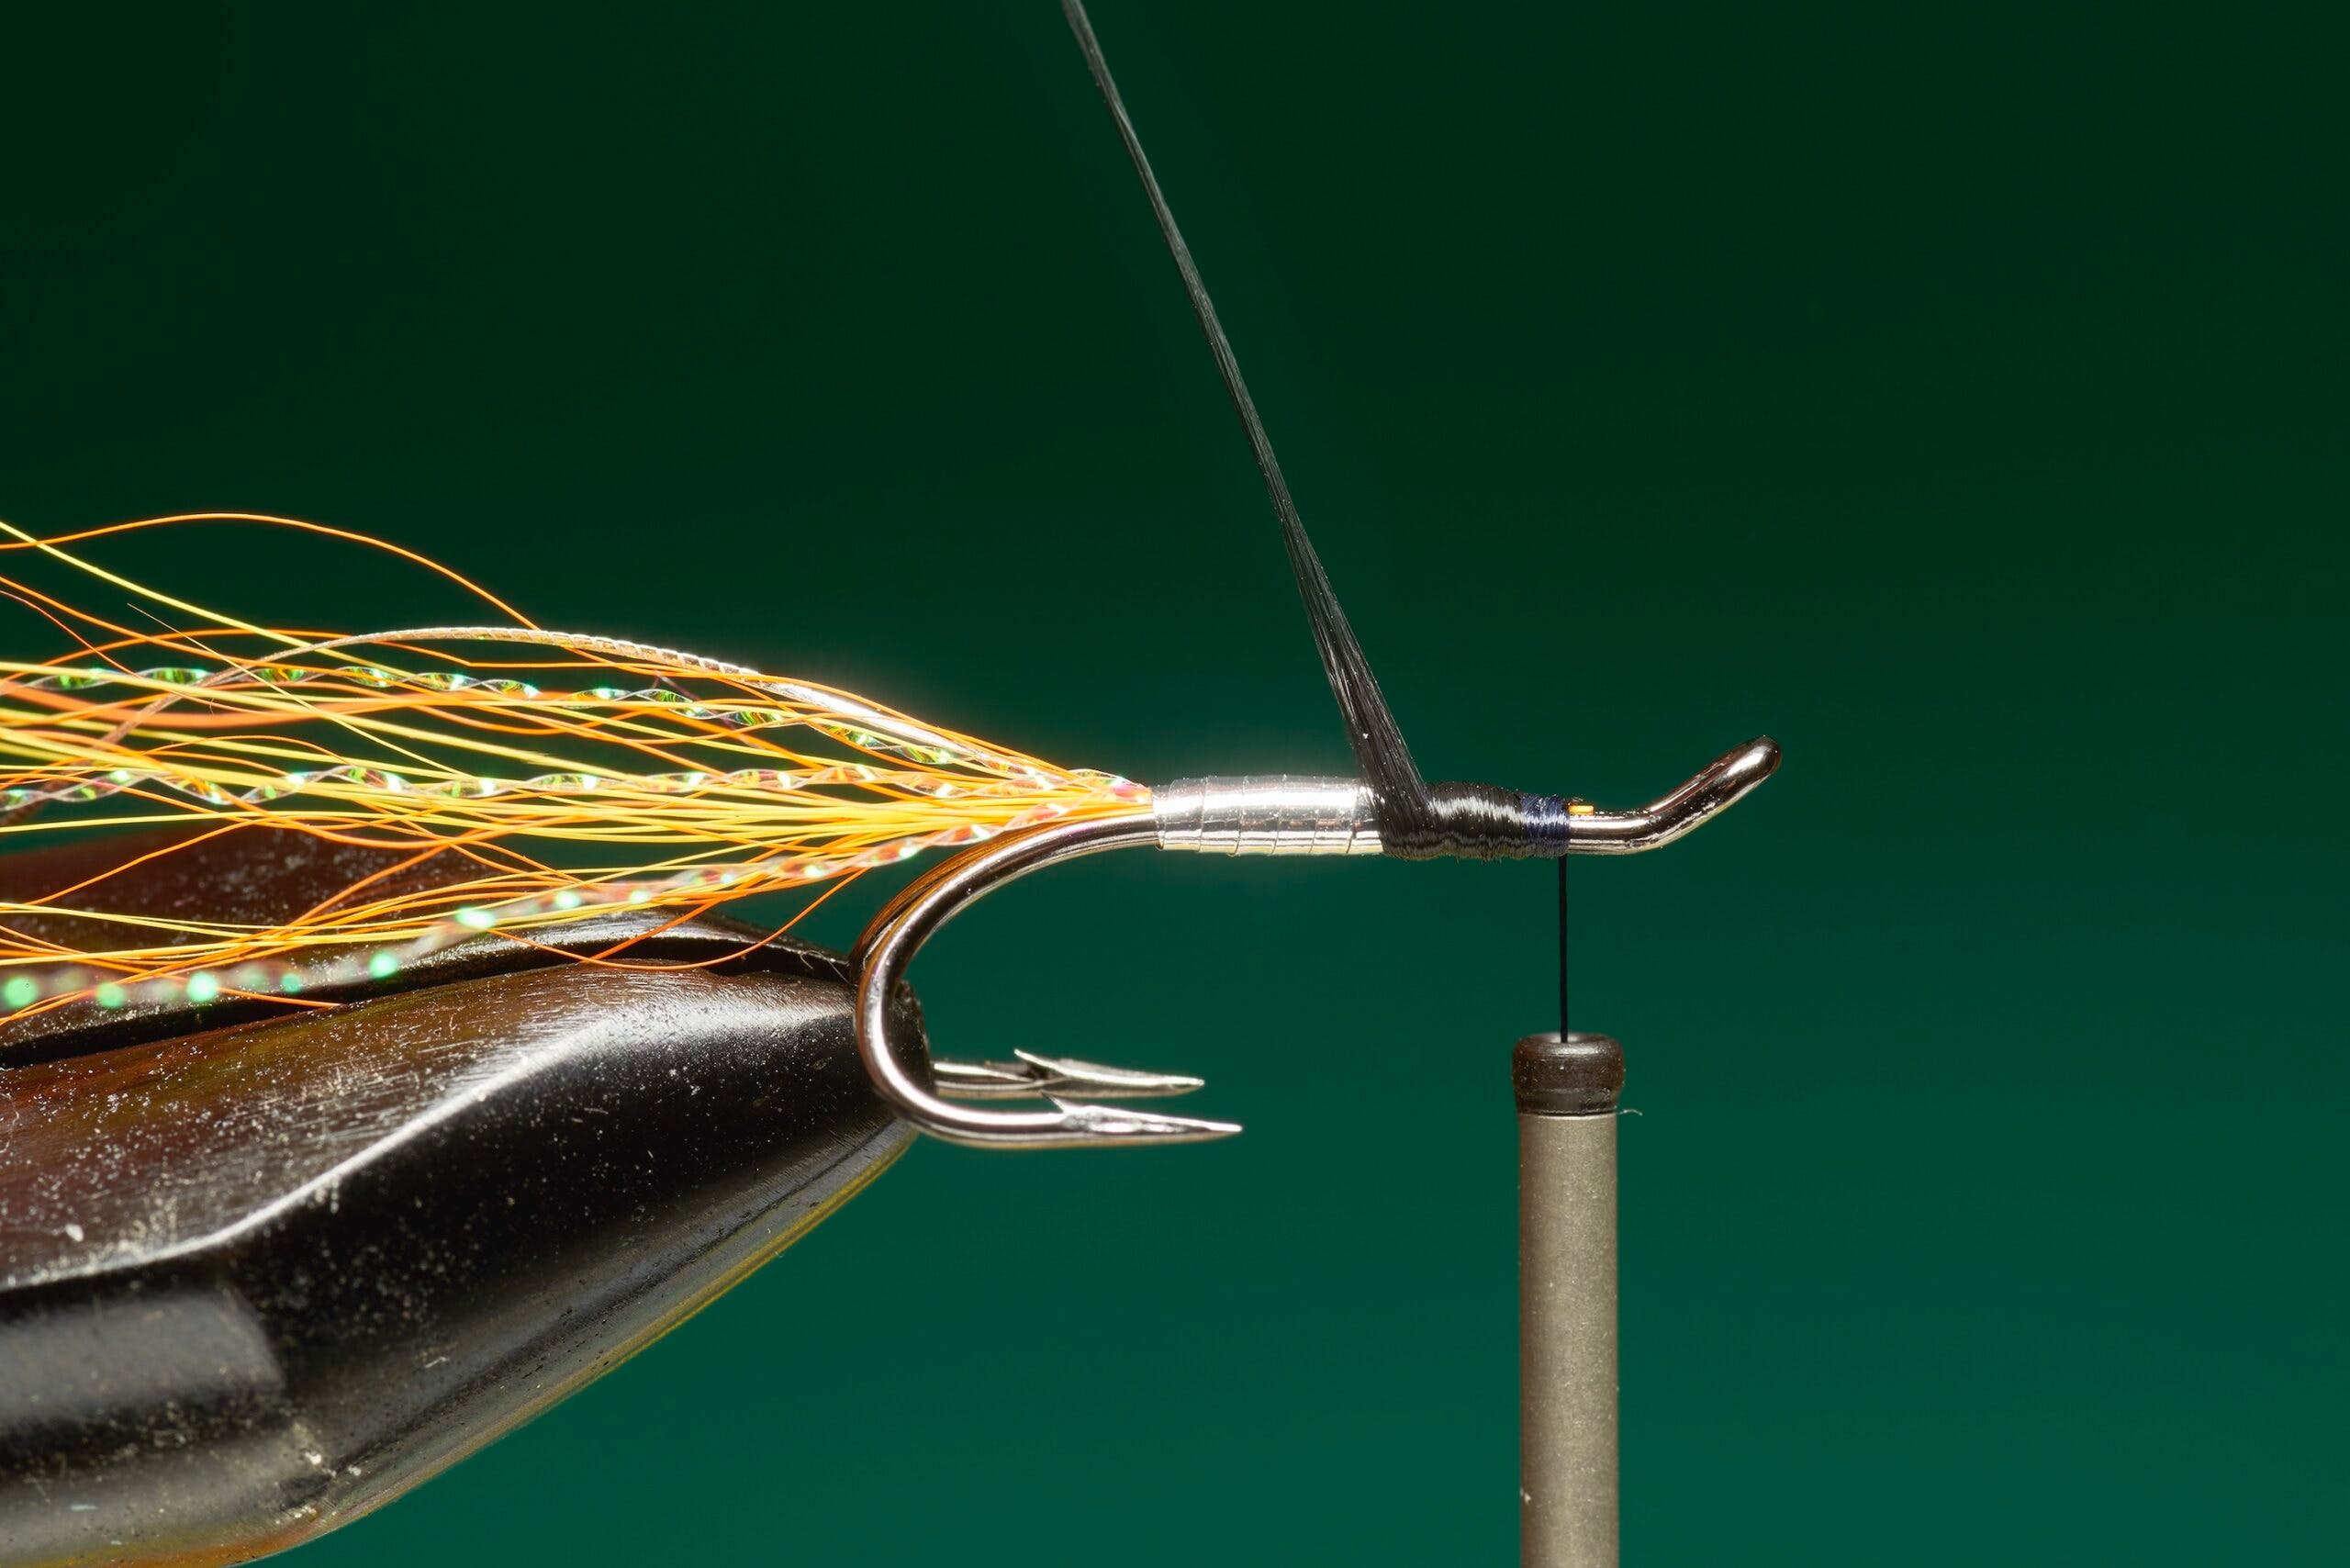
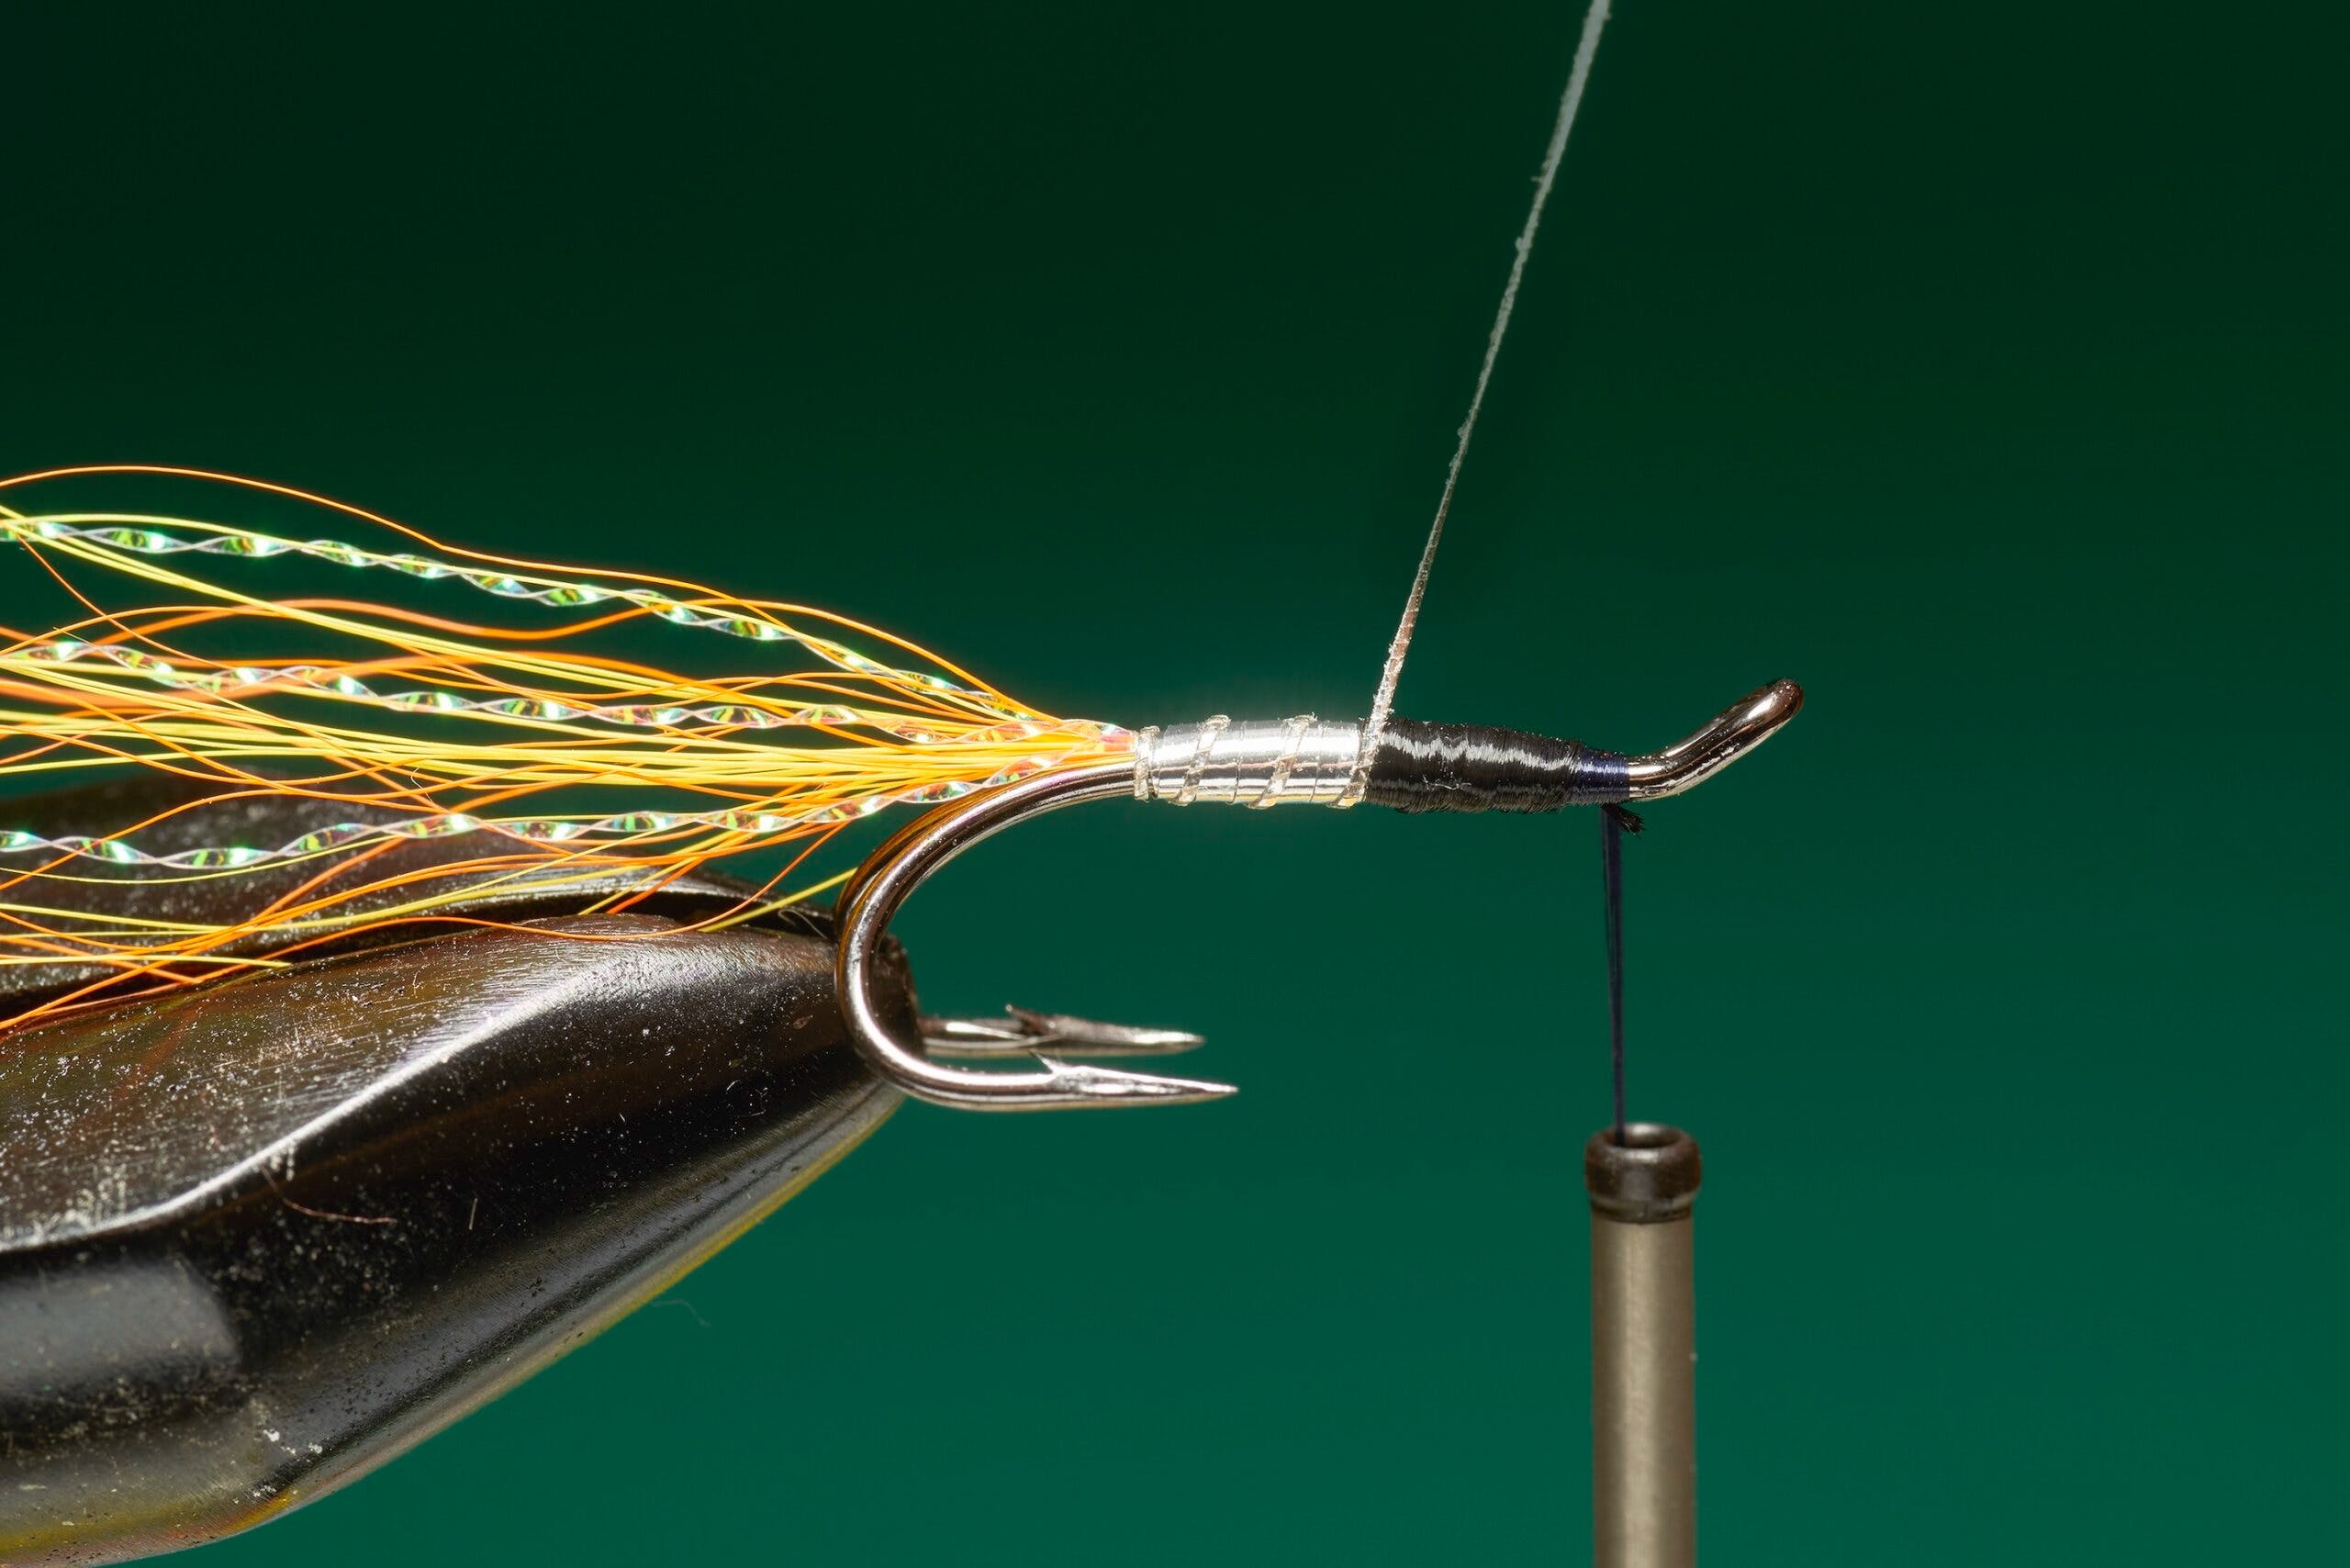
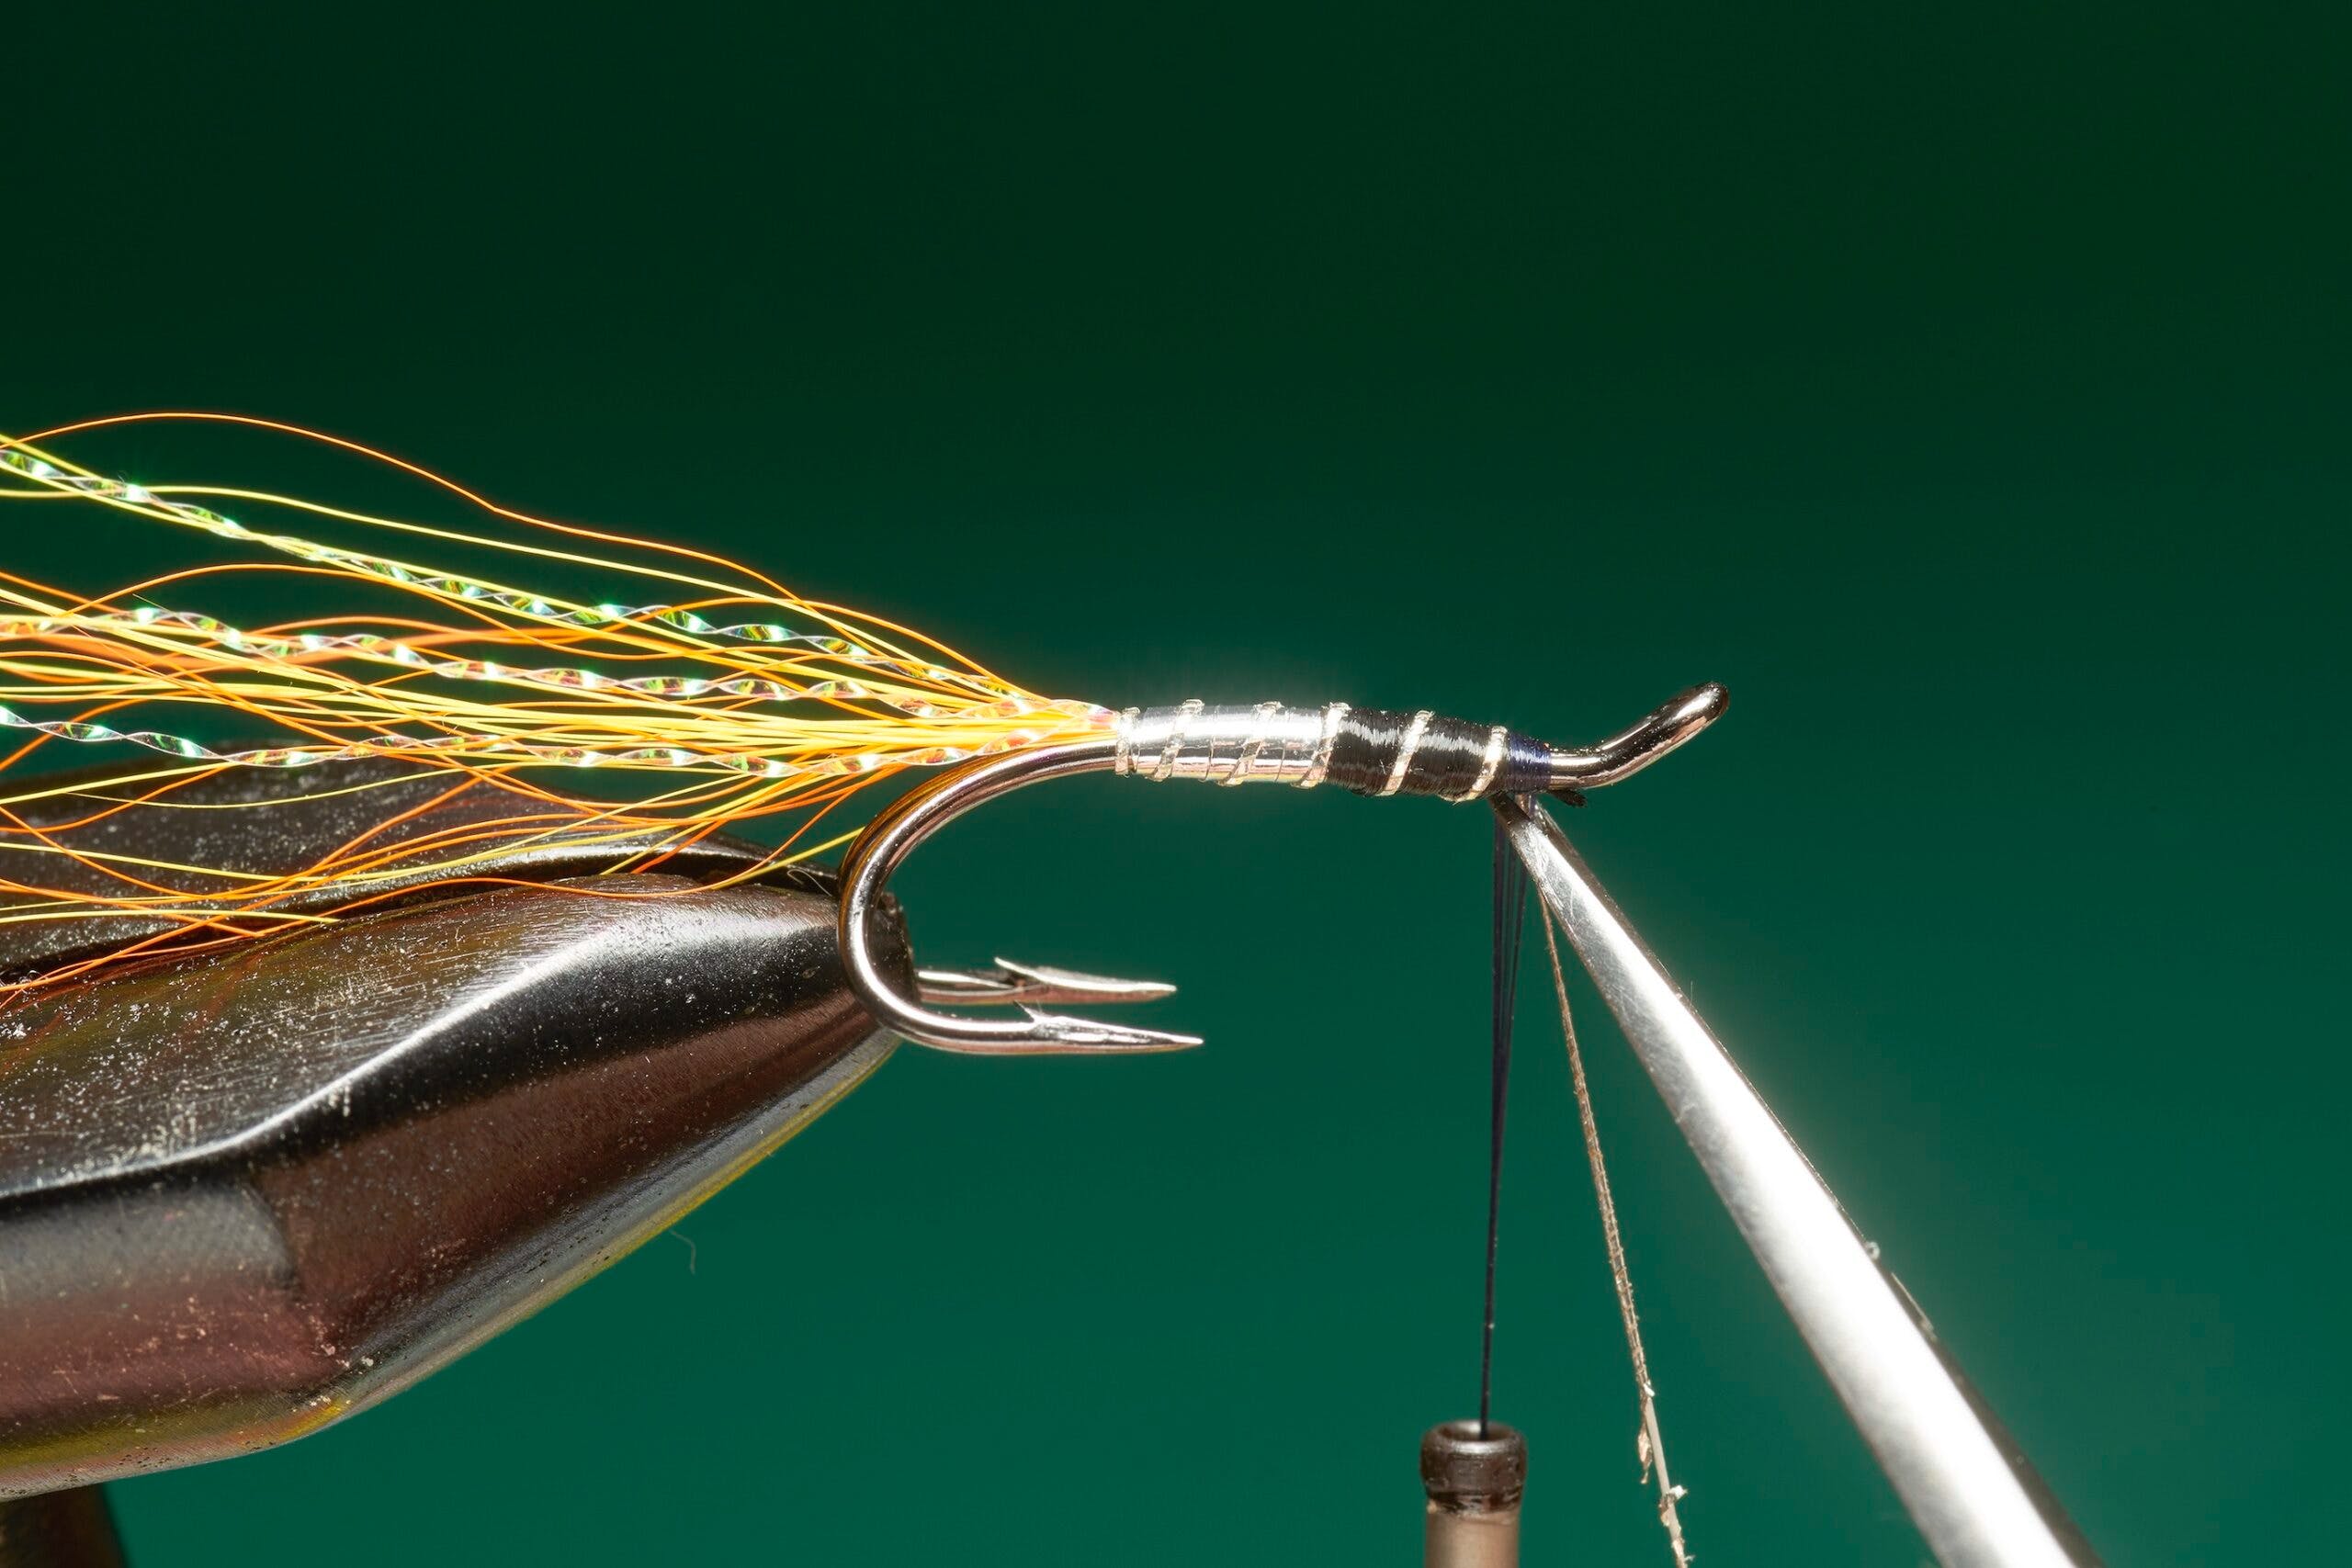
Step 1. Fix the hook in the vice. With a double hook, insert the far hook rather than the near one. Run thread on close to the eye and wind down shank. Stop thread opposite the hook points.
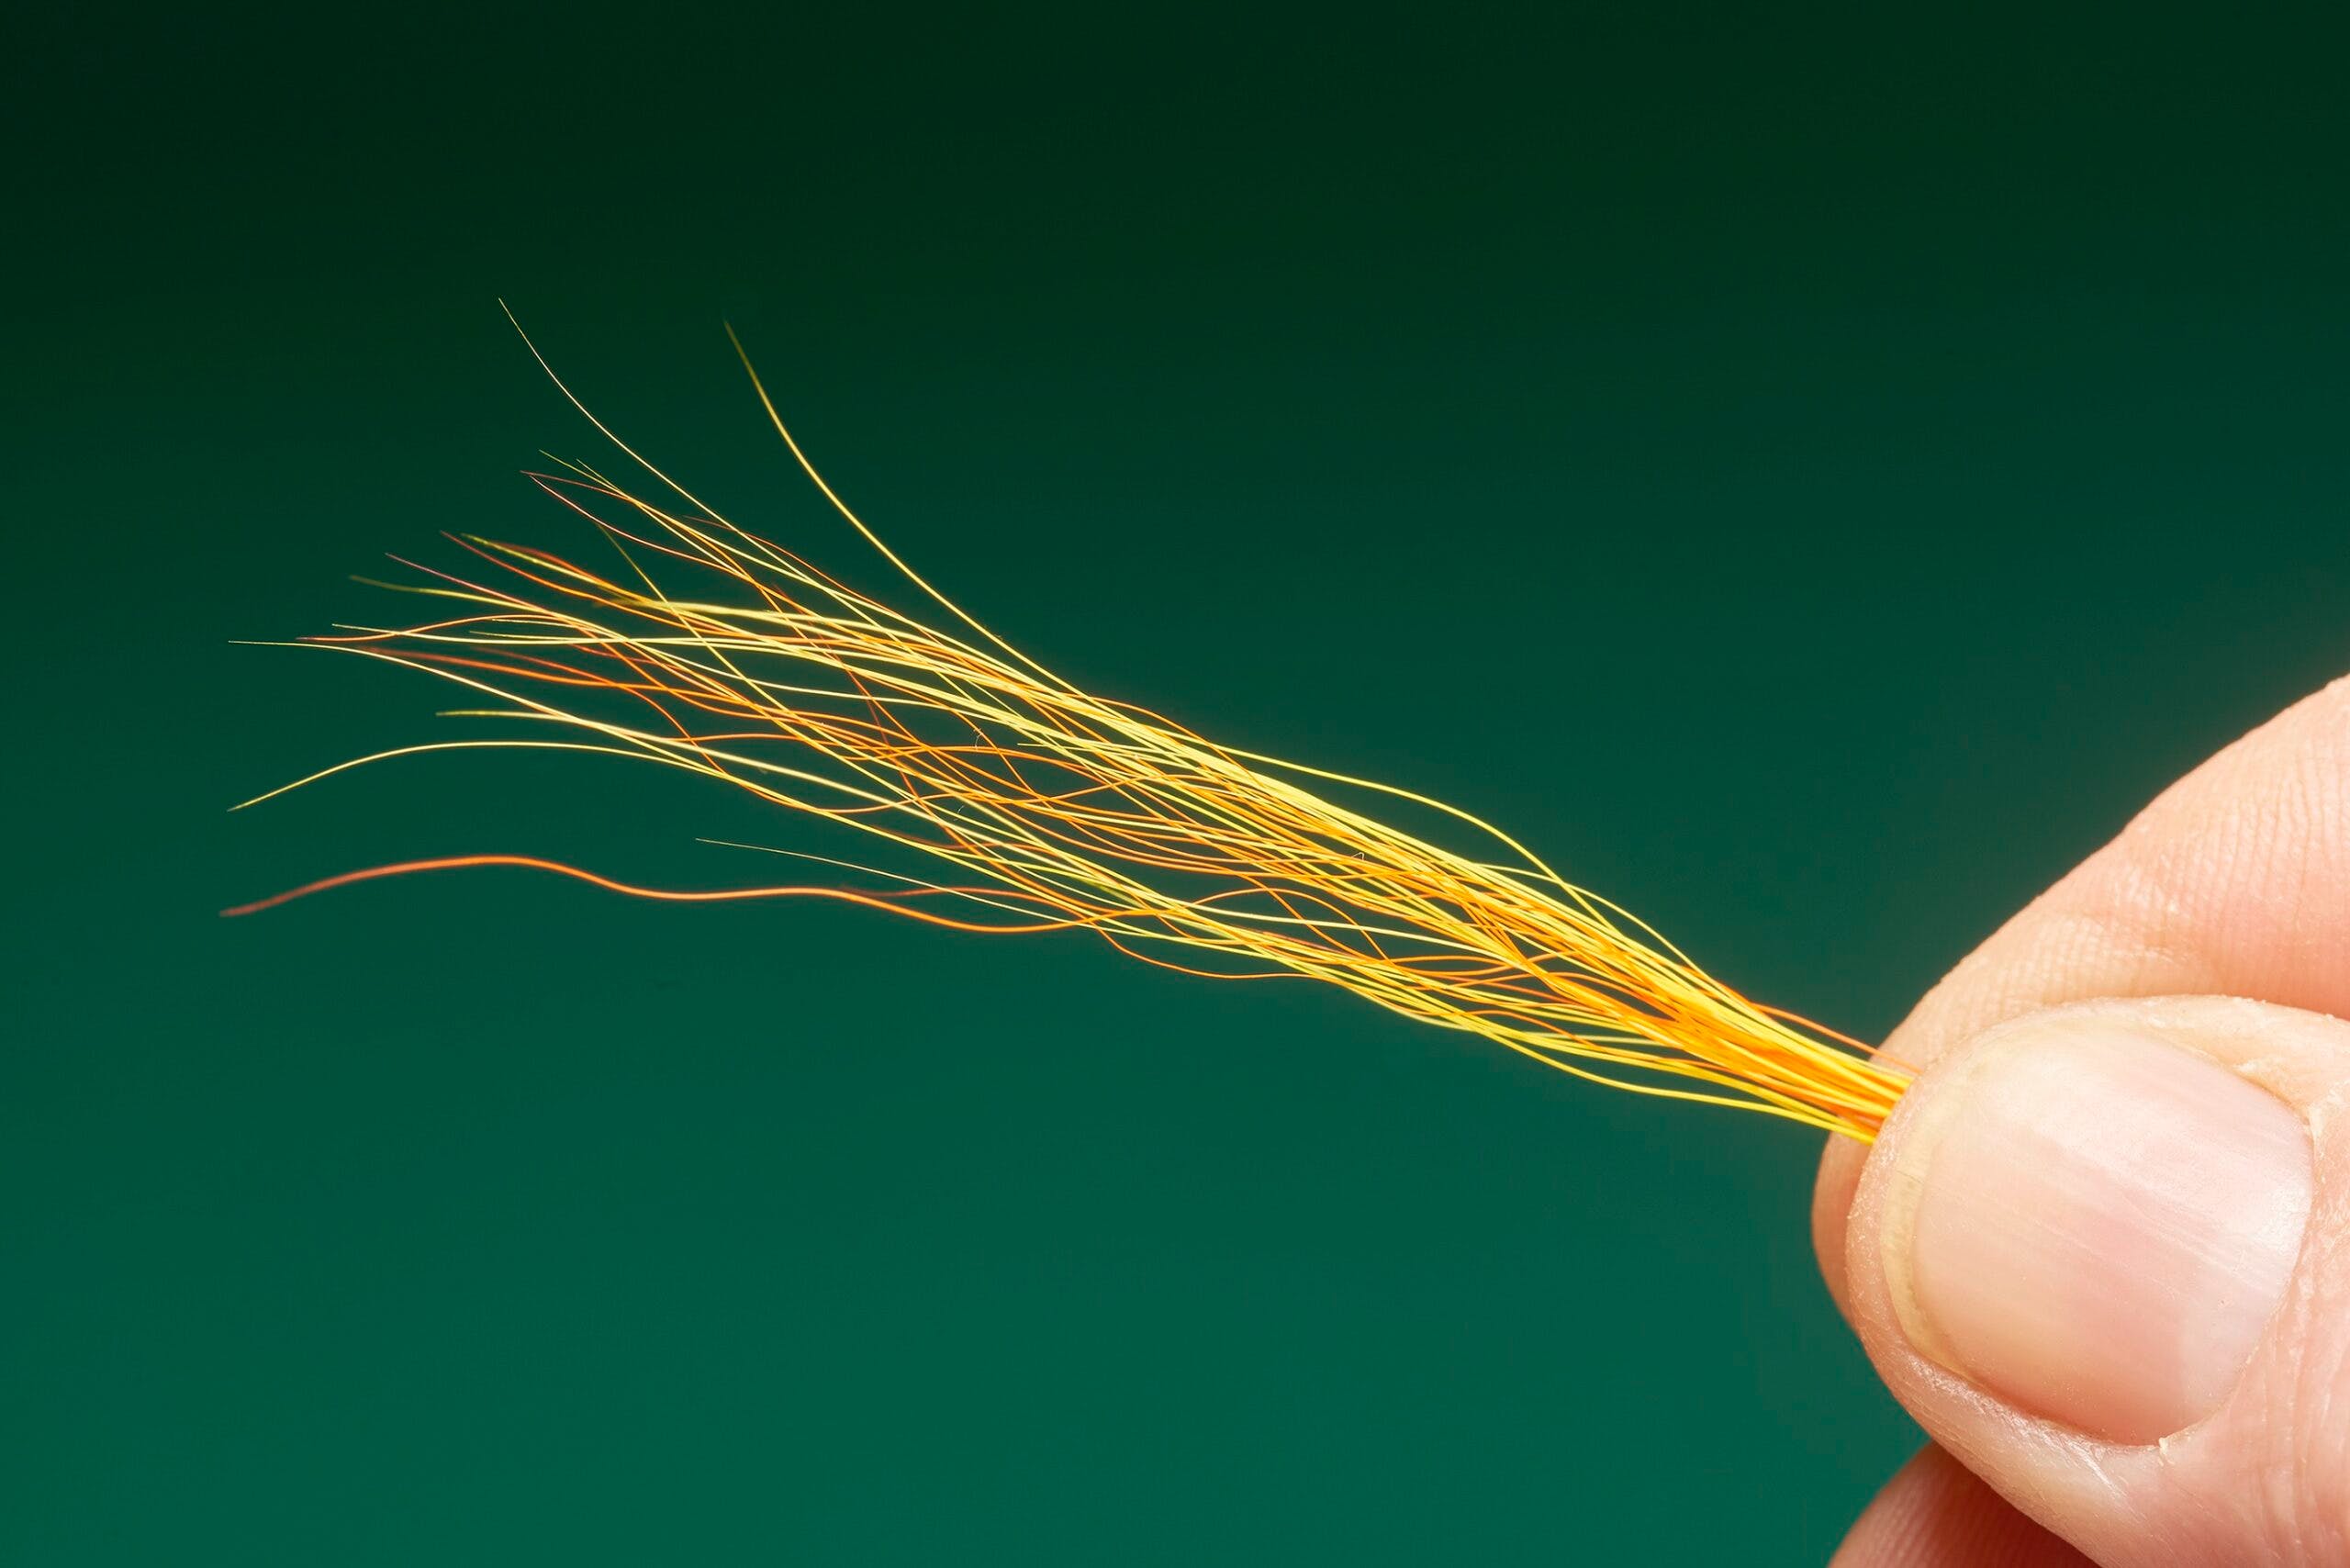
Step 2. Take equal pinches of orange and yellow bucktail – 30 hairs in total. Remove damaged hairs. Hair-tips should be roughly level. Mix by rolling between finger and thumb.
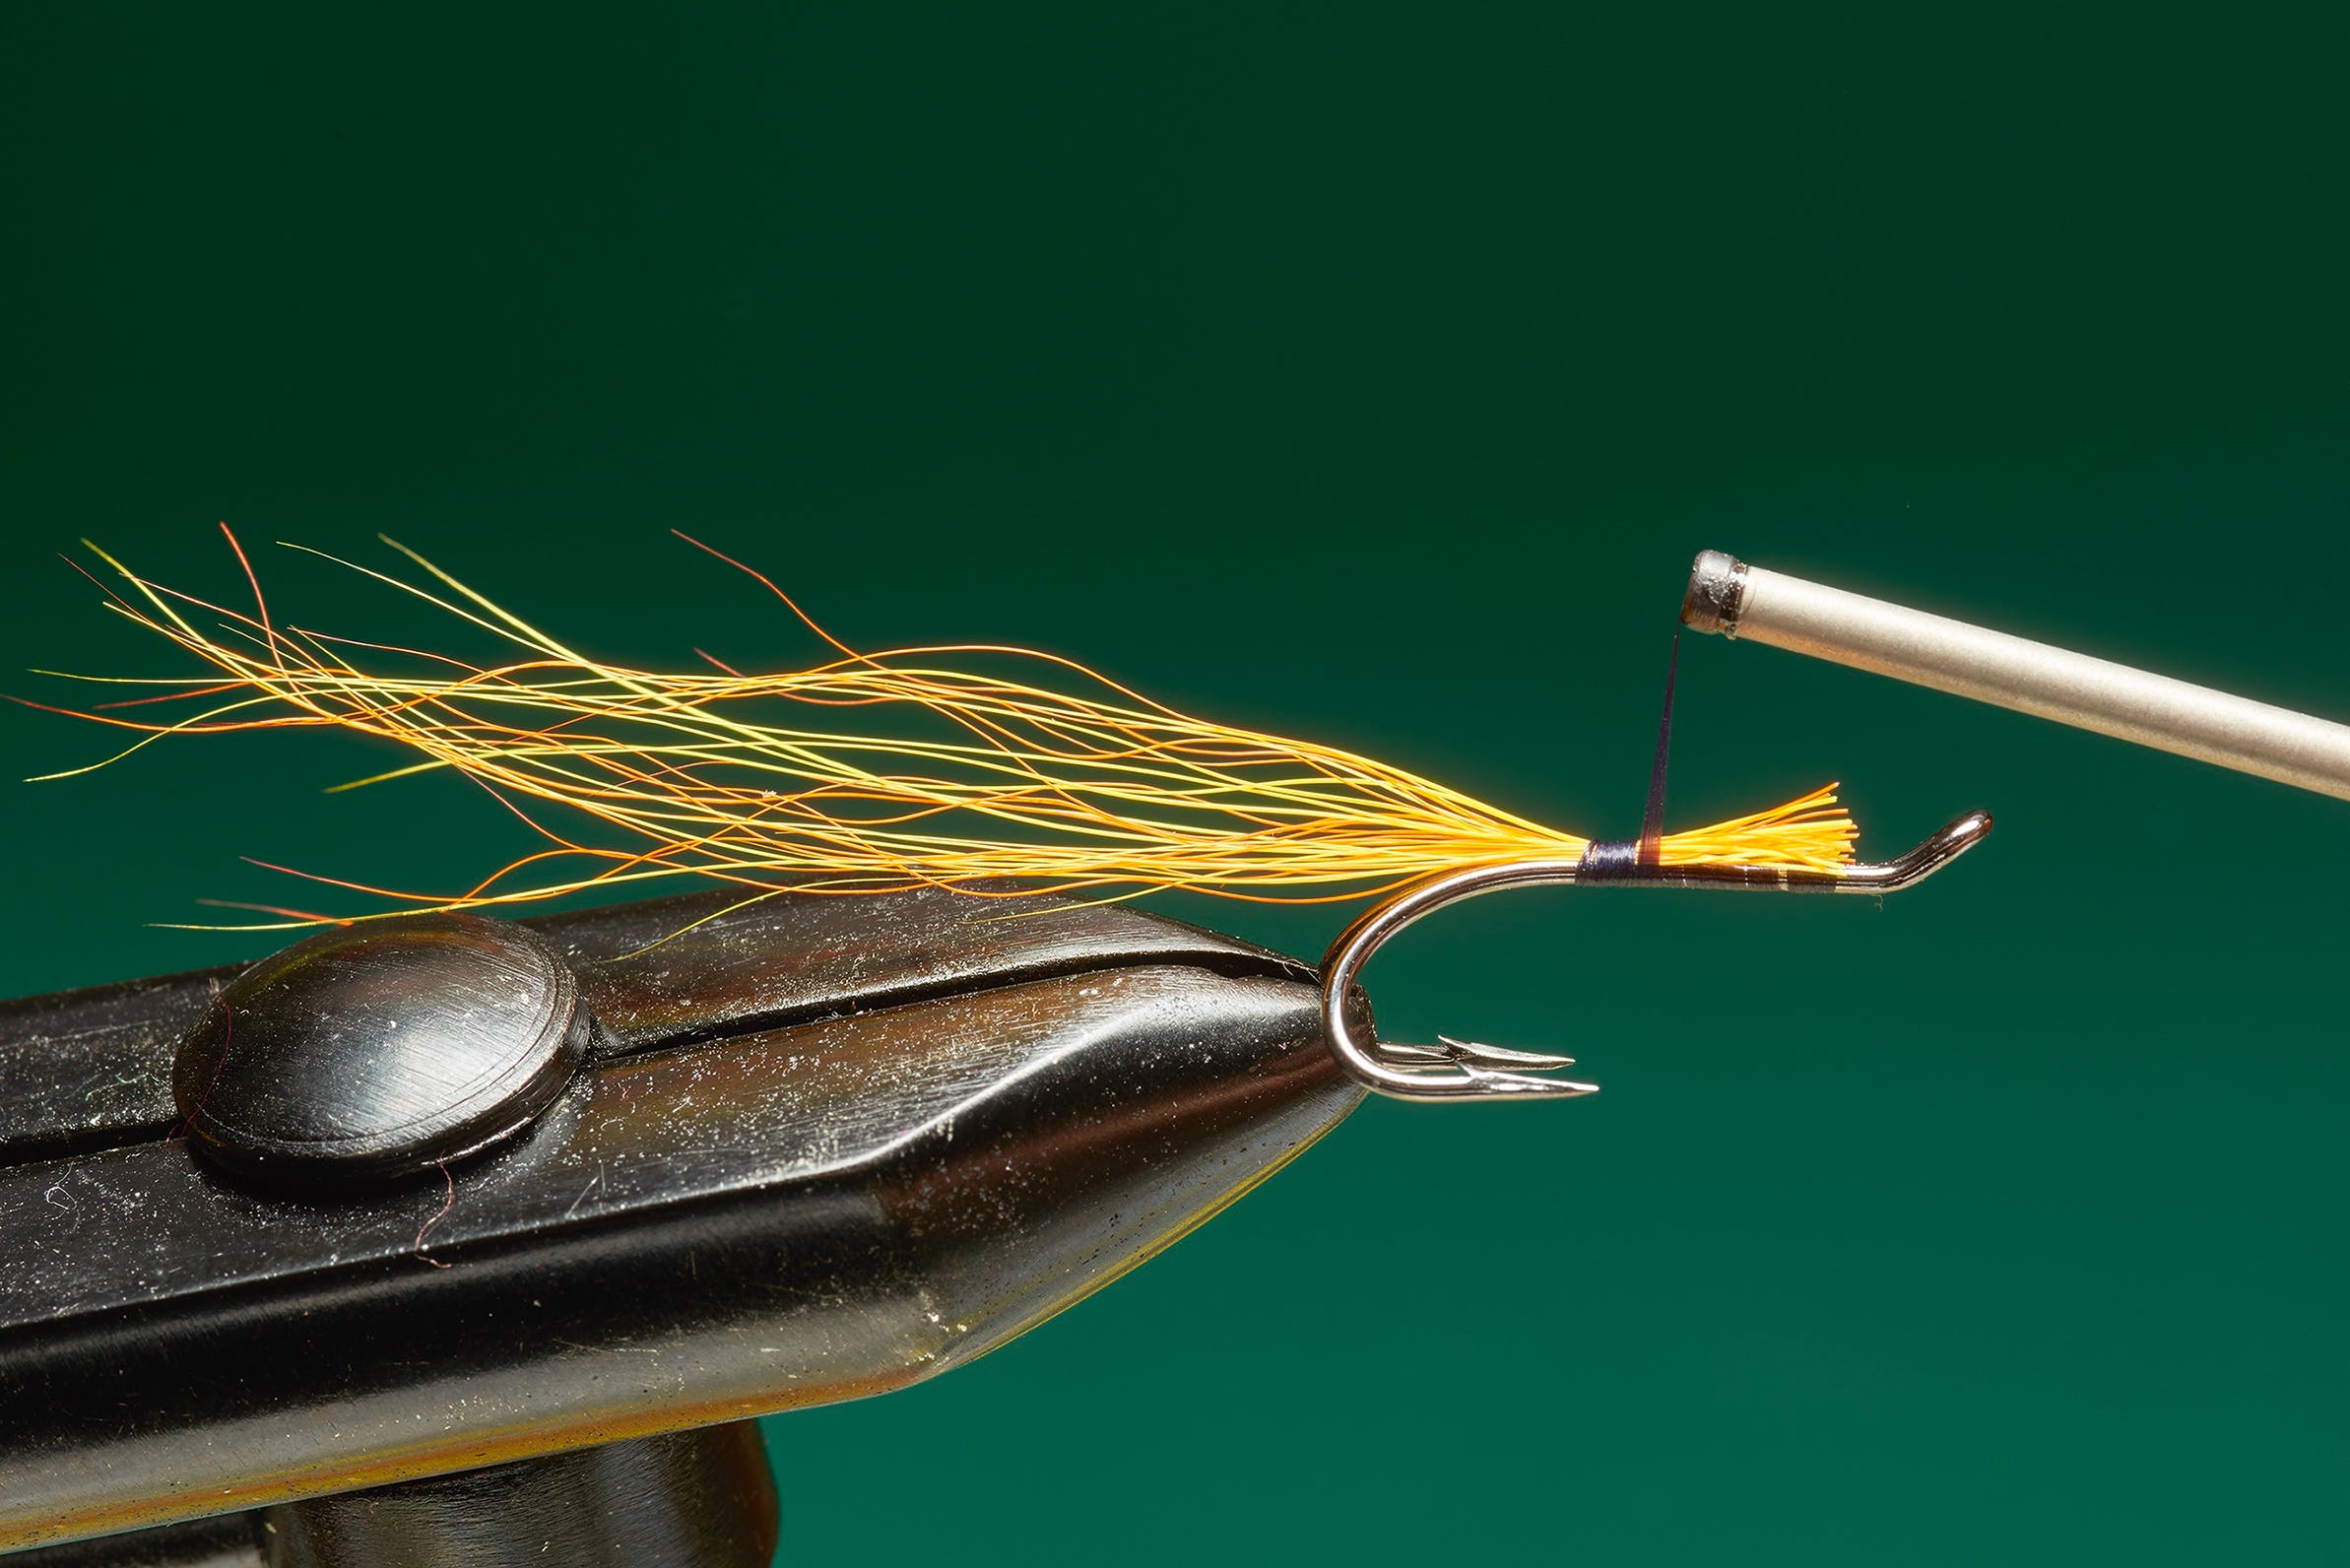
Step 3. Offer the hair to the hook and catch in with two or three thread turns. The tail should be 2½-3 times the length of the hook. Secure the hair along the shank with tight turns of thread.

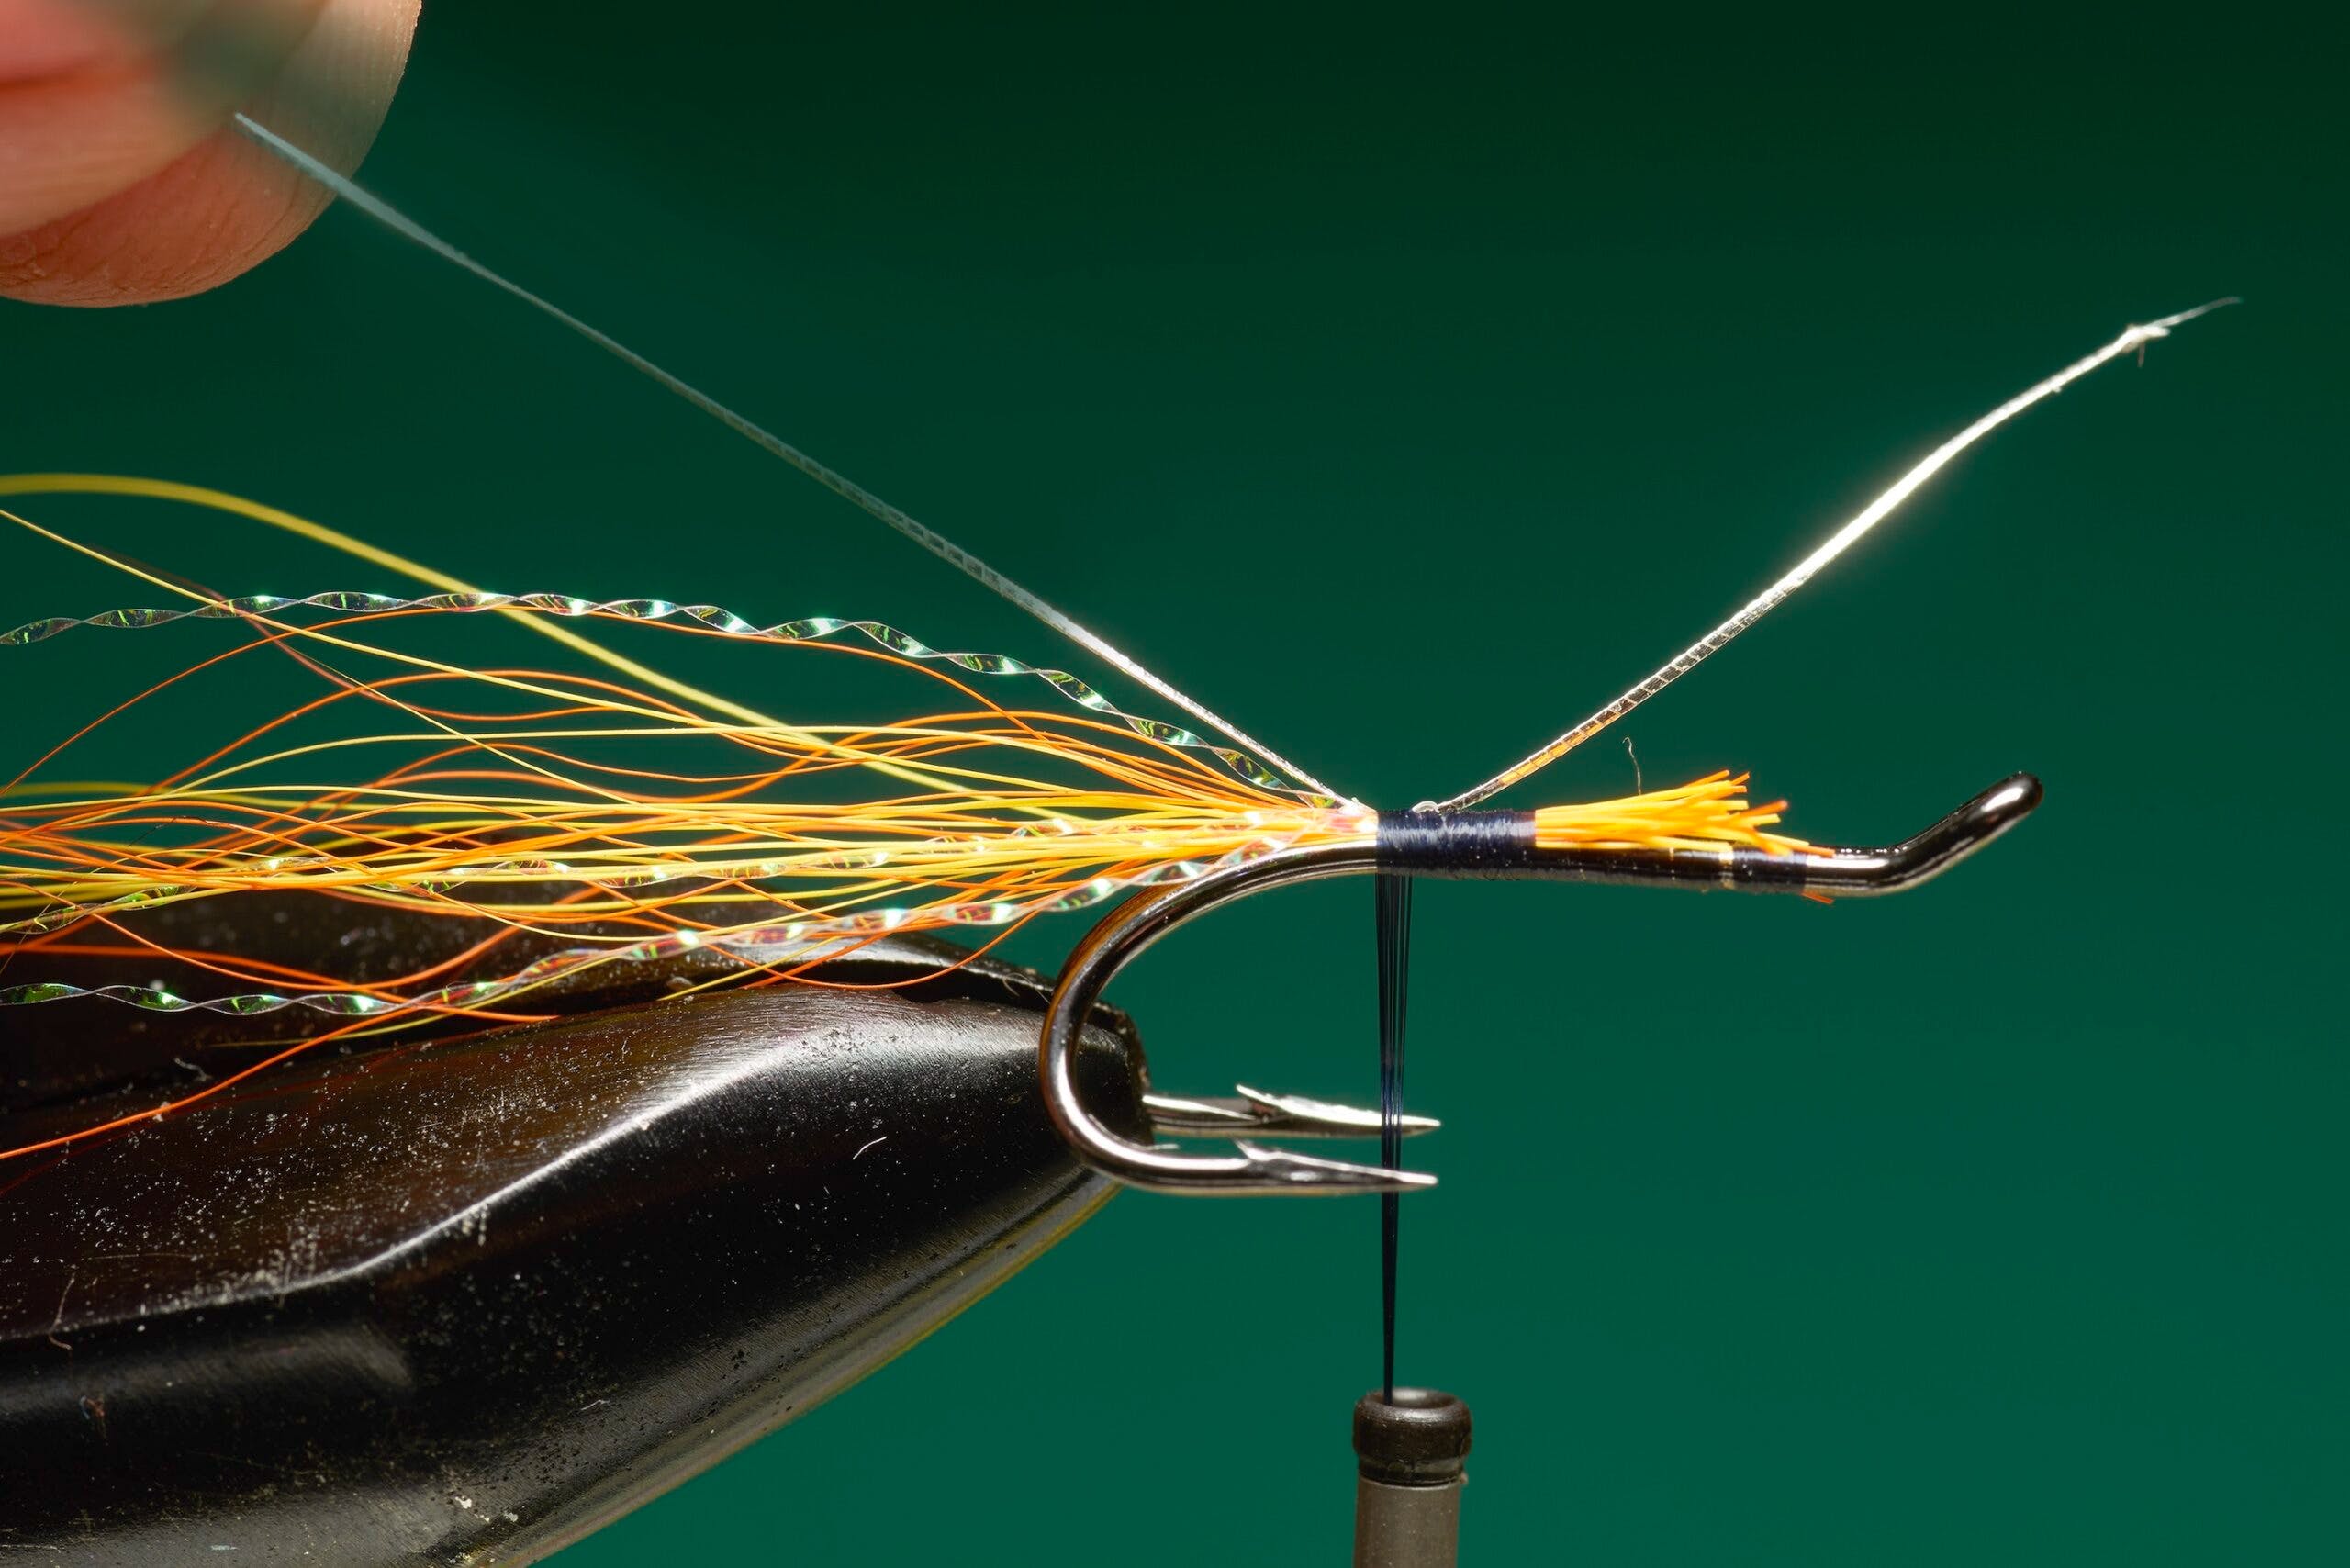
Step 4. Add pearl Krystal Flash. By tying in two long strands at their midpoint and then folding them over, you will have four strands that can’t be pulled out.
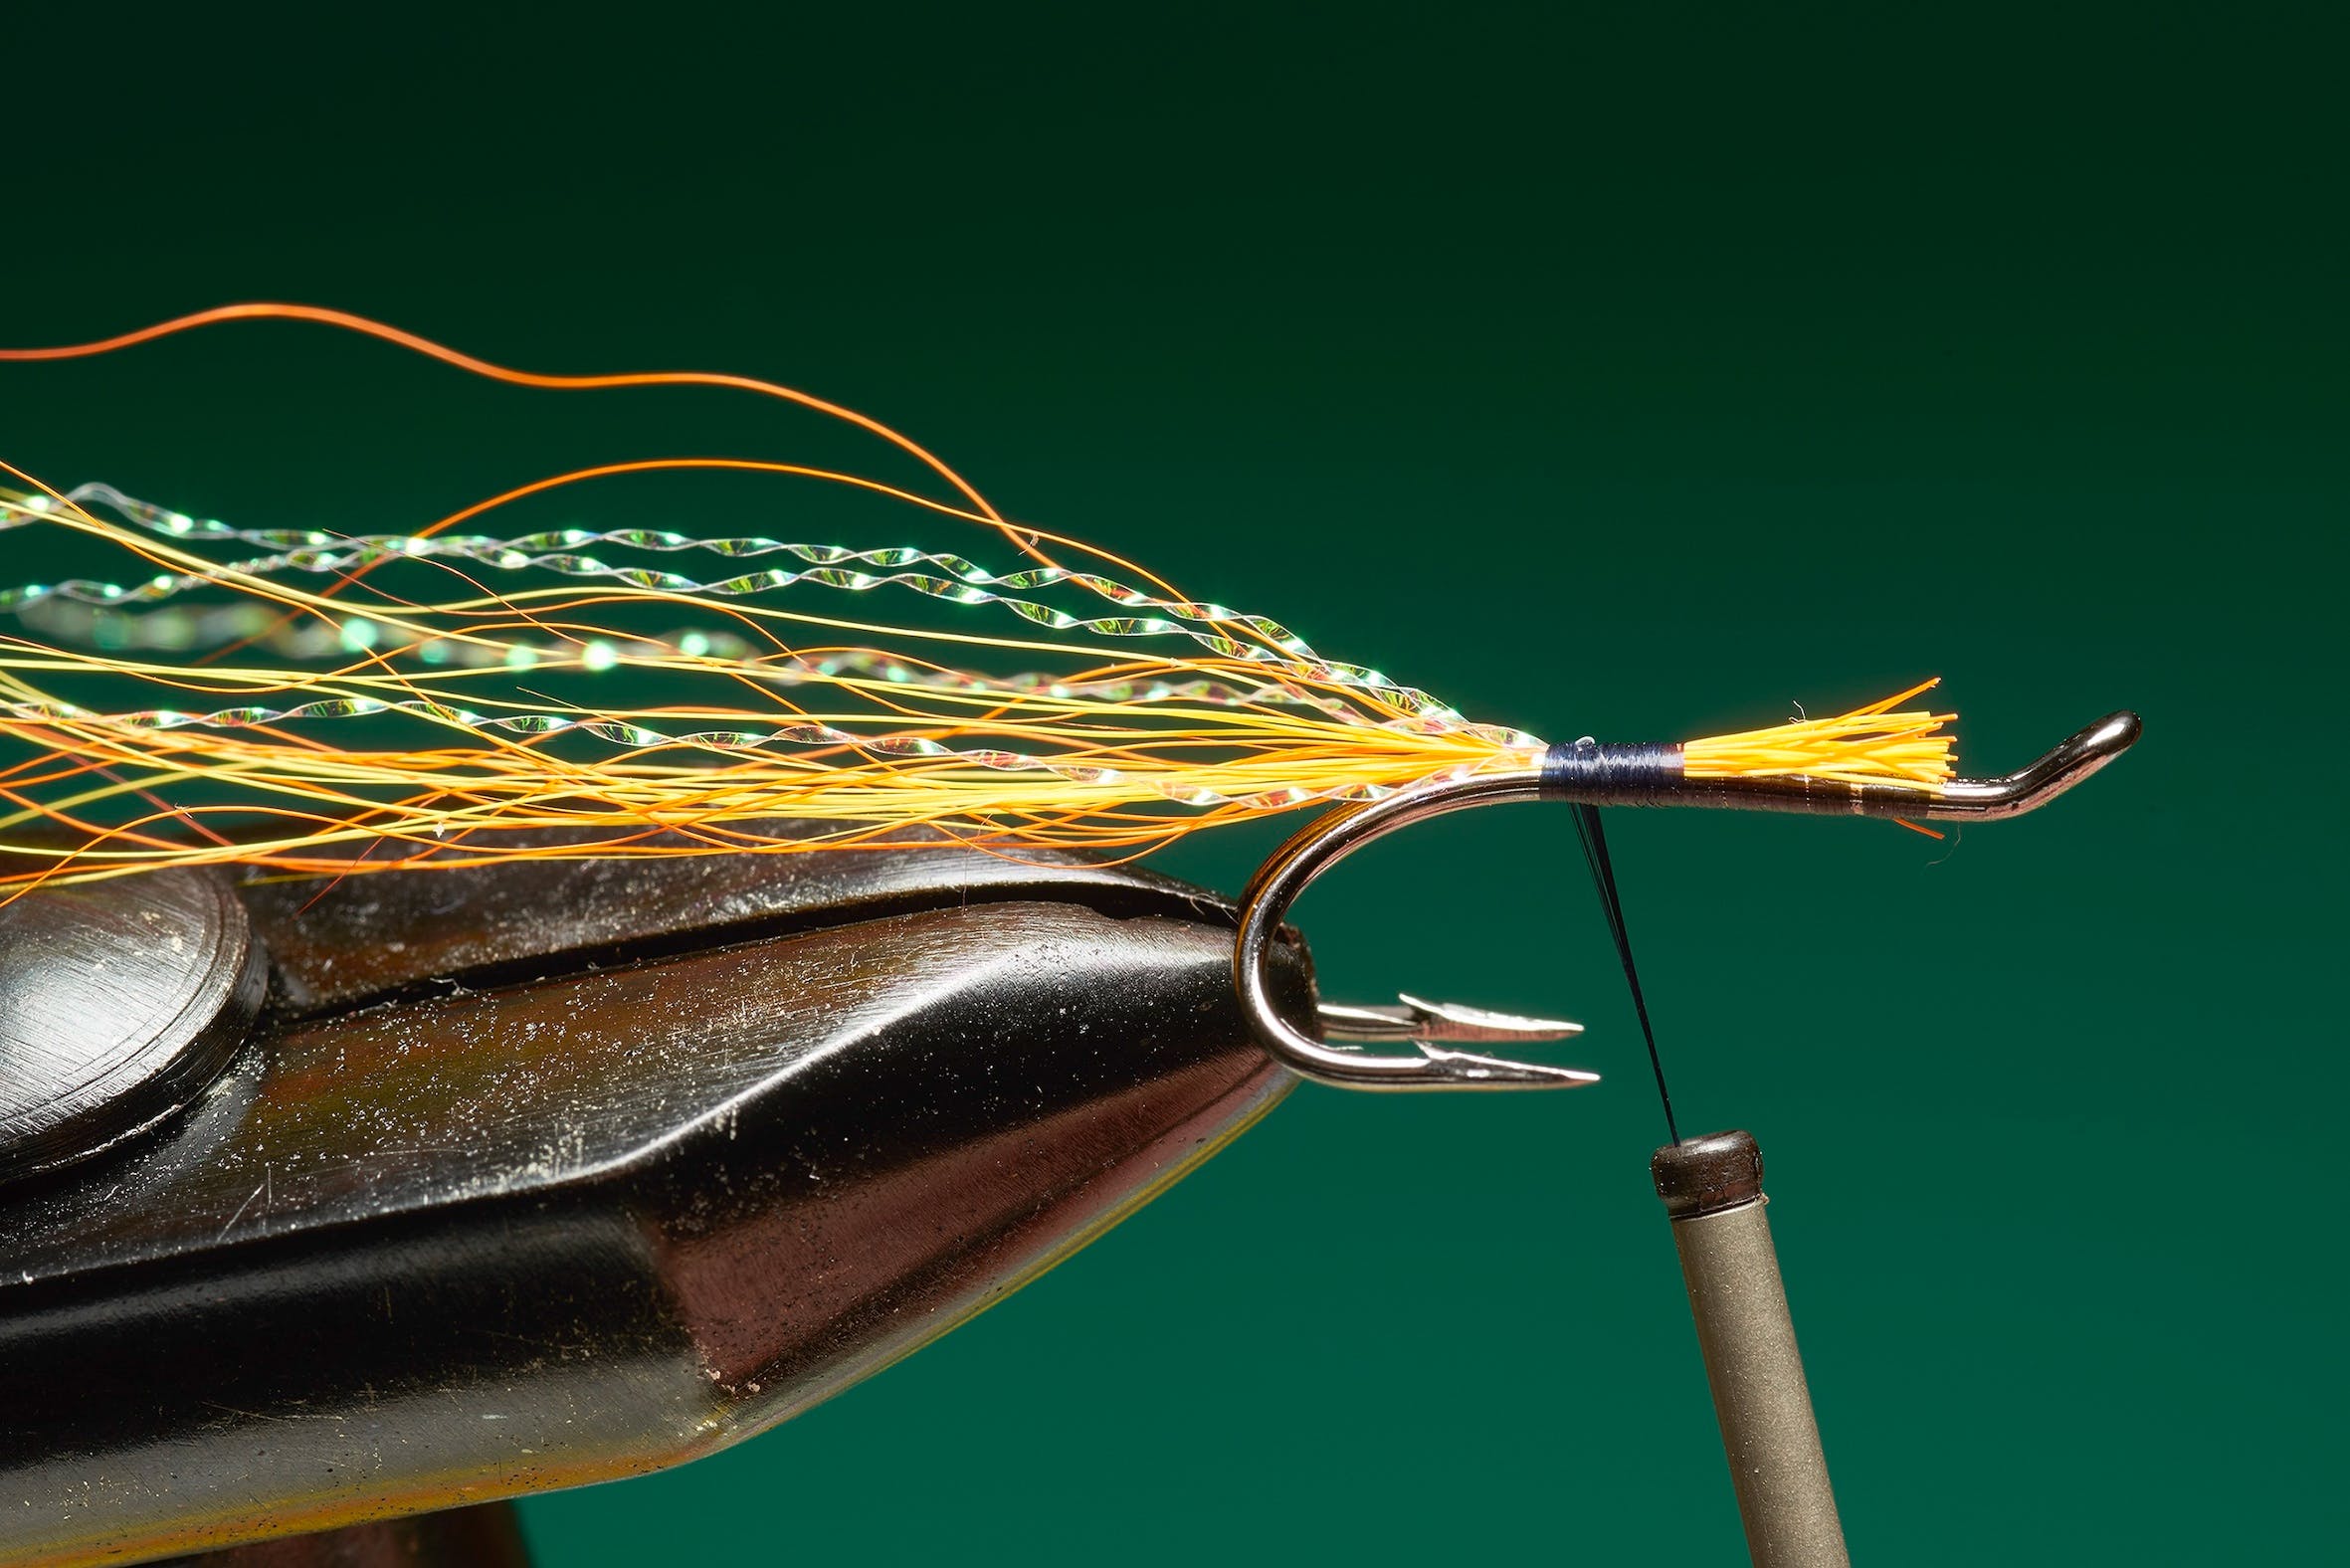
Step 5. Fix the flash strands with thread-turns. If four strands appear excessive, trim off one strand at the tail base. Trim all the strands to the same length as tail.
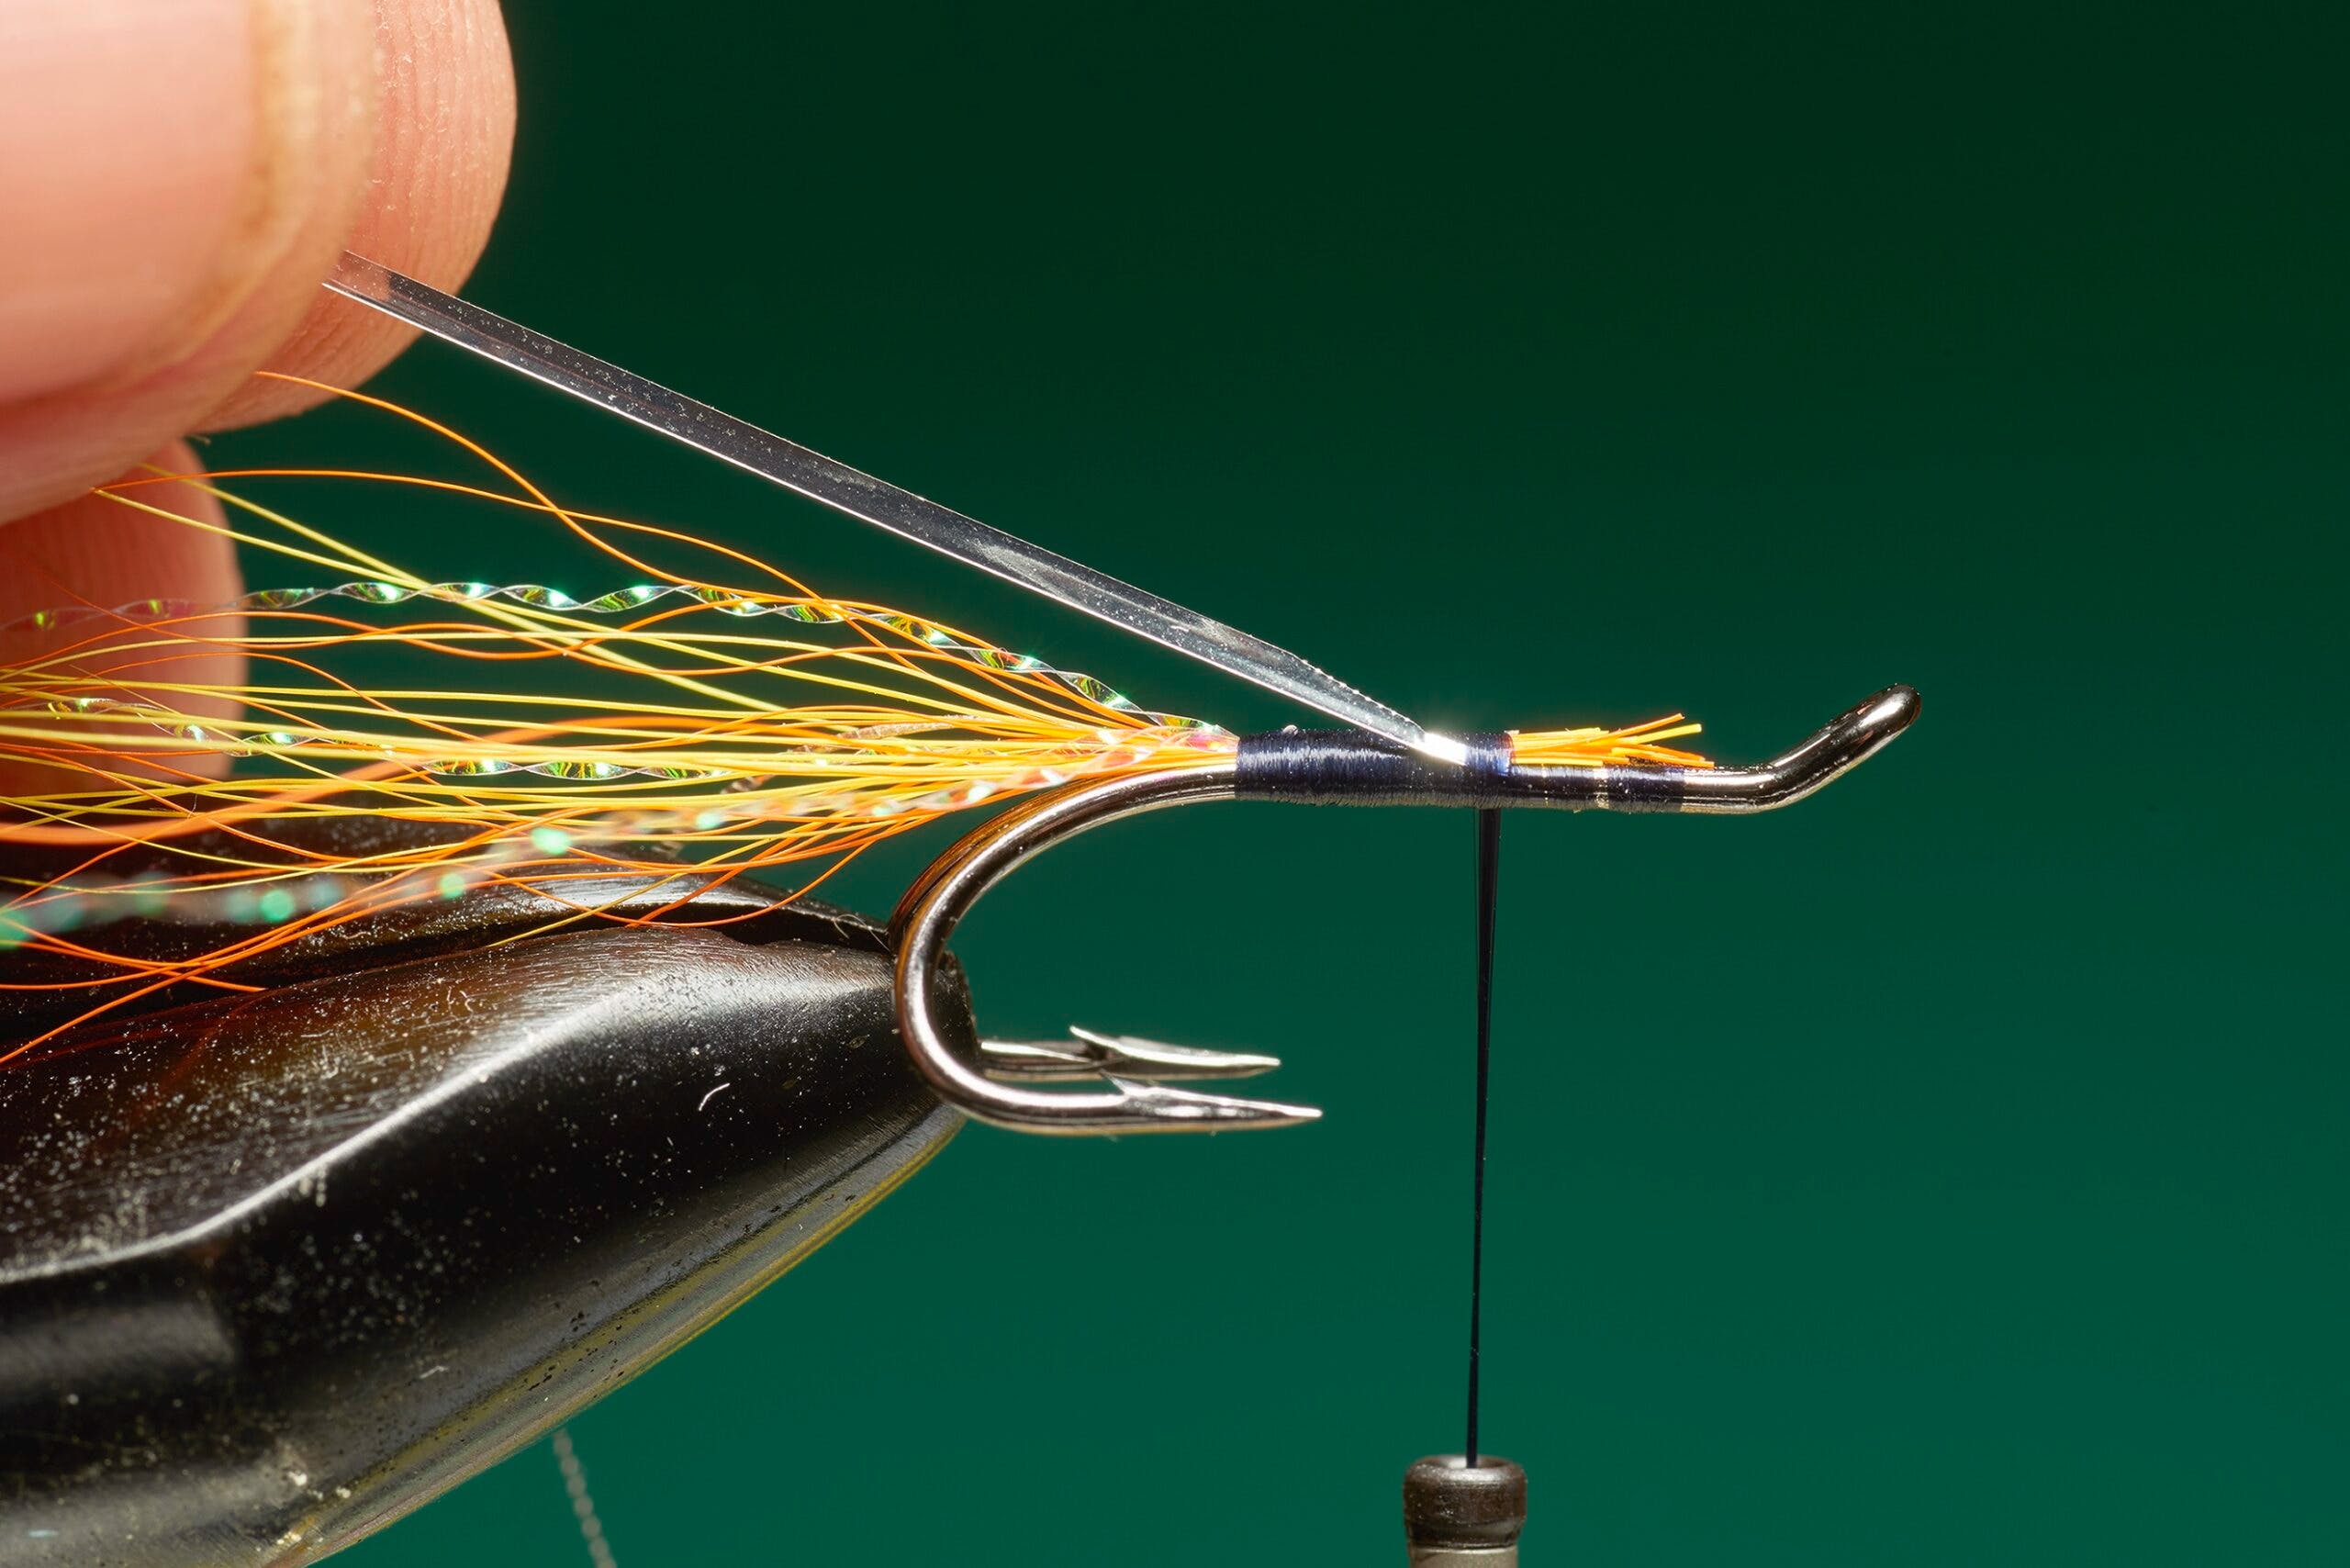
Step 6. Catch some oval tinsel in on the far side of the hook at the tail-base. Trim waste tinsel and wind thread over its end. Turns should be close and smooth to form an even base.
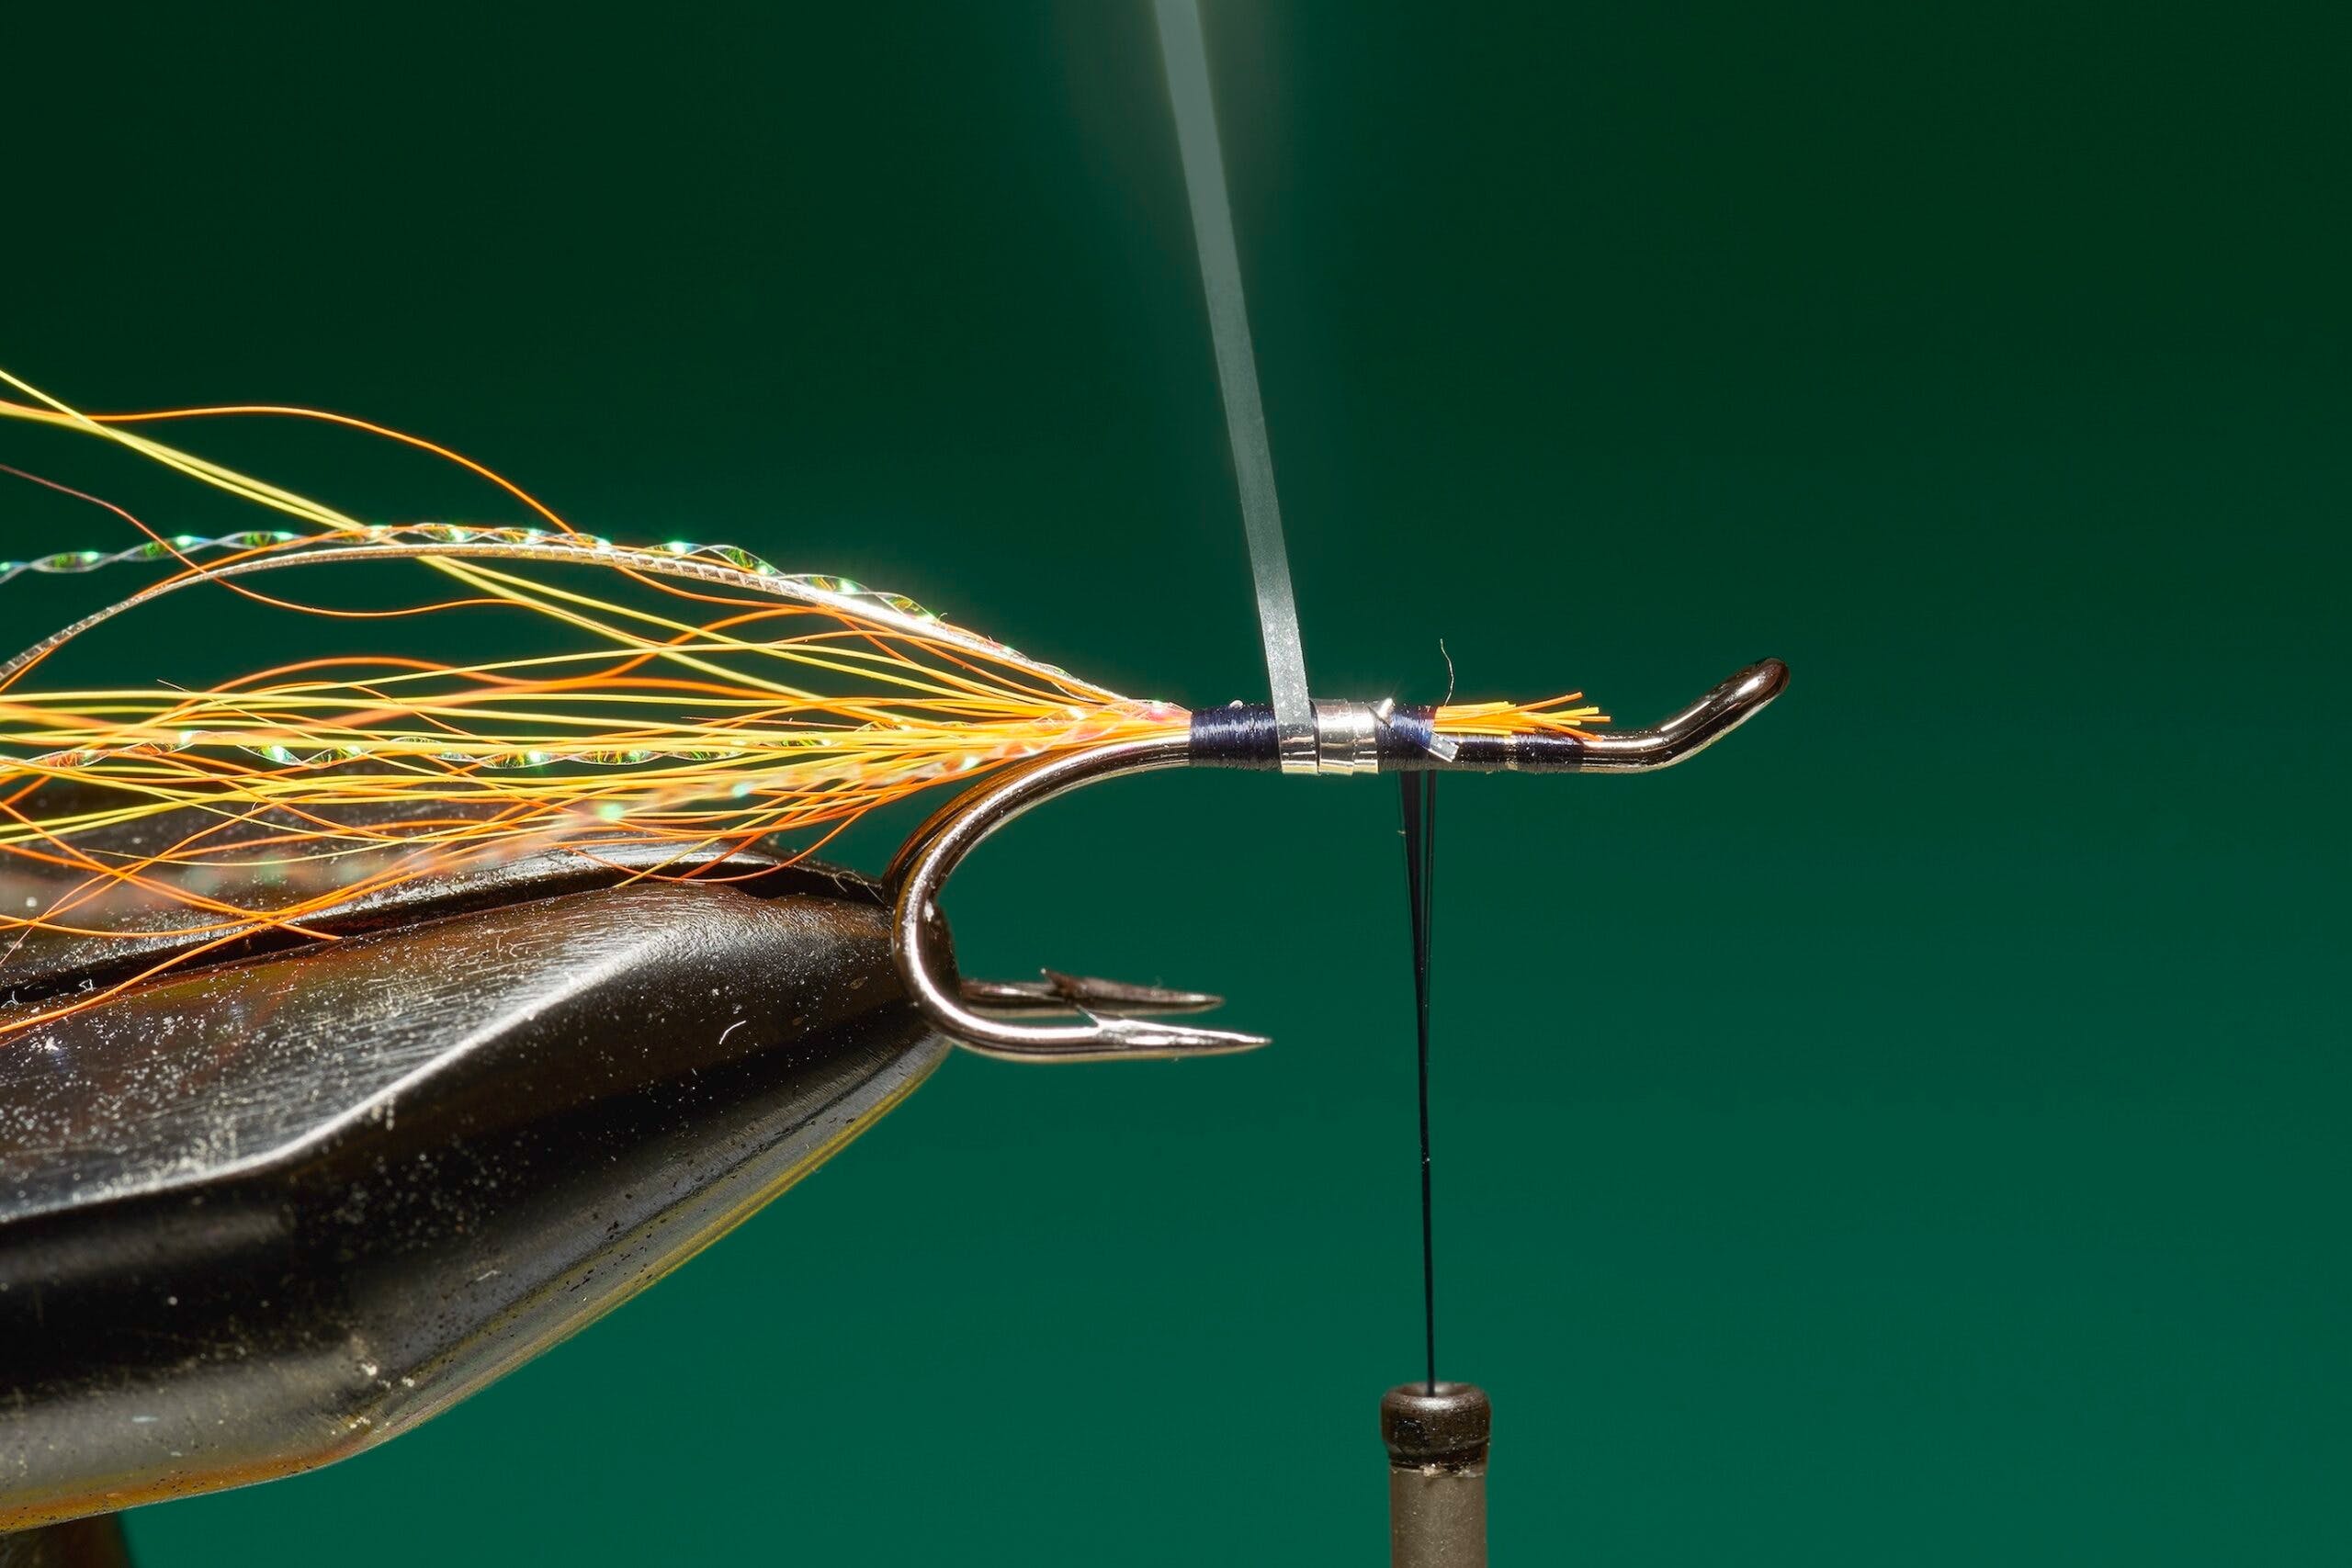
Step 7. Take the thread to middle of the shank. Take a length of flat silver tinsel and cut the end to a point. The taper will help you to make the first turn. Catch it in with silver side facing you.
Step 8. Holding the tinsel, tightly wind it towards the tail in touching, but not overlapping, turns. Keep winding the tinsel until it reaches the base of the tail.
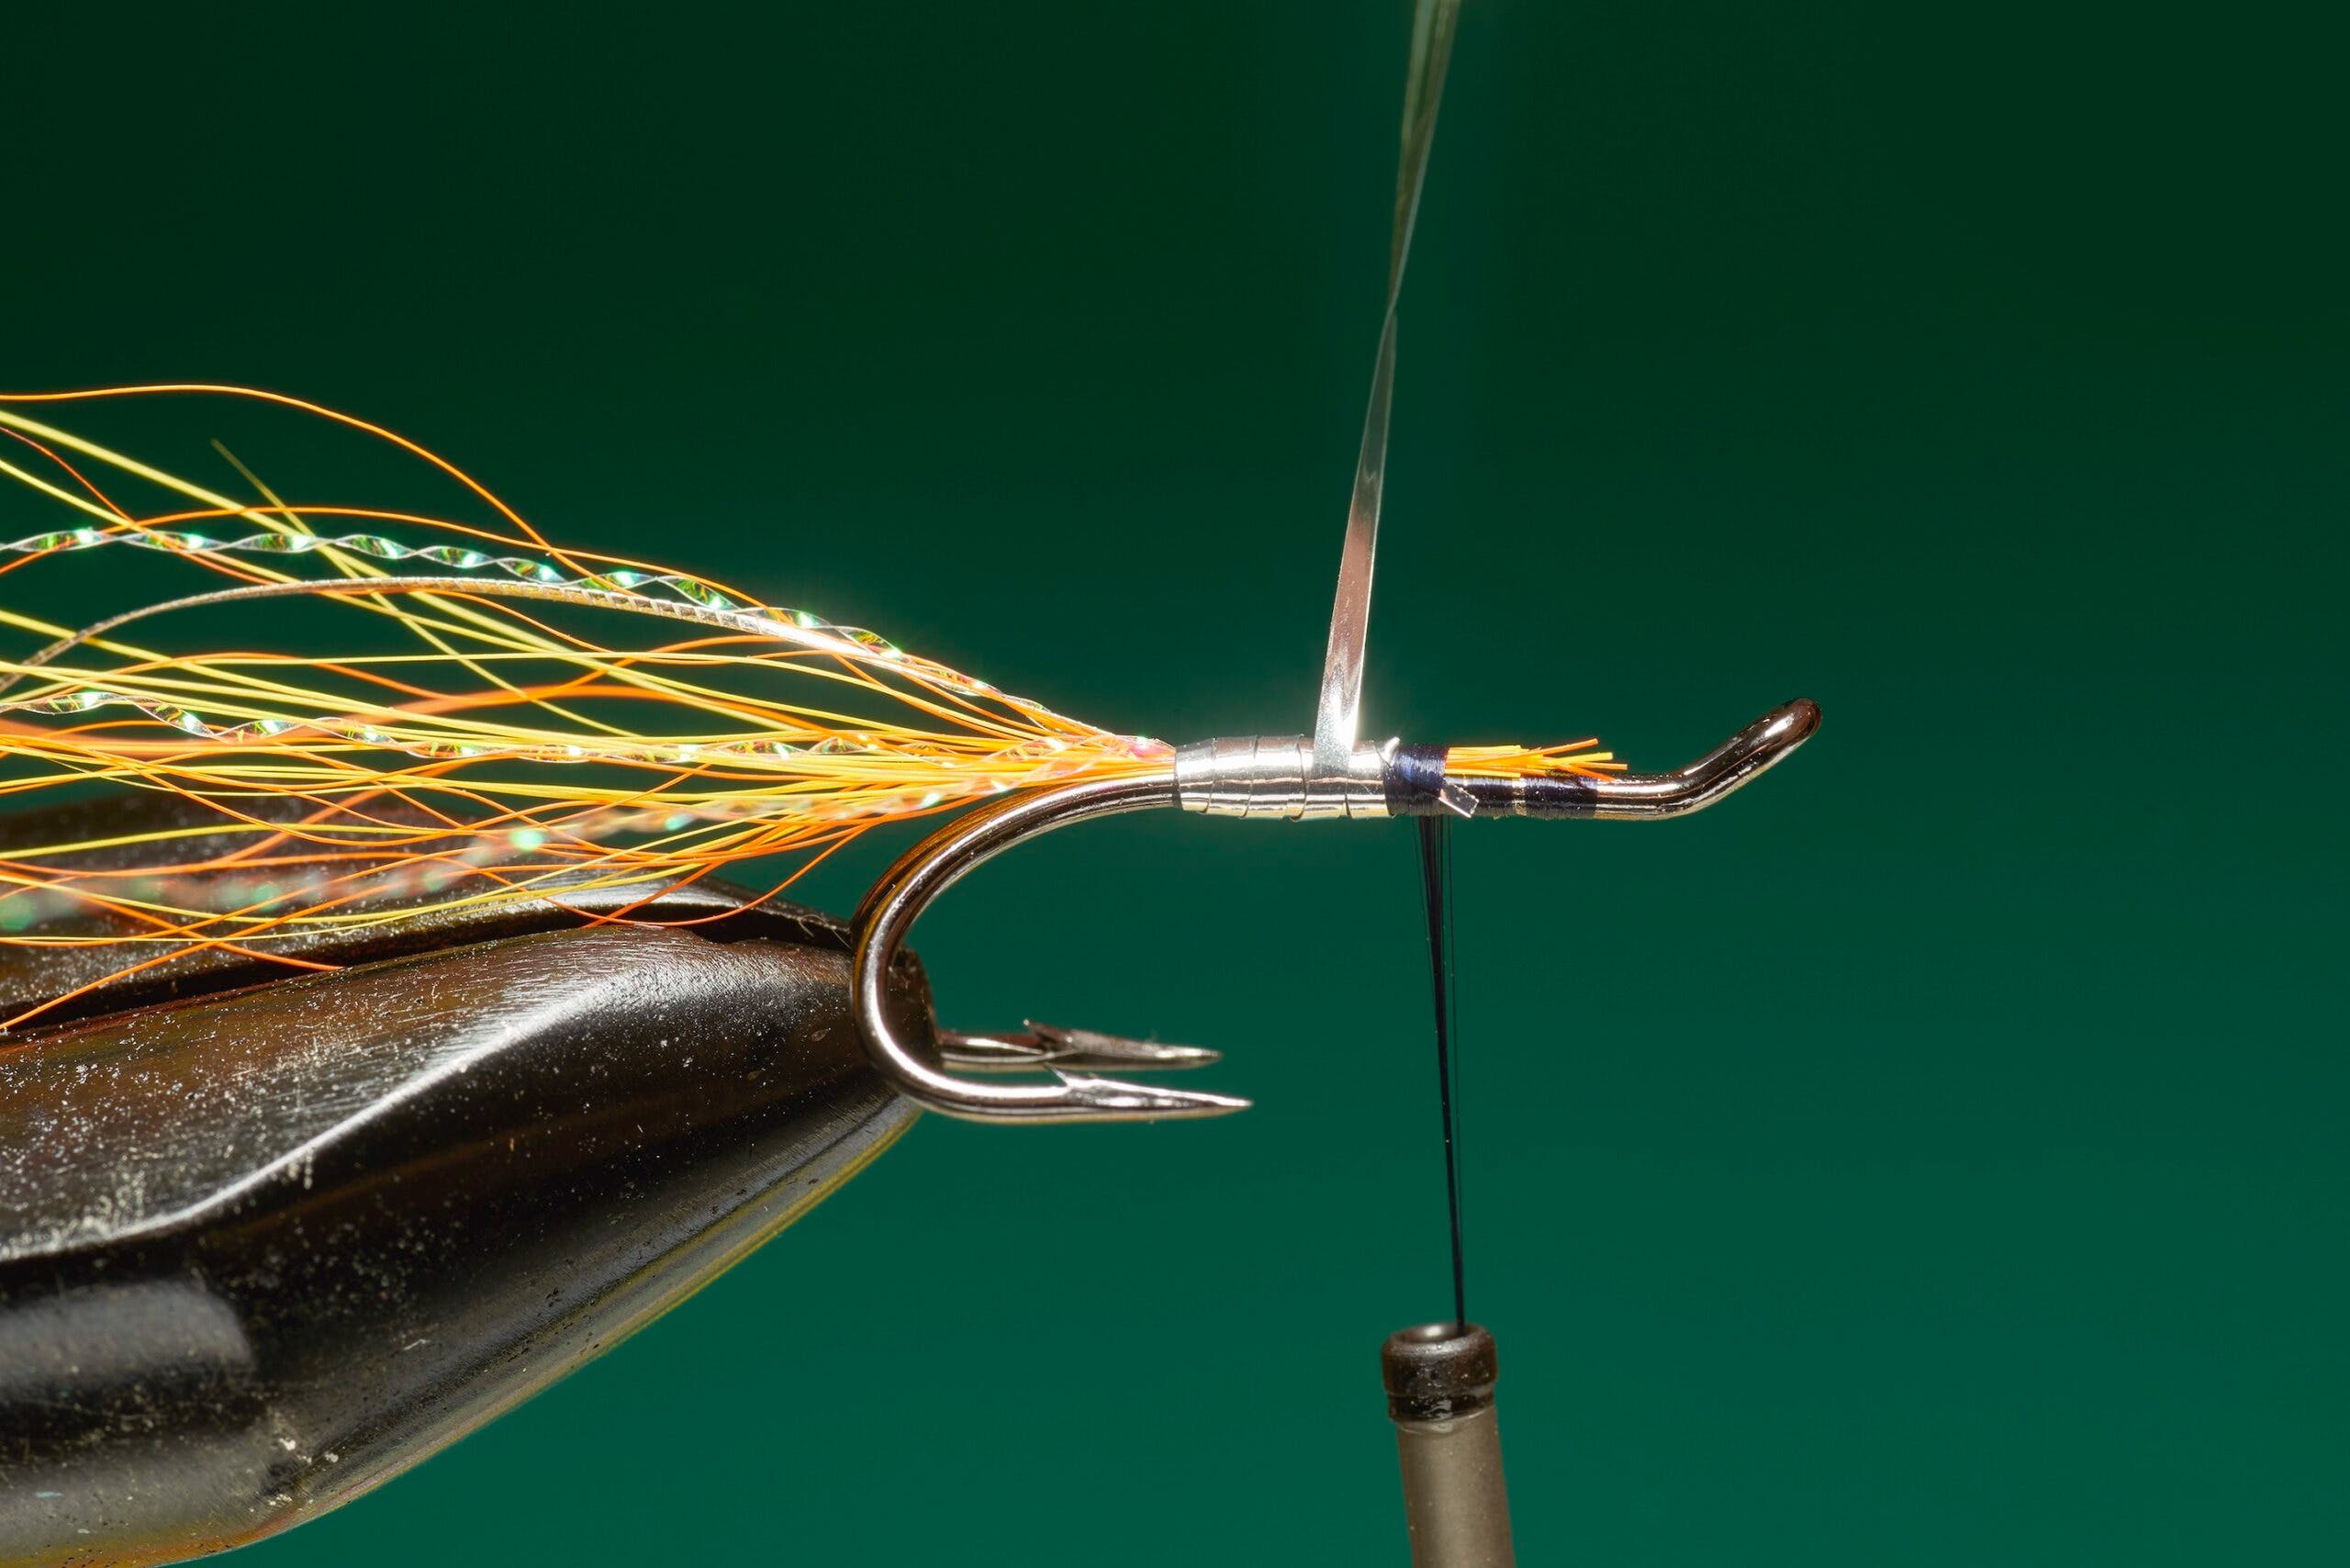
Step 9. At the tail, wind the tinsel back over itself in touching turns, ensuring there are no gaps in the body. Wind the tinsel to its catching-in point. Secure and trim off waste.
Step 10. Wind the thread closer to the eye in smooth turns before catching in black floss. Great care must be taken to leave room, up to one quarter of the shank, for the wing and hackle.
Step 11. Wind the floss in touching turns towards the rear body. Once the tinsel has been reached make another turn to cover the join then wind the floss over itself to form a double layer.
Step 12. Secure floss and trim the end. Take the oval tinsel and make one tight turn at the tail-base. Wind on two evenly spaced turns. Make the third over the join between tinsel and floss.
Step 13. Add two more evenly spaced turns of the tinsel, over the floss, then secure the end with thread. Trim the loose end close to the shank.
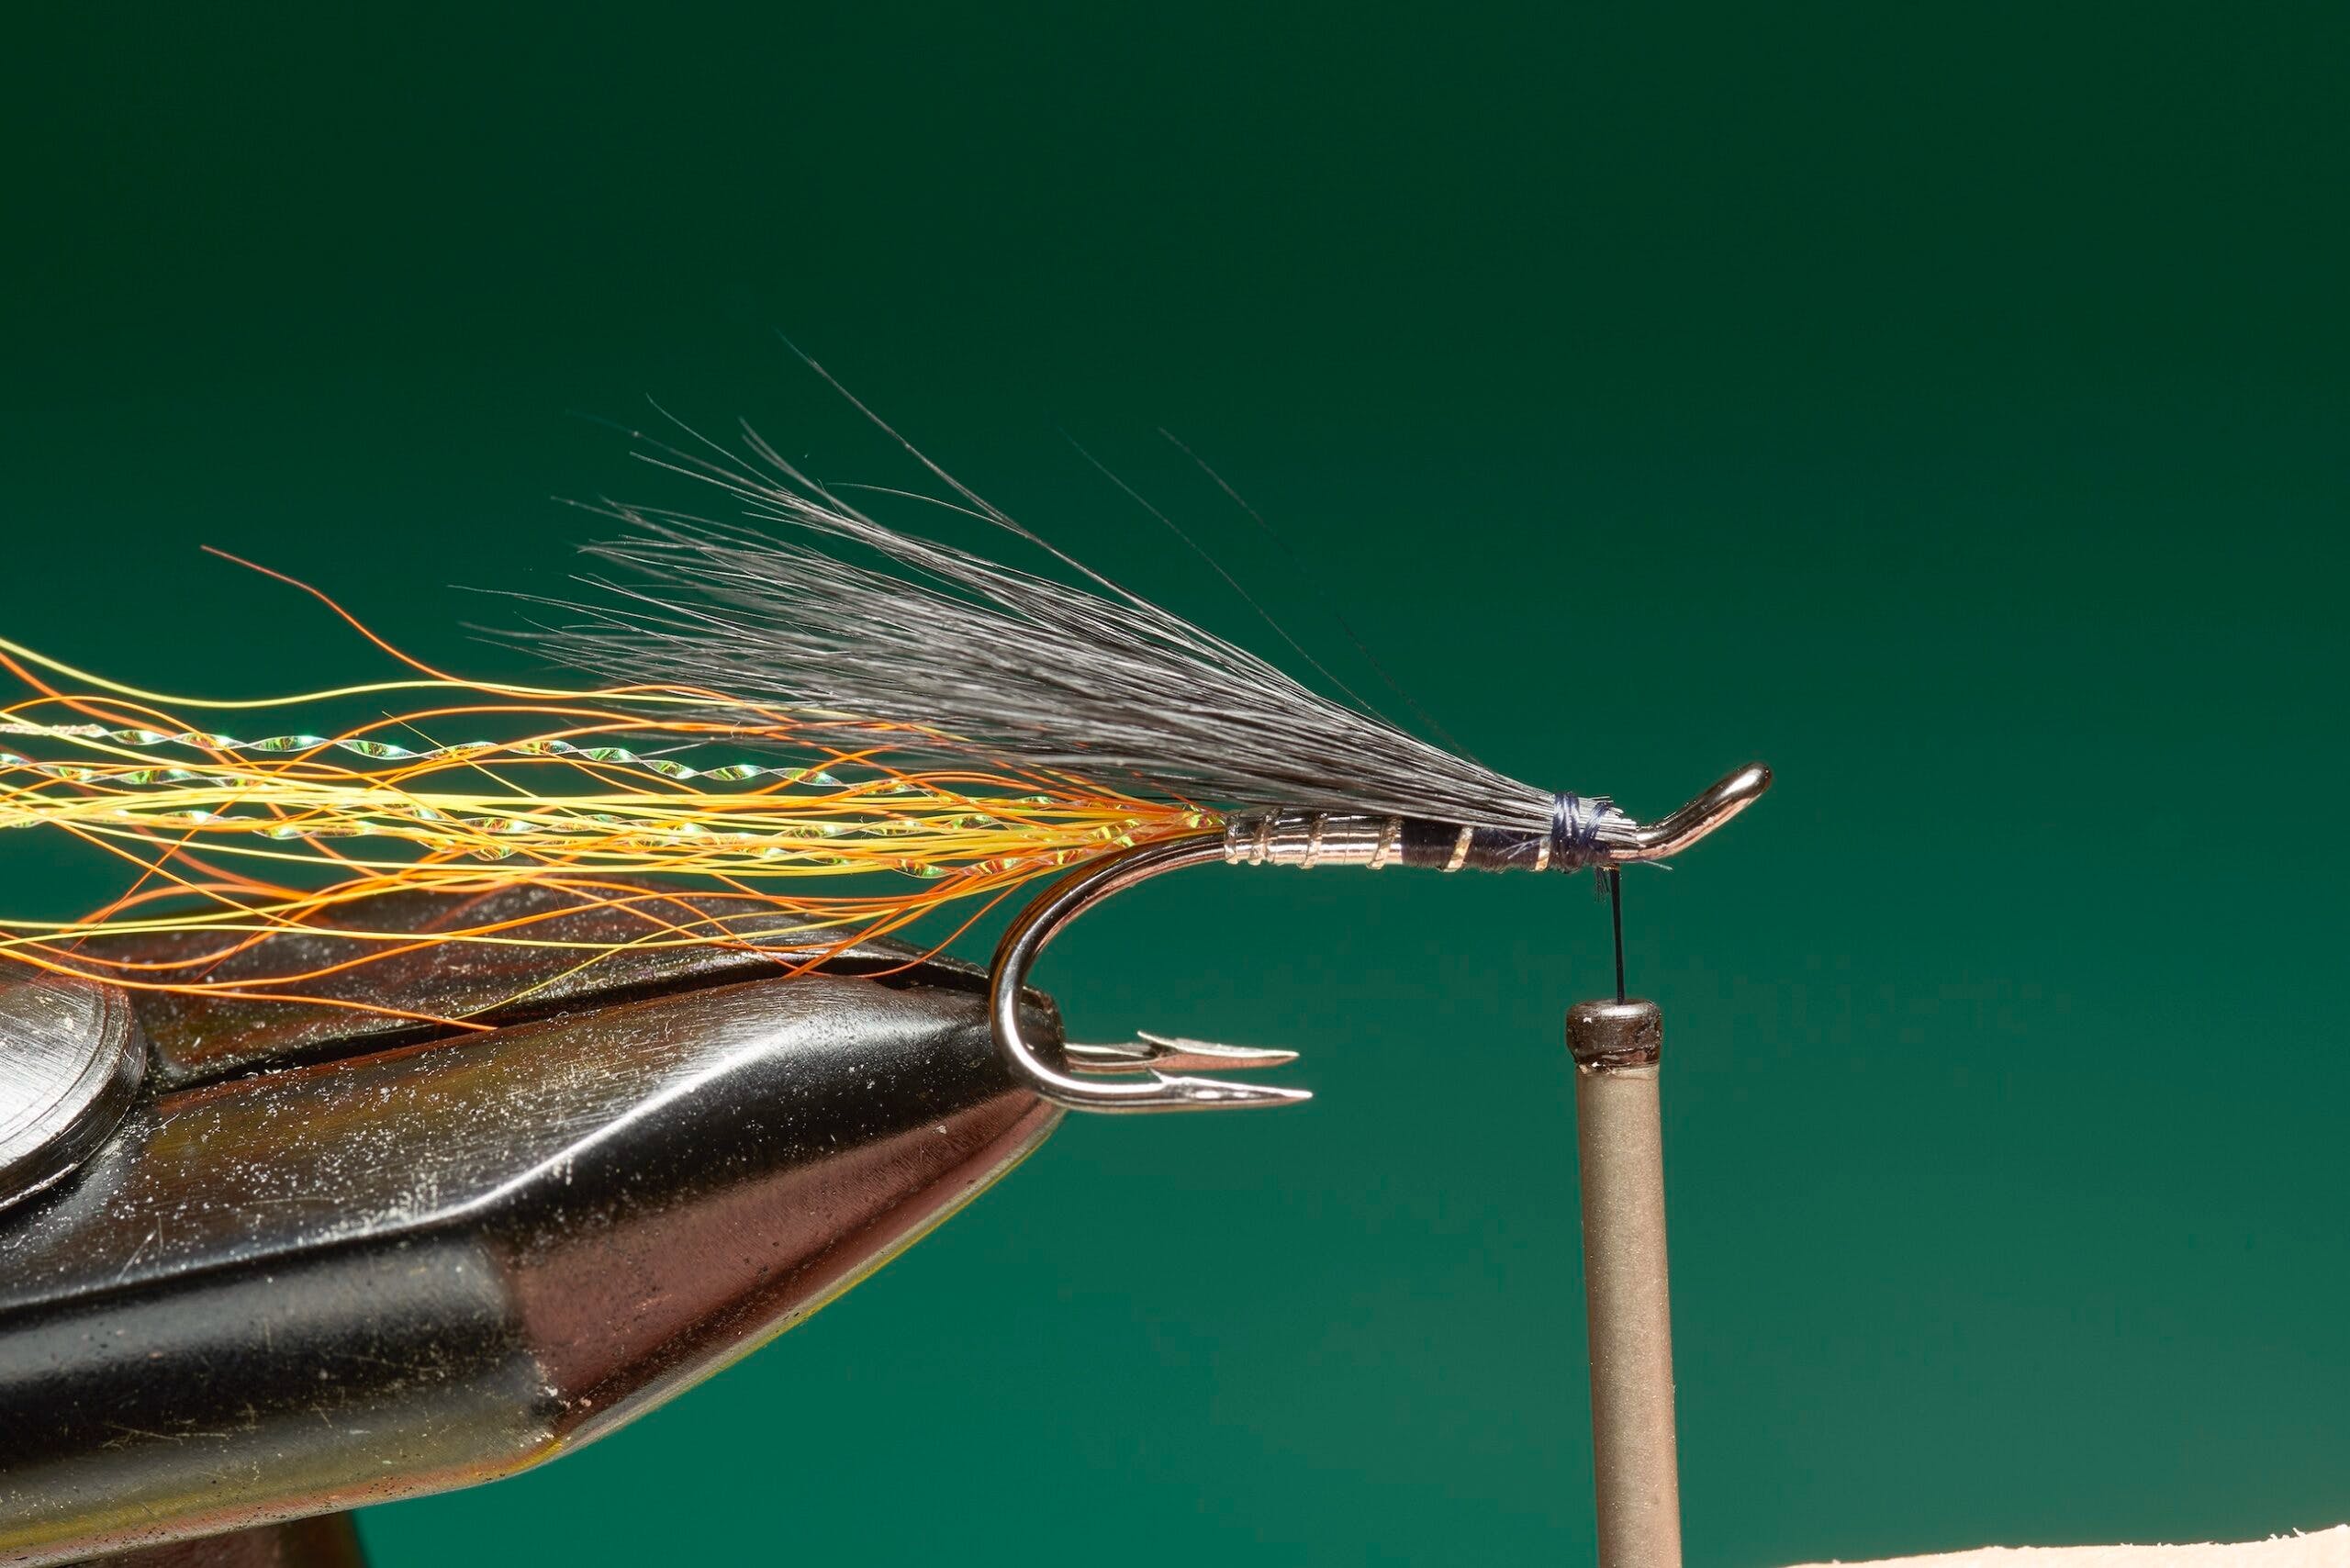
Step 14. Select a slim bunch of dyed-black squirrel tail. Remove all the soft or broken fibres. Position the hair so the tips project well past the hook-bend, then secure it with tight turns of thread.
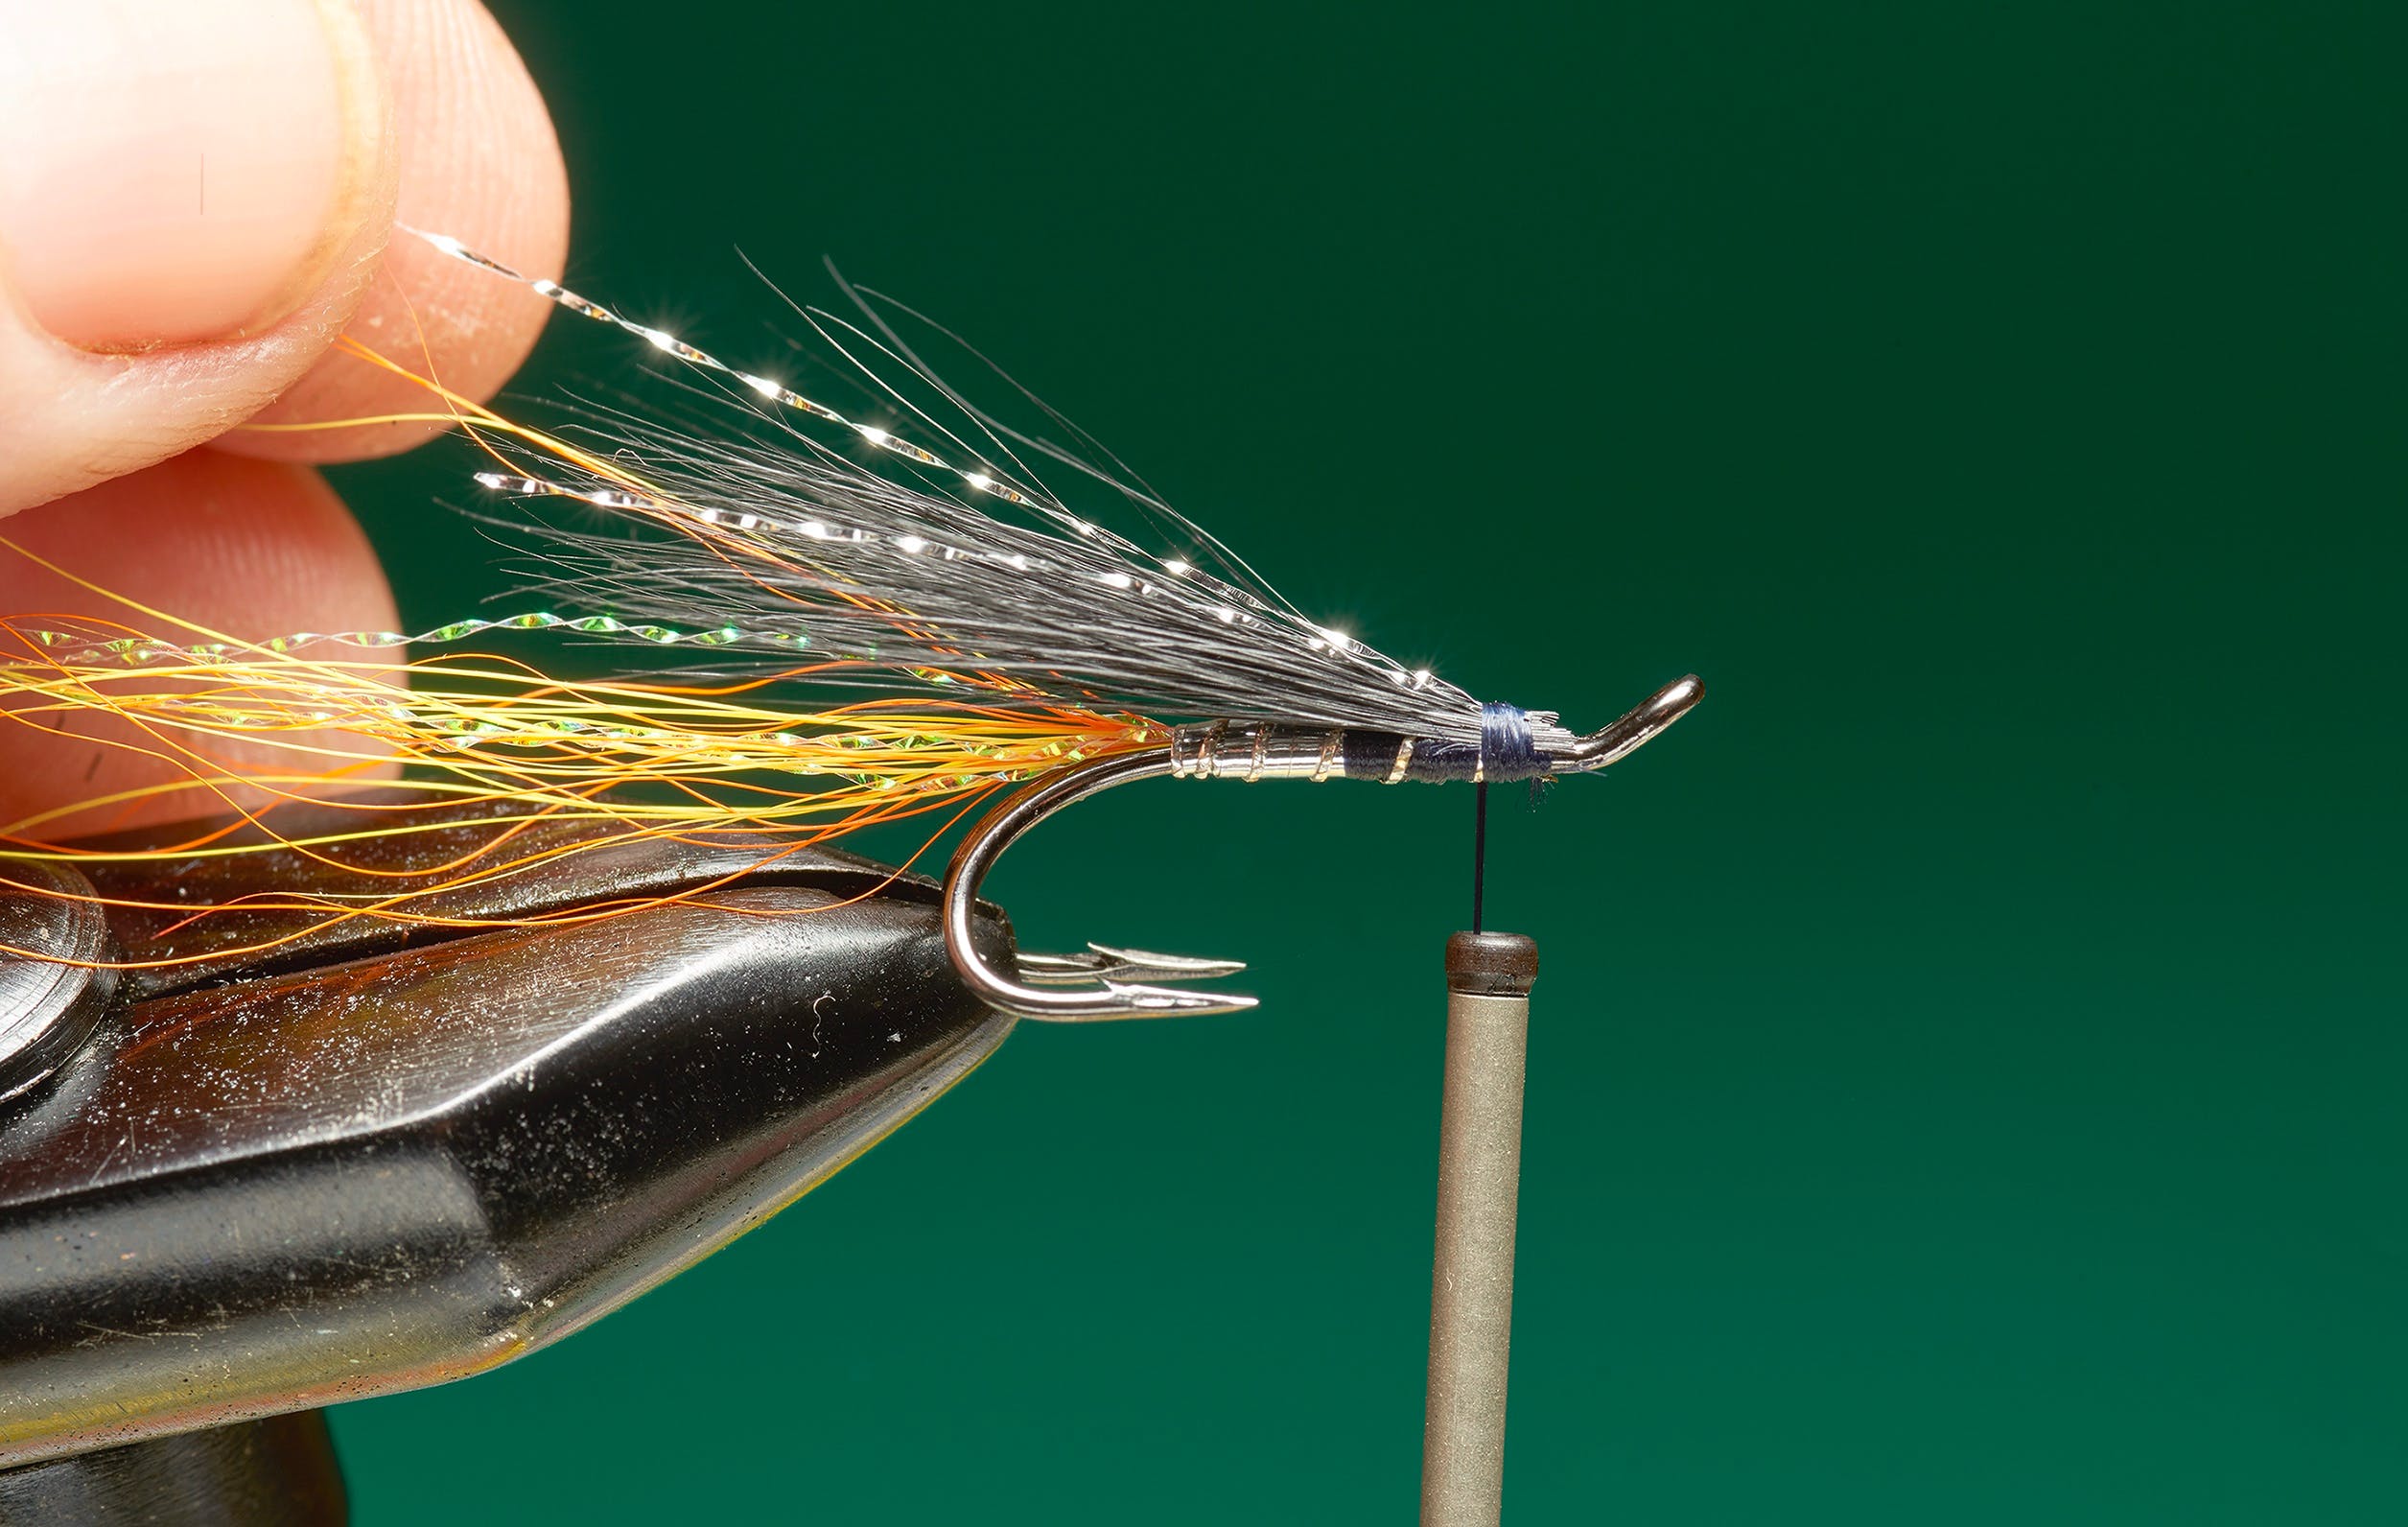
Step 15. Catch in a strand of silver Krystal Flash at its midpoint then fold to form two strands. Trim the ends to the same length as the wing then add tight turns of thread to the wing base.
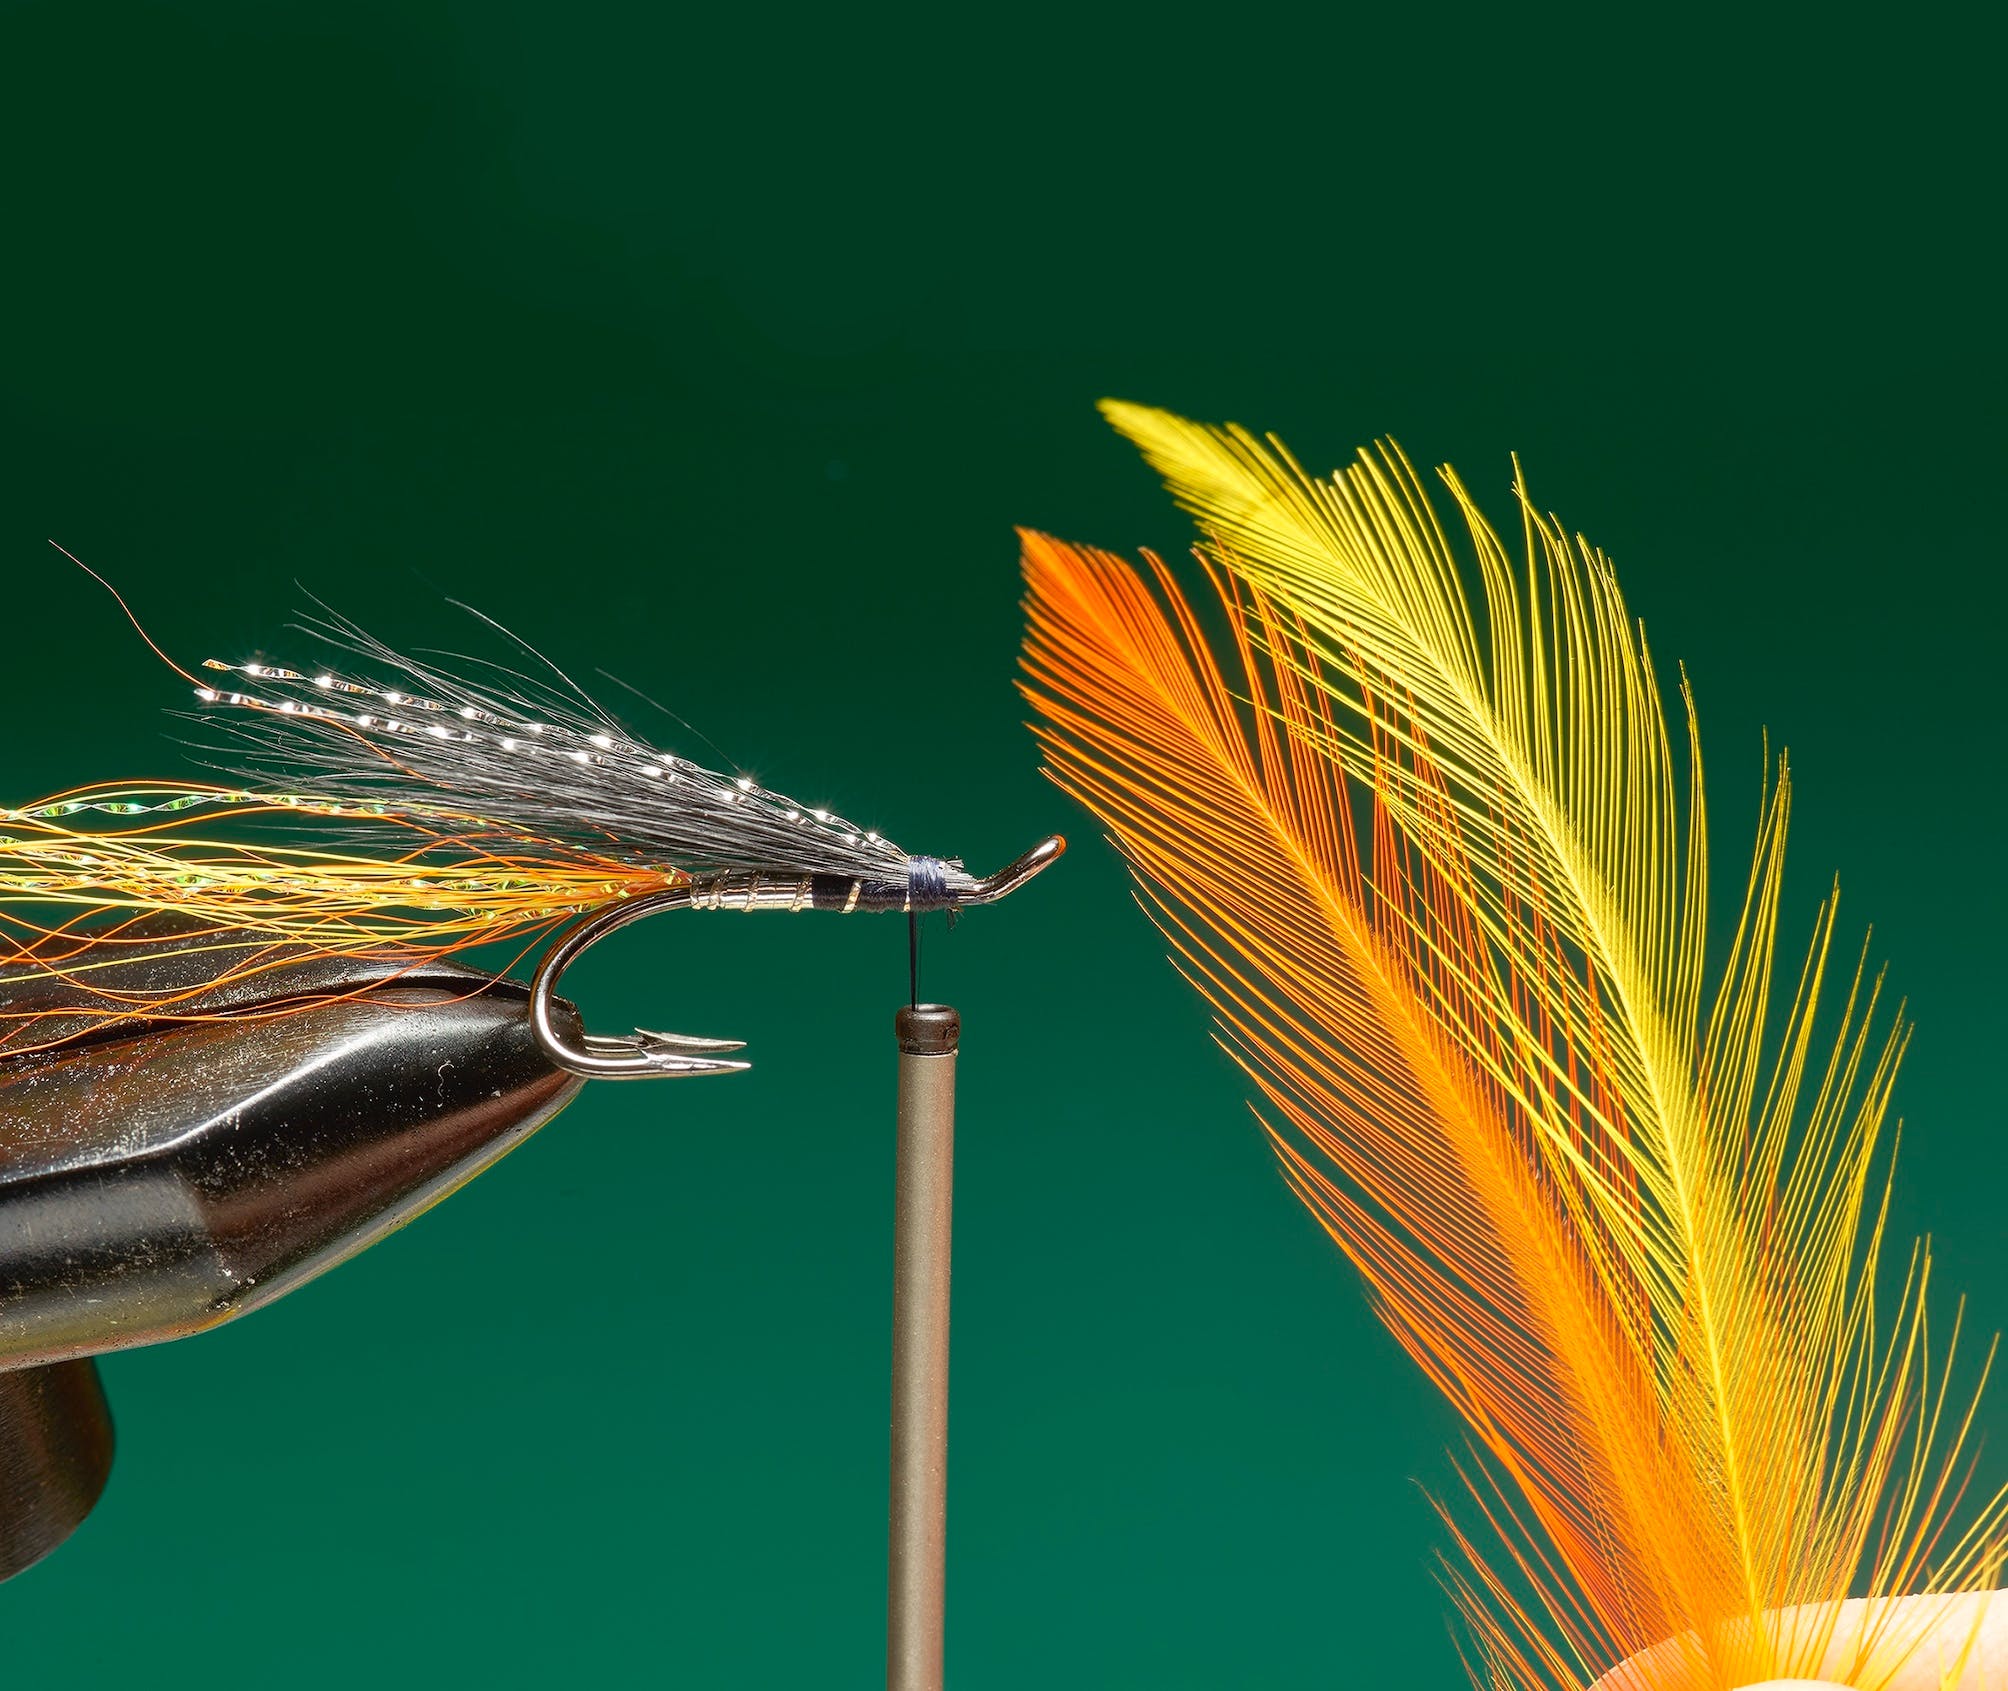
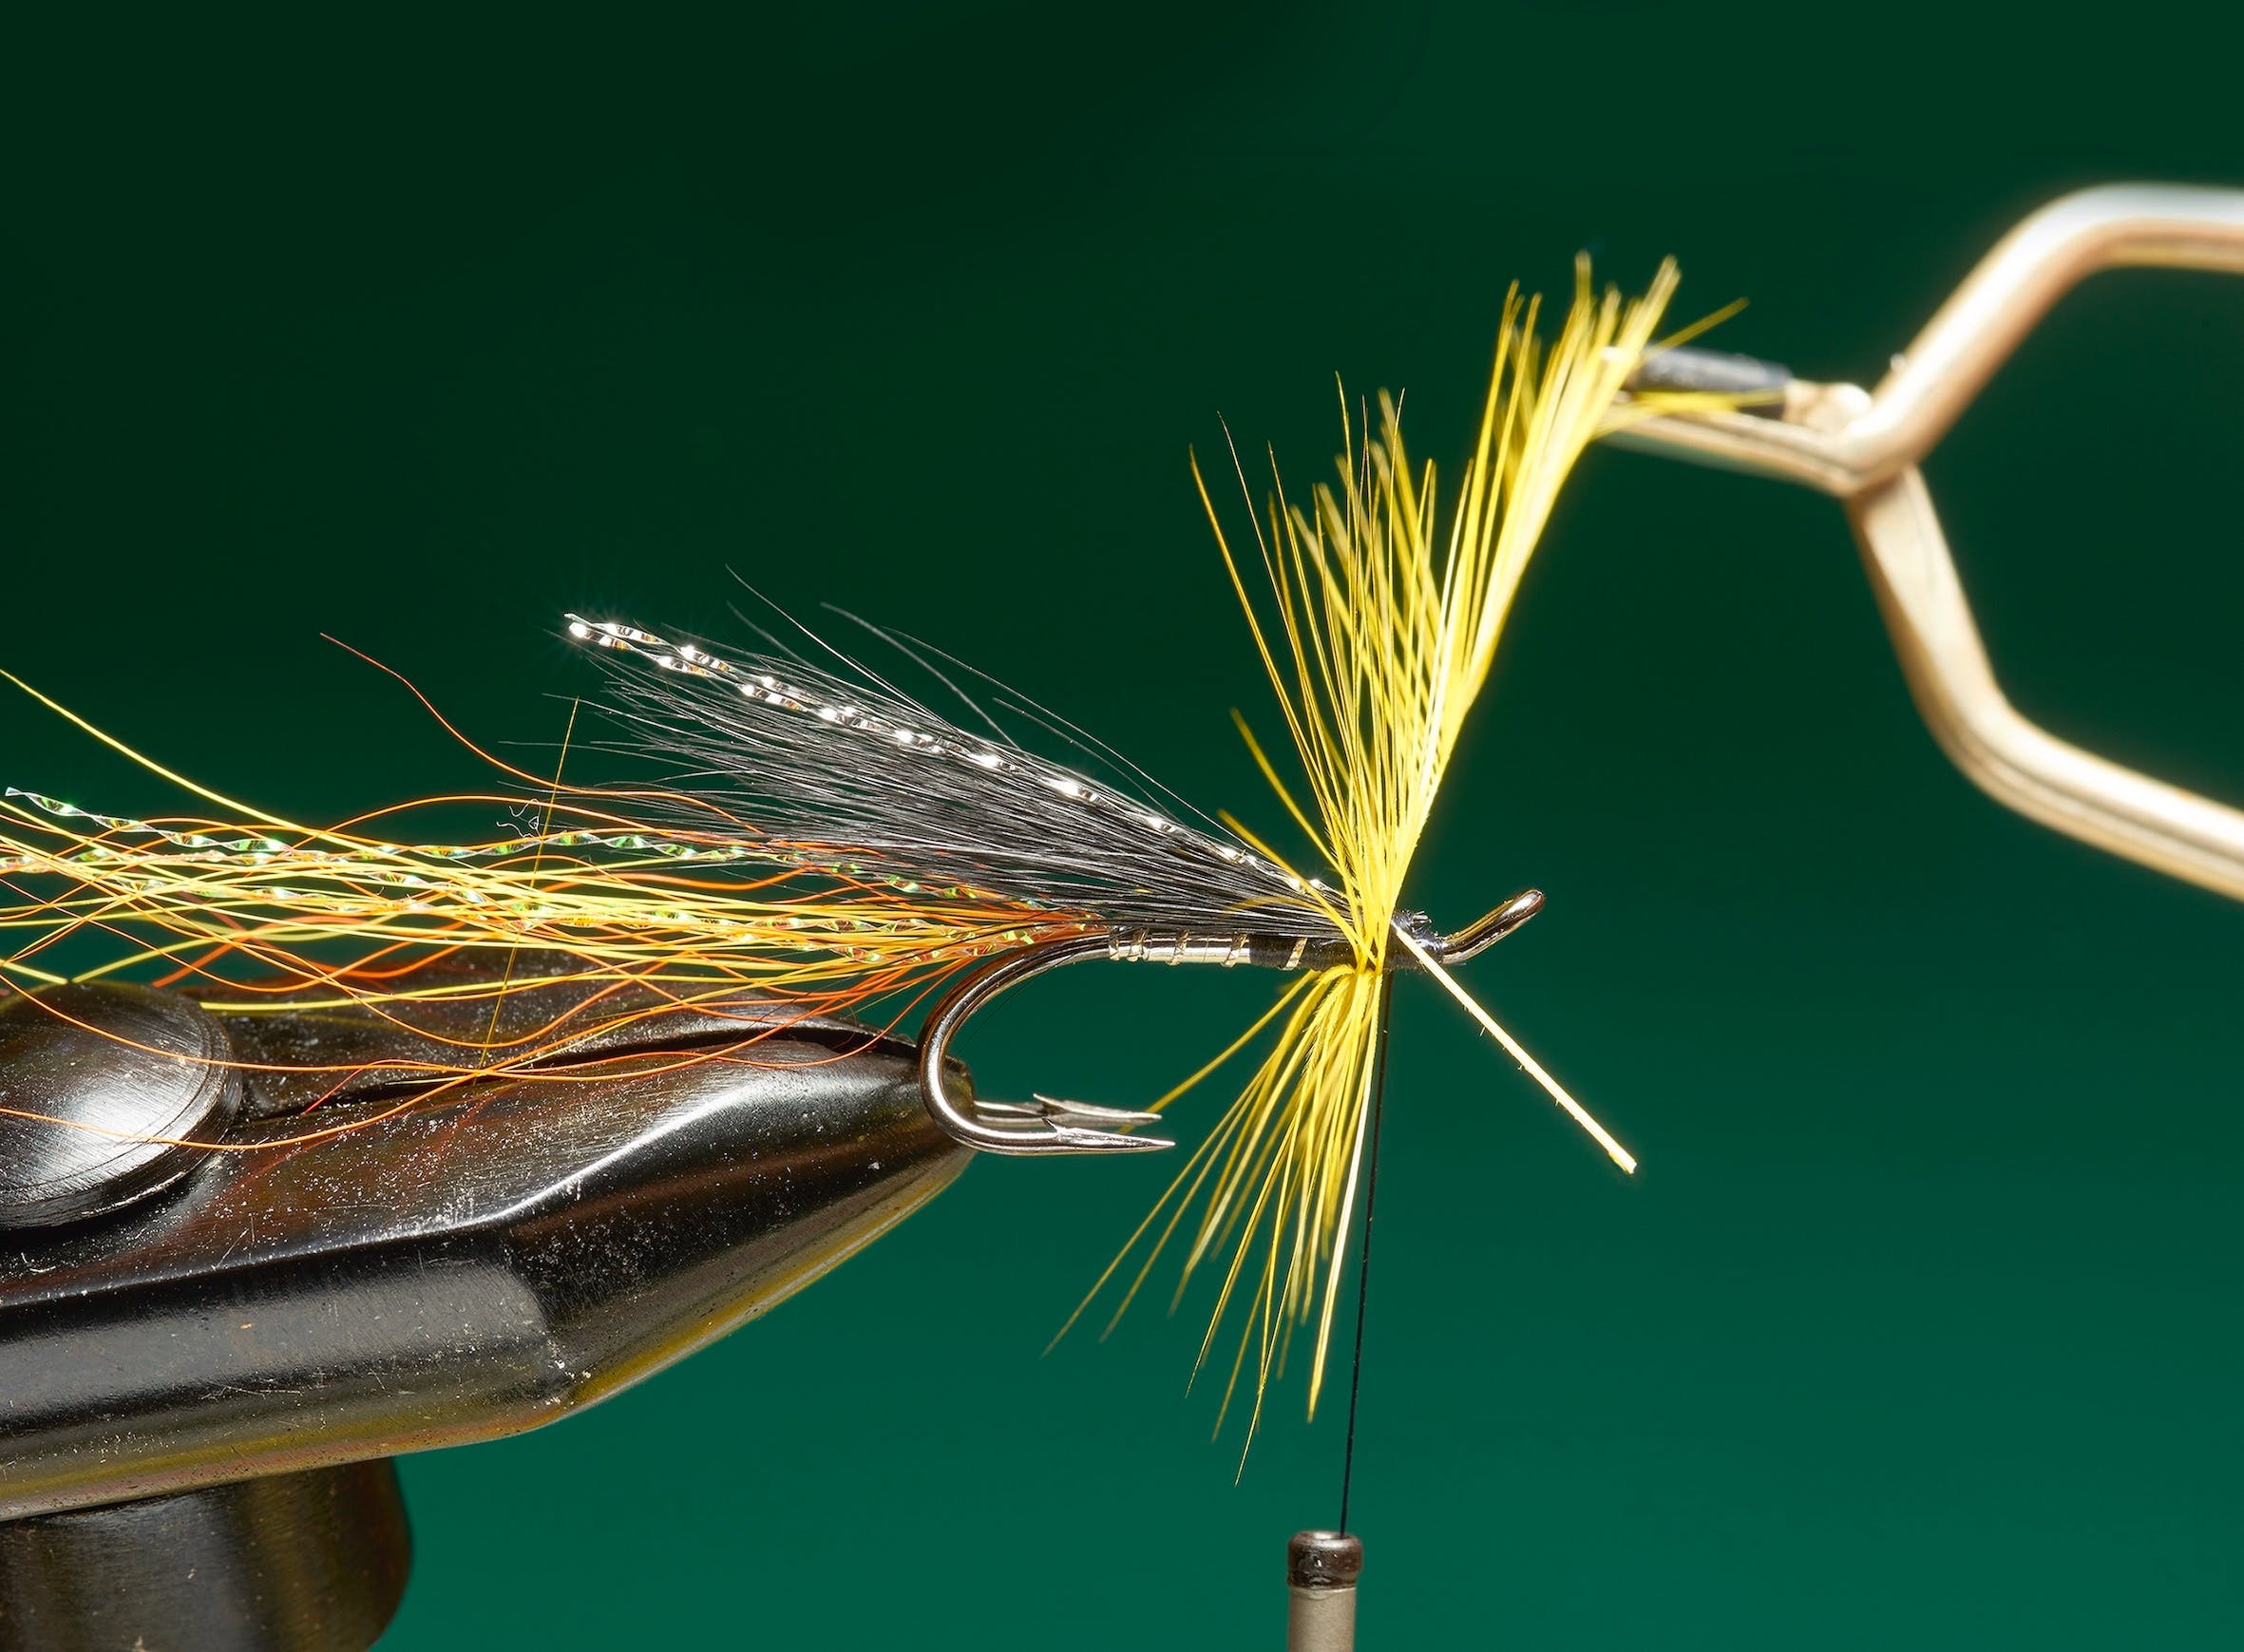
Step 16. Select two cock hackles – one orange, one yellow. It’s important that their fibres are the same length, slightly more than twice that of the hook gape.
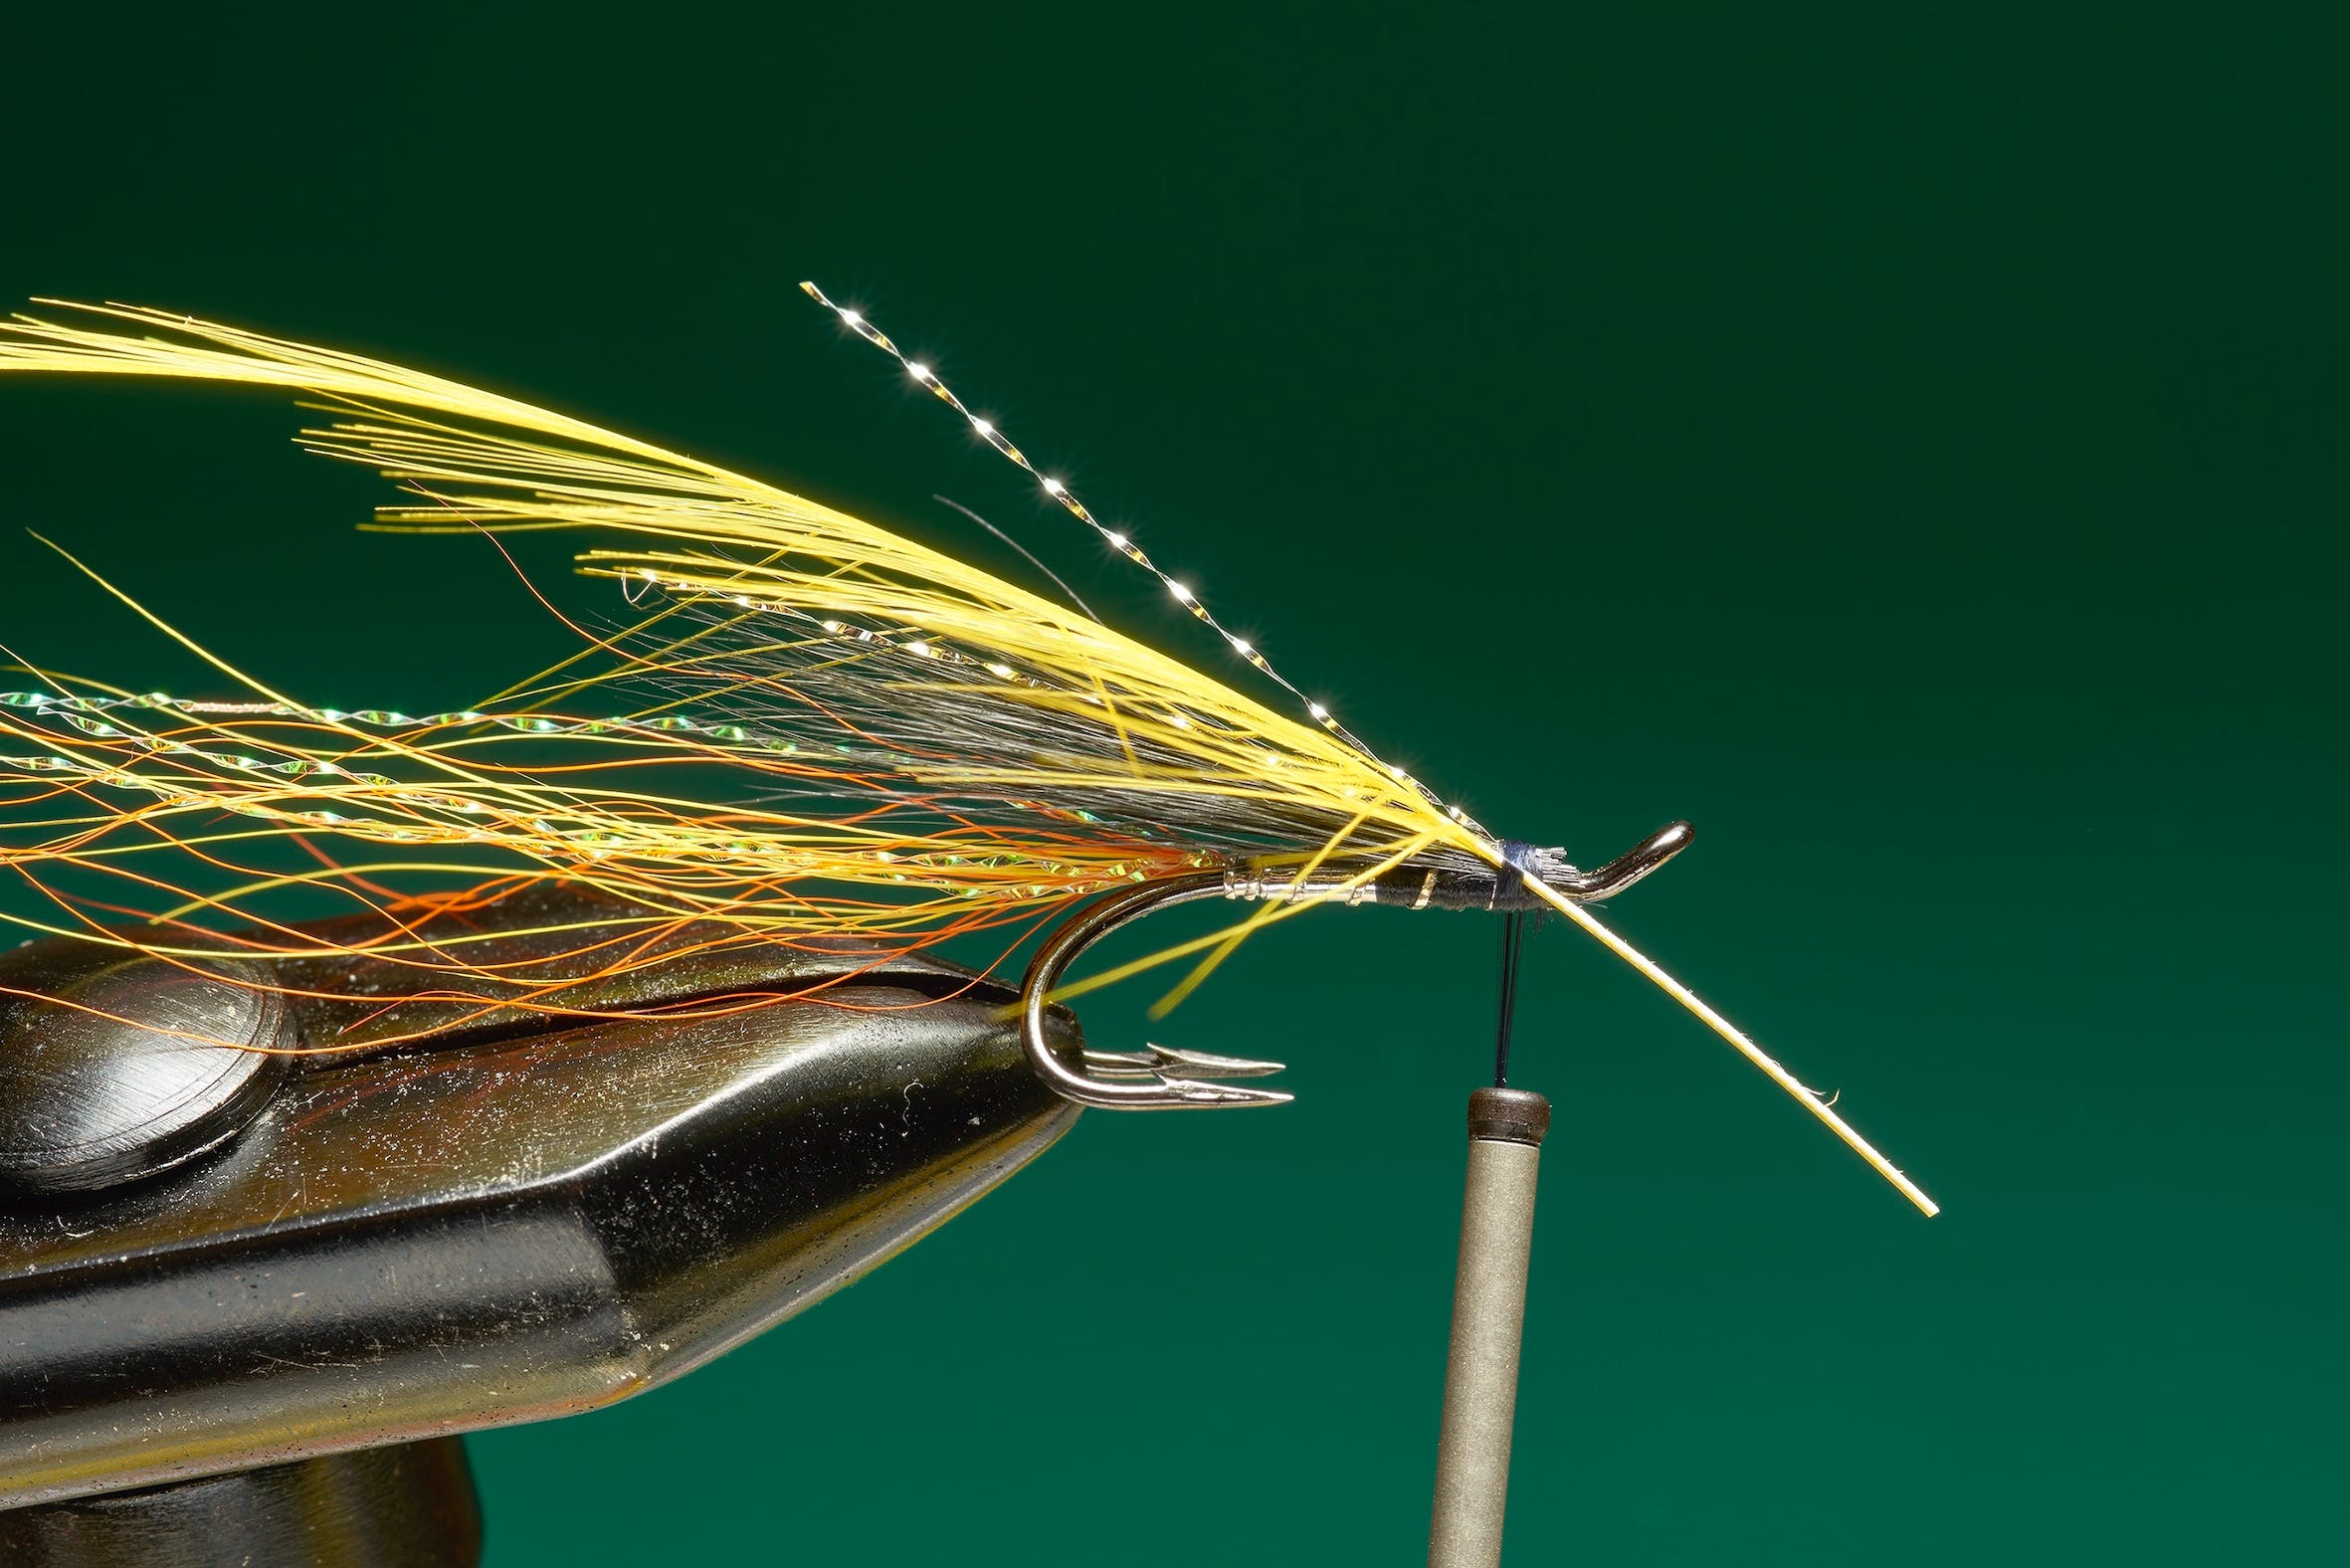
Step 17. Strip fibres from the base of the yellow hackle to leave a bare stem. Hold the stem with hackle pliers and stroke the fibres so they all sit on one side. Catch in the stem at the wing base.
Step 18. Using hackle pliers again, grasp the hackle by its tip. Wind on two full turns, the second immediately in front of the first. Ensure the turns are close together, but not overlapping.
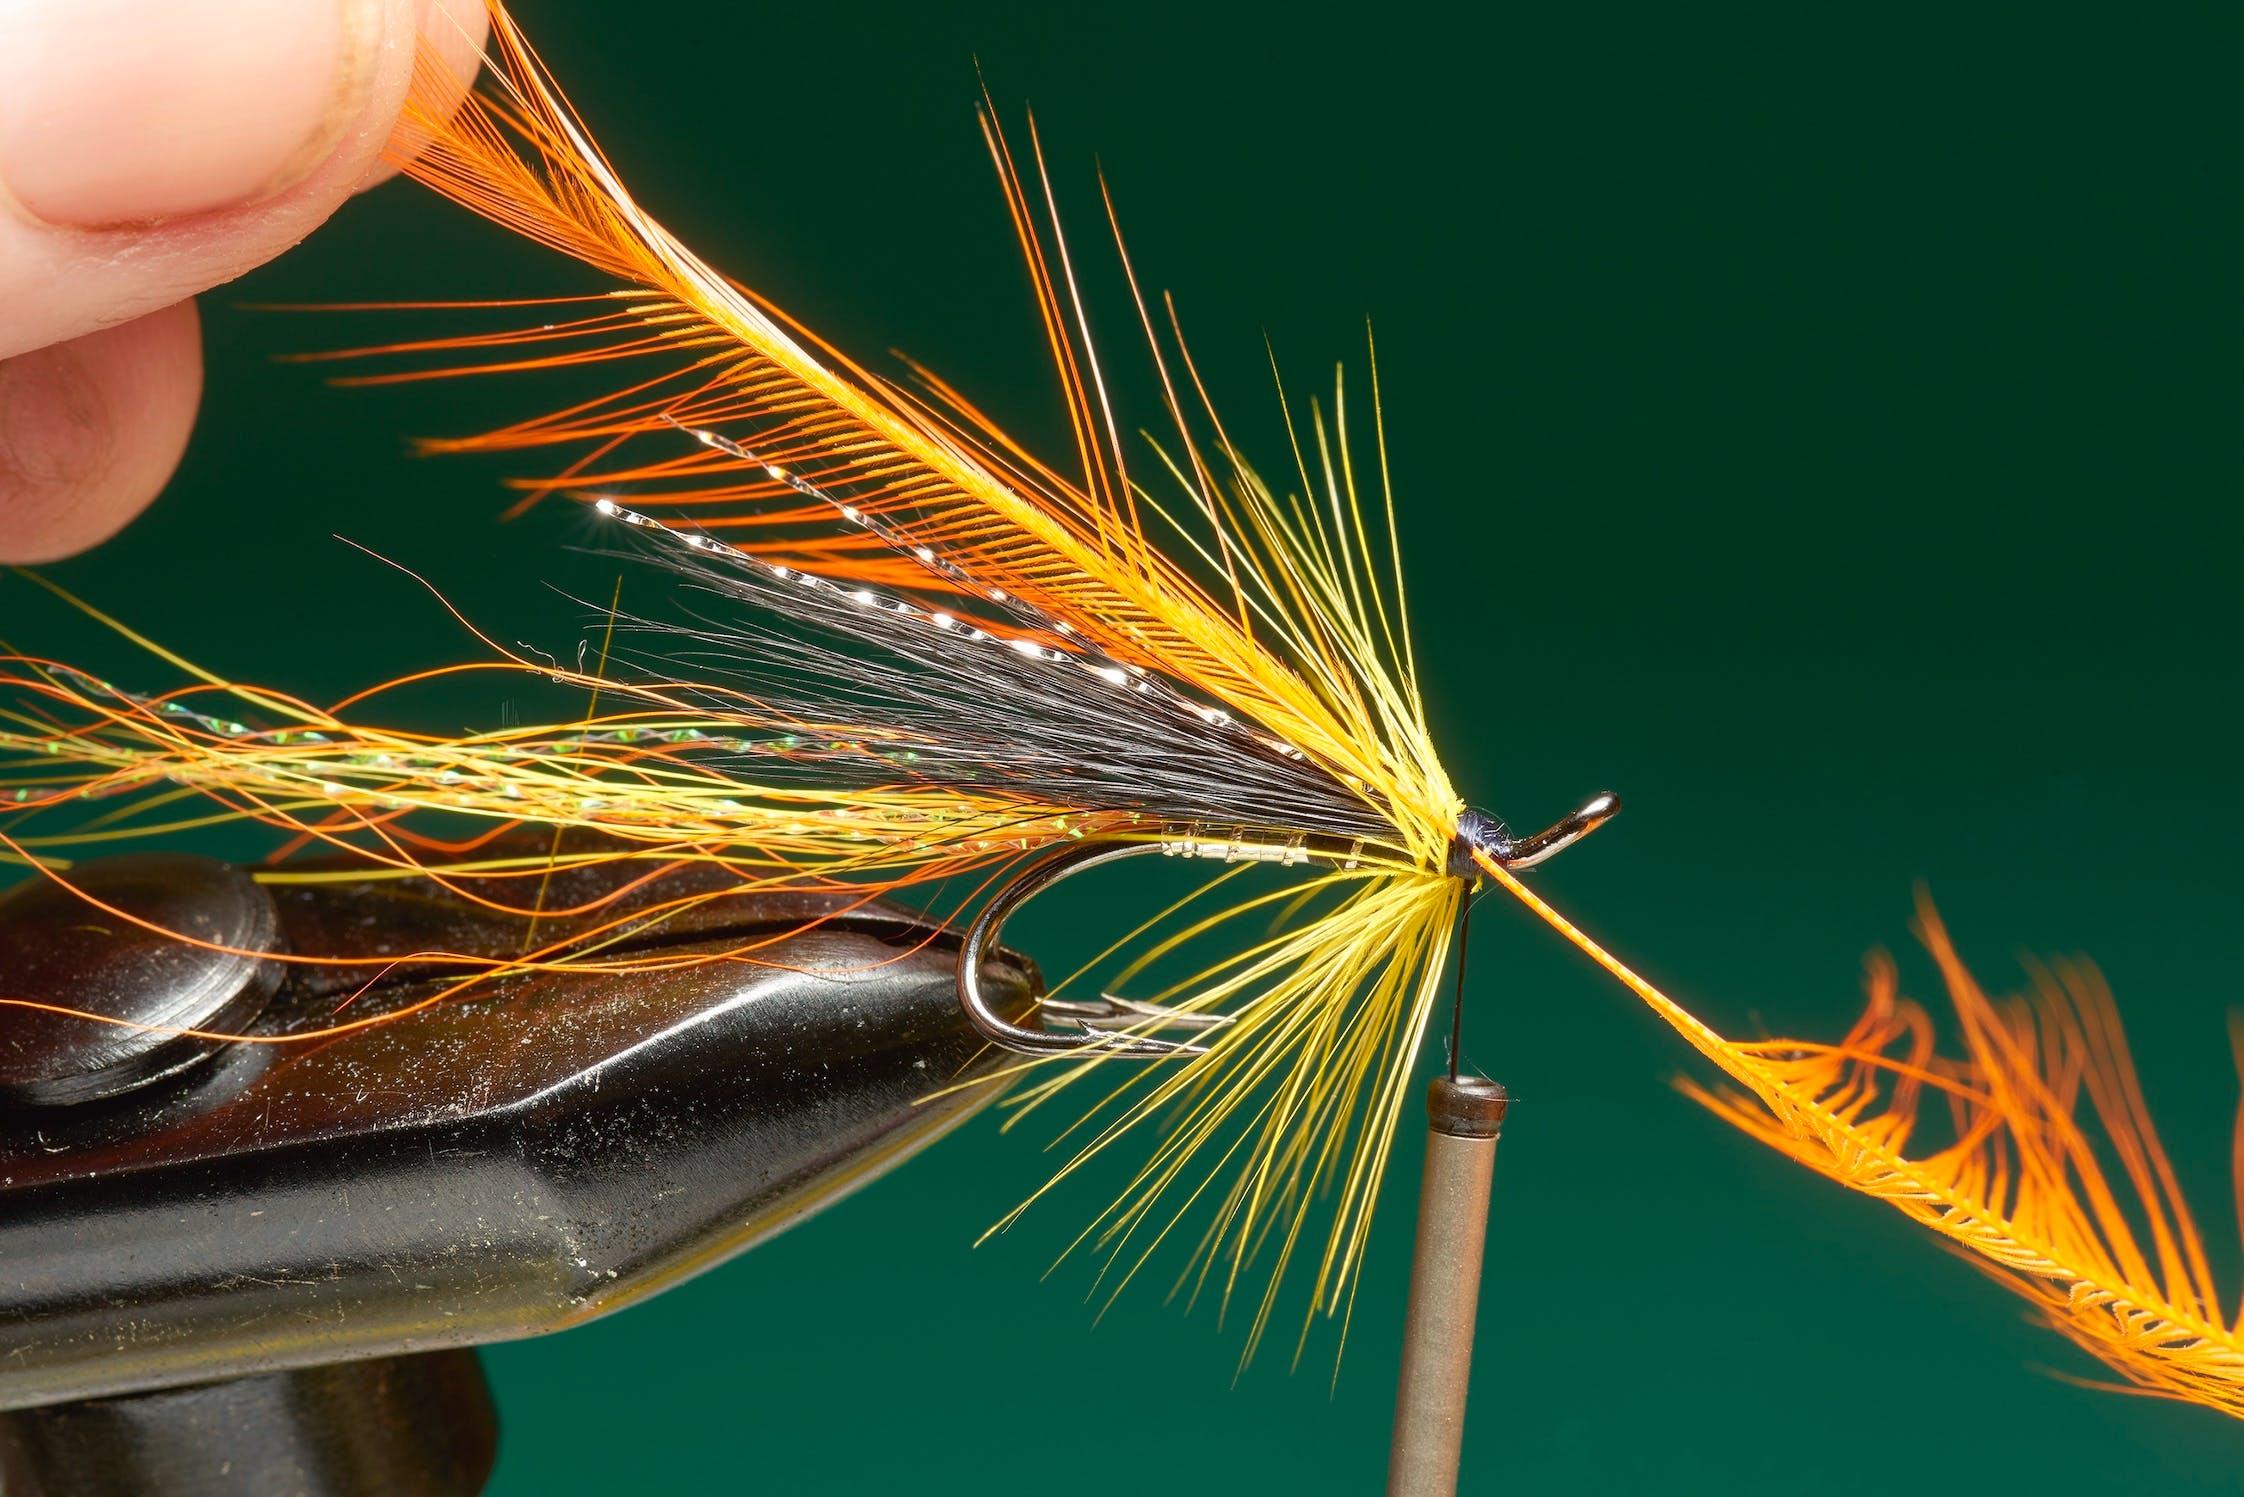
Step 19. Use the thread to secure the hackle-tip then trim it off along with the bare stem. Prepare the orange hackle and catch it in immediately in front of the yellow one.
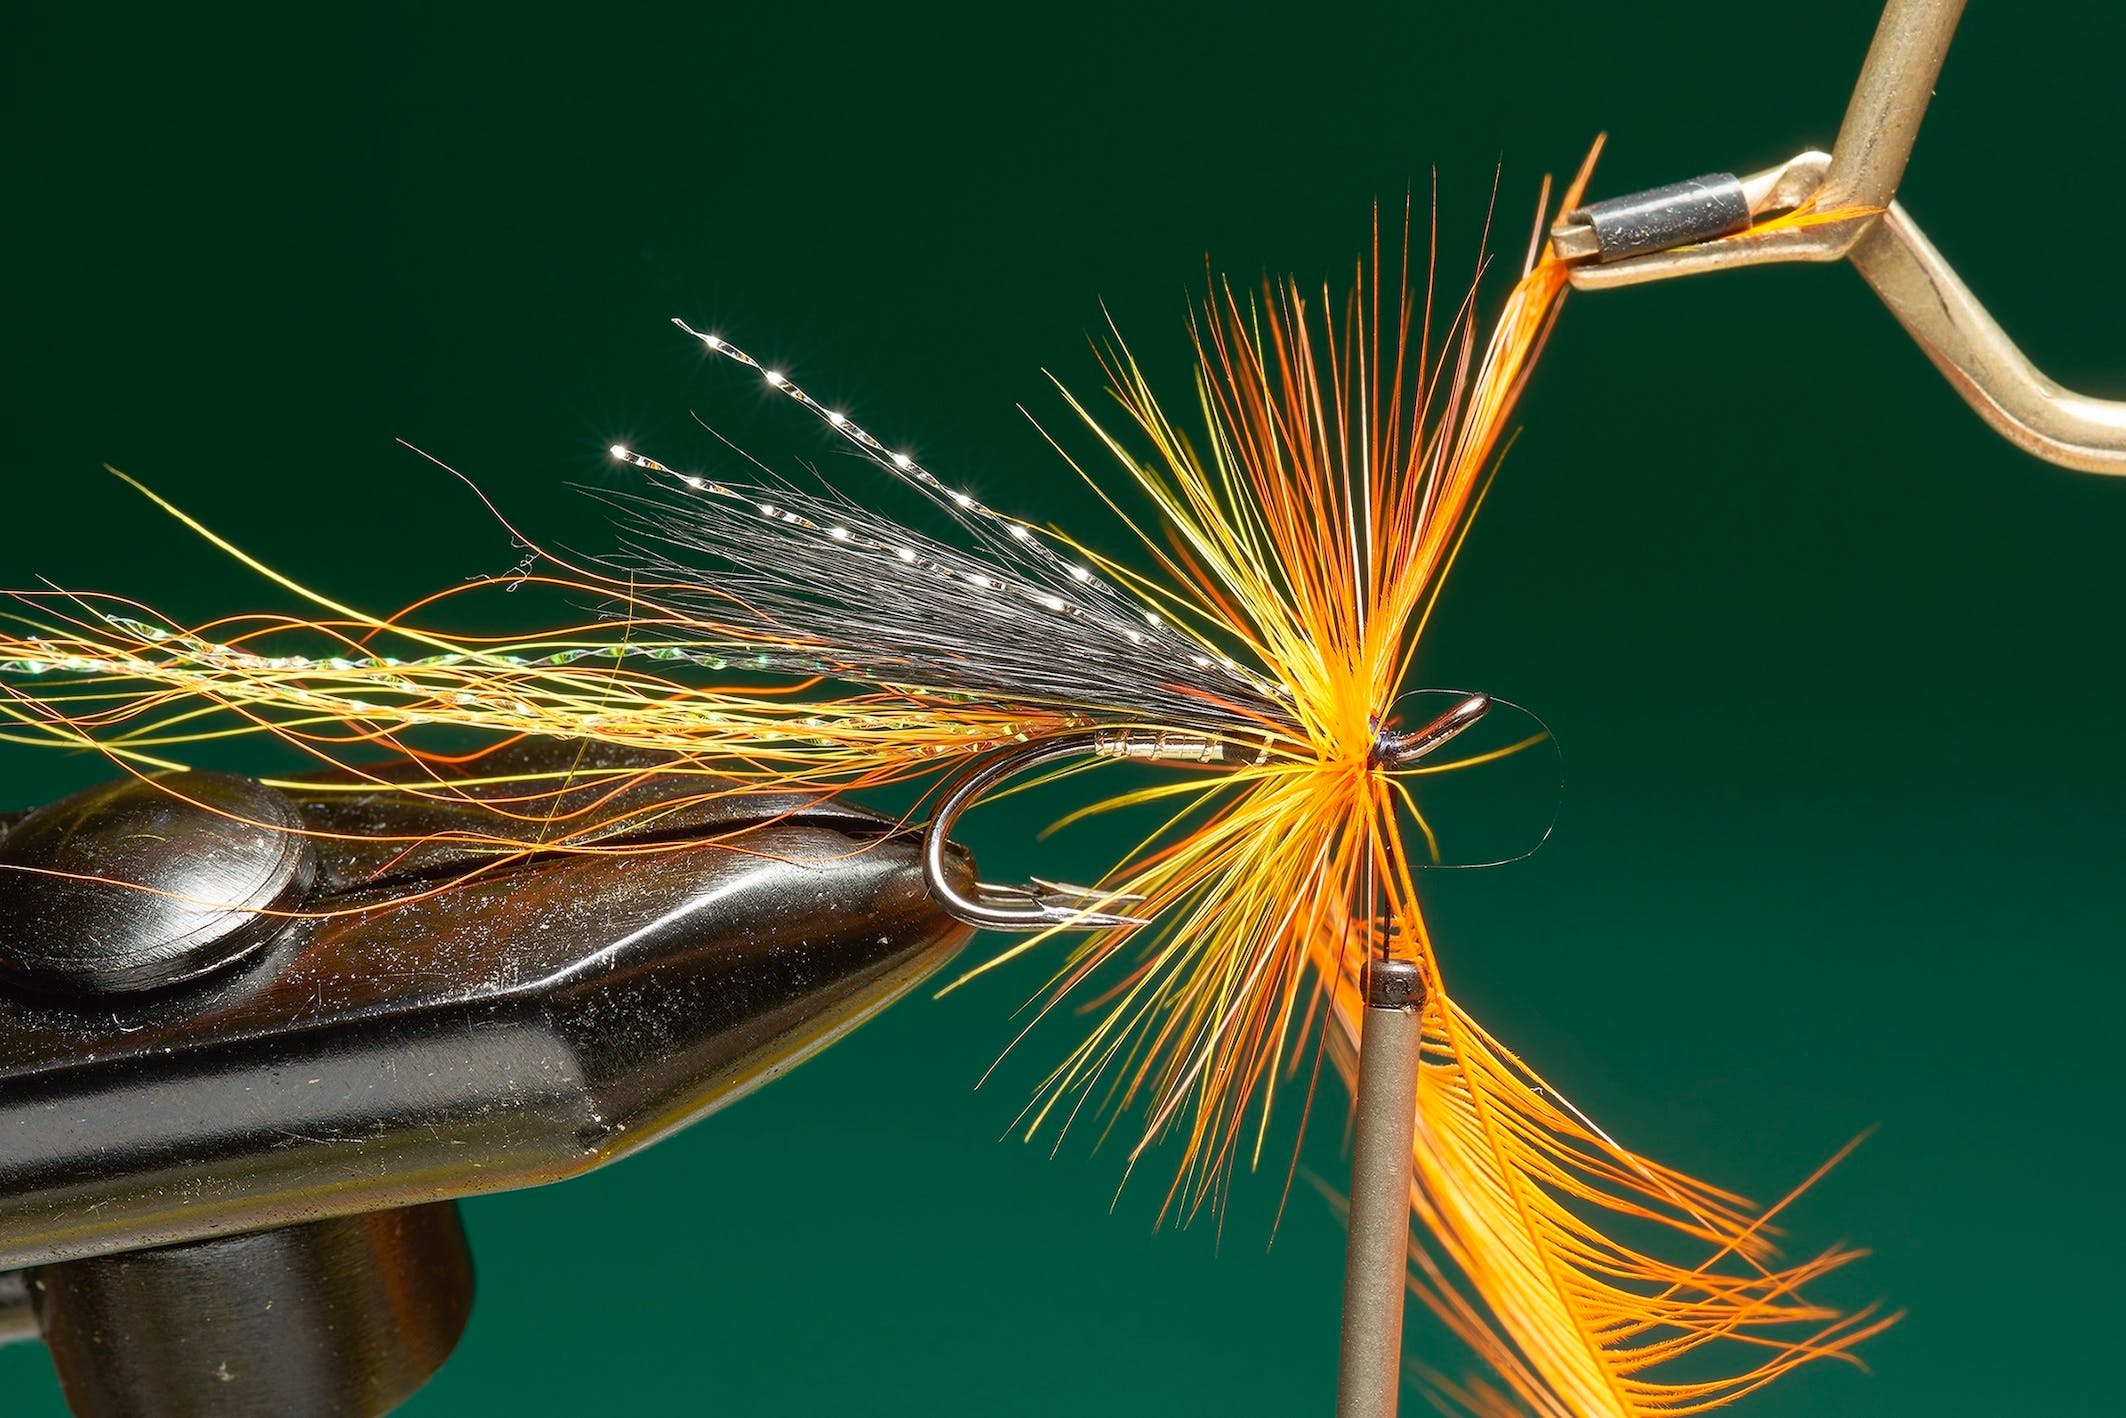
Step 20. Wind on the orange hackle, keeping the turns tight against those of the yellow one. Keep away from the eye. Secure the tip and trim off the waste end of the stem.
Step 21. To ensure the hackles are pushed back, add two thread-turns at the front. Then build a slim tapered head, leaving space behind the eye to accommodate a Turle knot.
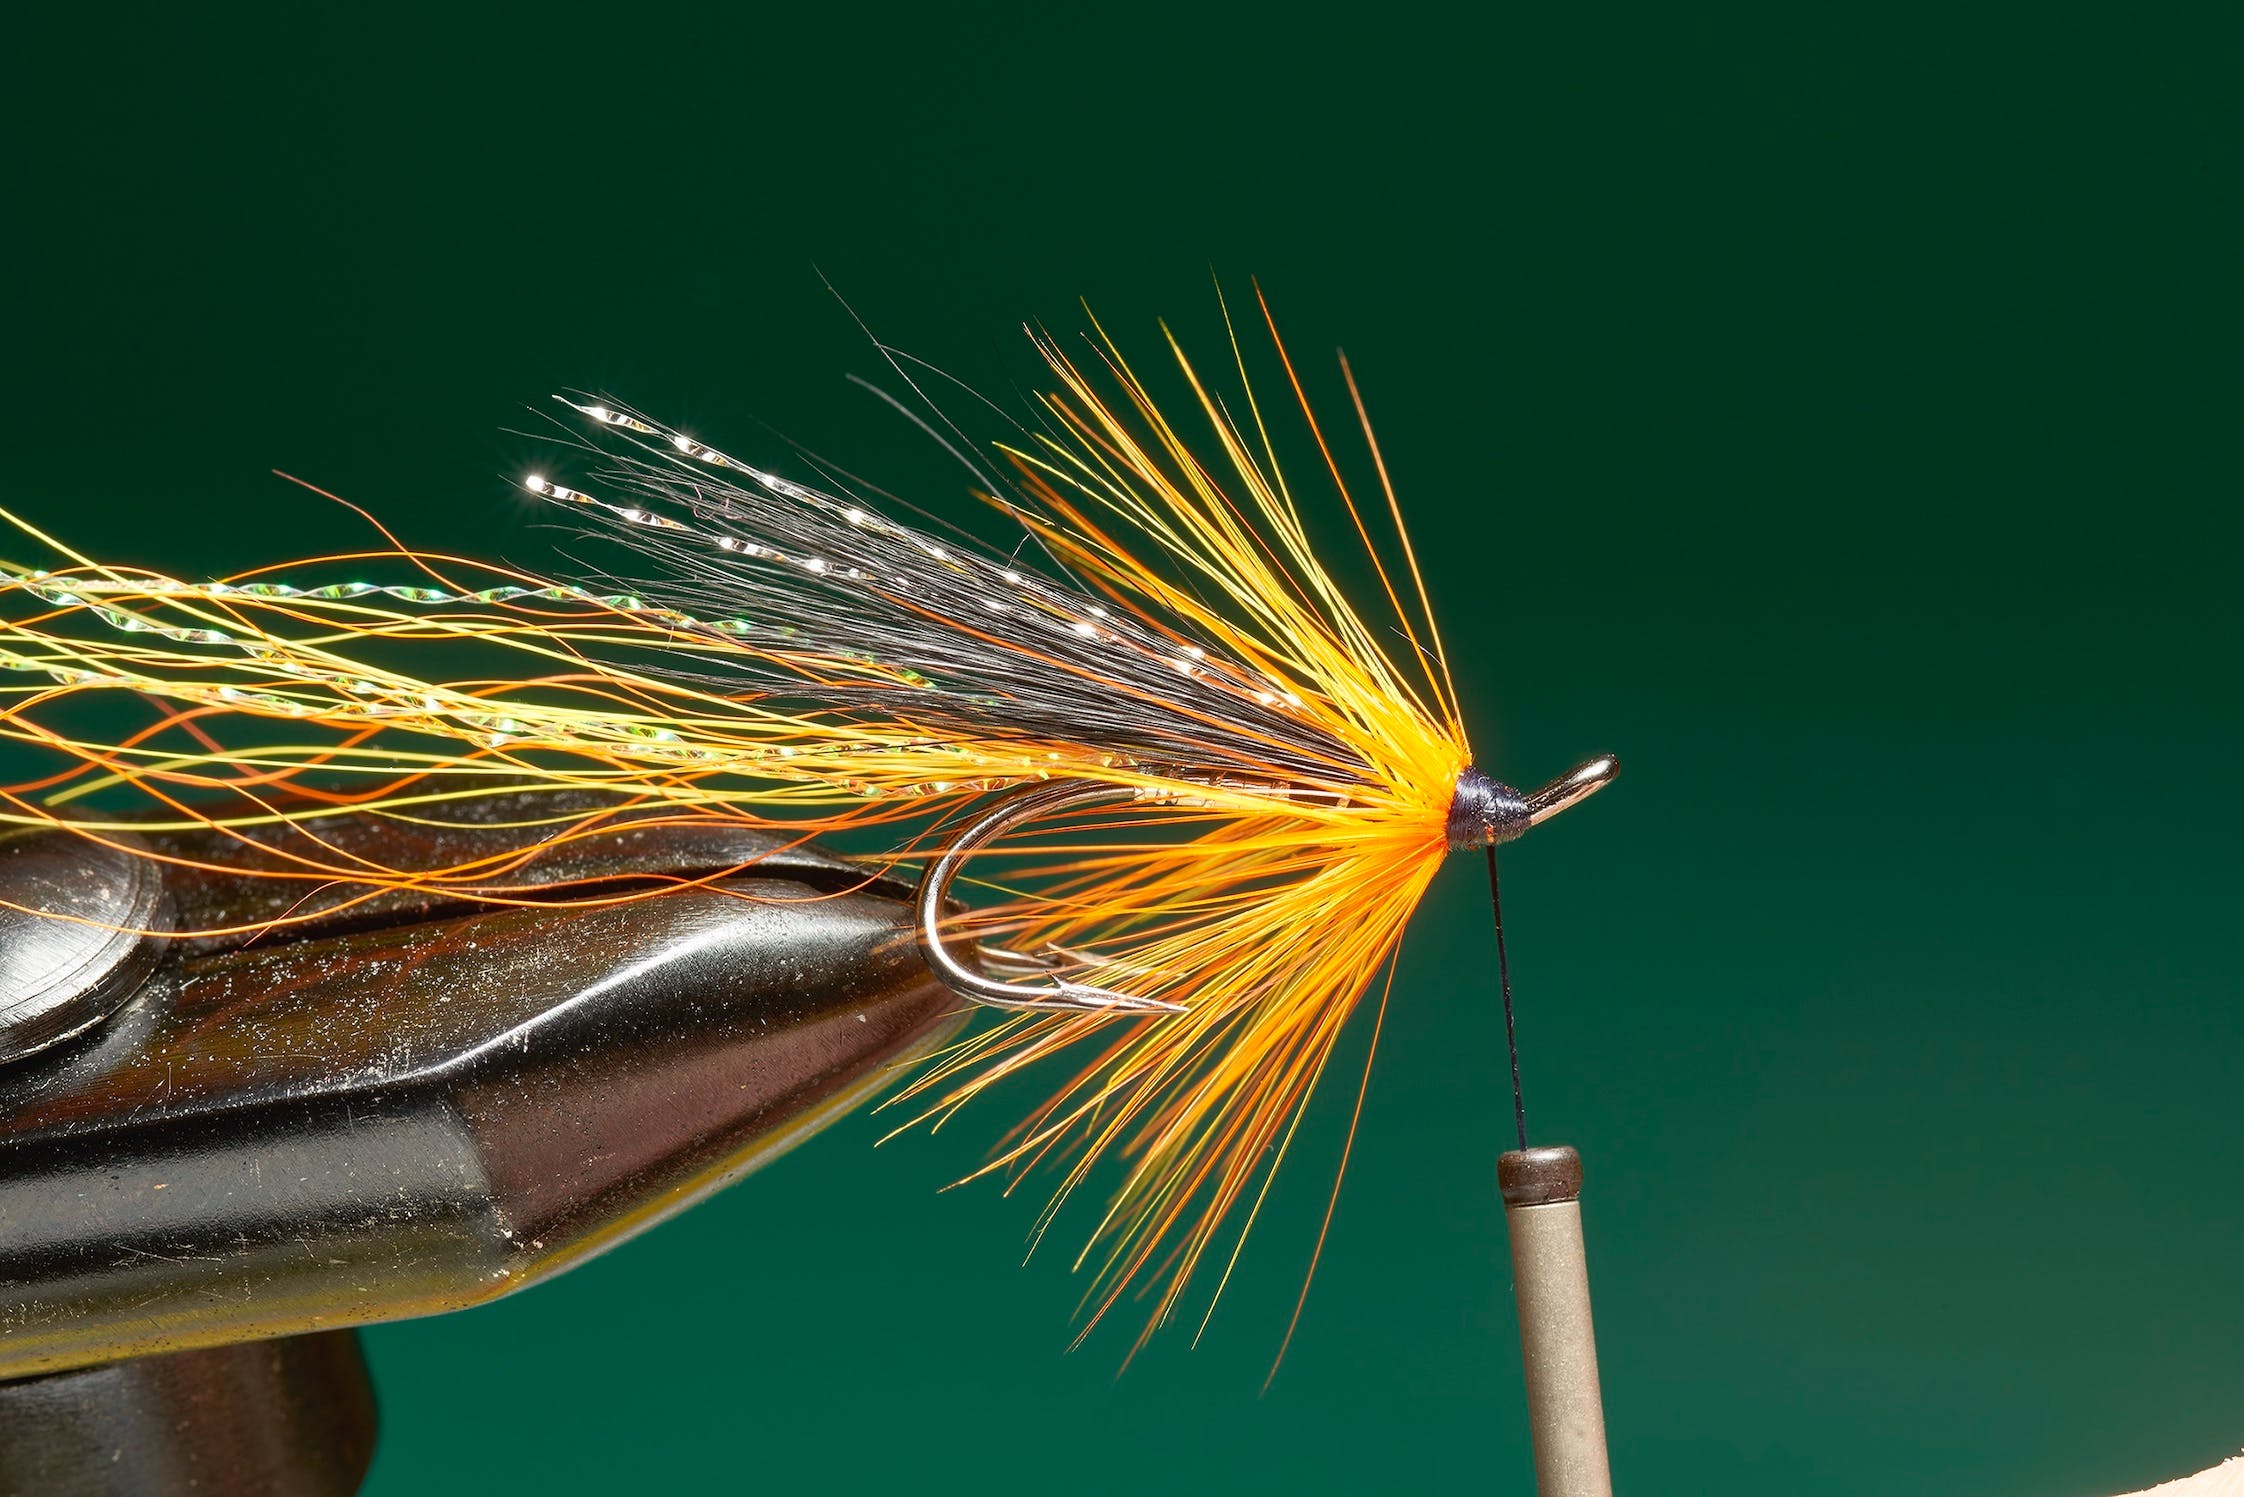
Step 22. Cast off thread with a whip finish. Trim the waste thread and apply two coats of clear varnish to produce a smooth glossy head.
Related articles

Fly tying
Tie the CDC Mayfly Dun
Try this low-riding Mayfly Dun for fussy trout that refuse a high-riding dry-fly.
By Time Well Spent